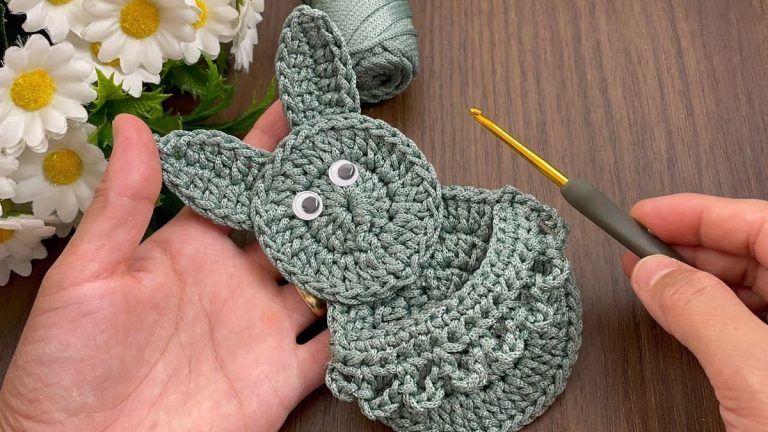
Crochet Bunny Cutlery Holder- Pattern

The Crochet Granny Square is a classic design that has stood the test of time. Whether you’re new to crochet or an experienced enthusiast, this pattern offers endless creative possibilities.
Granny squares are incredibly versatile, making them perfect for a variety of crochet projects.
From blankets and scarves to bags and pillows, the granny square serves as a solid foundation for many crochet designs.
In this article, we will dive into the world of Crochet Granny Square – pattern, breaking down how to create your own squares, providing helpful tips, and offering inspiration for how to incorporate them into larger projects. If you’re looking to learn how to crochet granny squares or want to refine your technique, you’ve come to the right place.
Whether you want to create a blanket for the couch or a unique accessory, understanding the basic structure of the Crochet Granny Square – pattern is the first step toward mastering this iconic craft. Let’s begin by gathering the necessary materials and learning the basics before diving into the steps.
Before starting your Crochet Granny Square – pattern, it’s important to have the right tools and materials at hand. Here’s a breakdown of what you’ll need to get started:
For the Crochet Granny Square – pattern, you can use any type of yarn that suits your project, but most crocheters prefer medium-weight yarn (also known as worsted weight). Choose yarn that feels comfortable to work with, and pick colors that reflect the style you want for your finished project. You can mix and match colors for a vibrant look, or opt for a more subtle, monochromatic design.
The hook size depends on the yarn you’re using, but for medium-weight yarn, a 5mm (H-8) crochet hook is commonly recommended. Make sure you choose a hook that feels comfortable in your hand, as this will make the crocheting process more enjoyable.
A sharp pair of scissors is essential for cutting your yarn after each granny square is completed. You’ll also use scissors to trim any loose ends.
A yarn needle is necessary for weaving in the loose ends of your yarn once you’ve finished each square. This ensures that your crochet project is neat and professional.
Although optional, stitch markers can help you keep track of your rounds and prevent you from losing your place while working on your granny square.
While you can create your own granny square design, it’s helpful to start with a simple Crochet Granny Square – pattern. There are many free patterns available online, ranging from basic to advanced techniques. Once you understand the foundation, you can begin experimenting with different designs.
The Crochet Granny Square – pattern is a simple but effective design. Follow these step-by-step instructions to get started on your first square.
Start by creating a magic ring, also known as a magic circle. This technique allows you to create a tight center for your granny square. To do this, wrap the yarn around your fingers, forming a loop. Insert your crochet hook into the loop, yarn over, and pull up a loop. Now you’re ready to start your first round.
For the first round of the Crochet Granny Square – pattern, you will typically work 3 double crochets (dc) into the magic ring. After the initial three, chain 2 to form the corner space. Then, repeat the double crochet stitch and chain 2 for a total of four times. Close the ring by pulling on the tail of the yarn and secure the round.
For the second round, turn your work and begin by making a slip stitch into the first corner space. This will prepare you for the next set of double crochets. Continue by making 3 double crochets into each corner space, separated by 2 chain stitches to create the corners. After completing all the corners, join the round with a slip stitch.
For the third round, repeat the same technique as in the second round. You’ll increase the number of double crochets in between each corner. Instead of just 2 double crochets between each corner, you will add another set to make the square larger. Continue to increase as needed for the size of the granny square.
Continue working the rounds until your square reaches the desired size. You can make your granny square as large as you like, depending on your project. Once you’ve reached the appropriate size, cut the yarn, leaving a long tail to weave in the end.
Use a yarn needle to weave in the loose ends, ensuring that your work is secure and neat. You’ll also want to make sure the yarn ends are hidden within the stitches of the square, so they don’t show on the front.
While the classic Crochet Granny Square – pattern is lovely on its own, there are countless ways to modify the design. Here are a few creative ideas to help you personalize your granny square project:
One of the most popular aspects of the Crochet Granny Square – pattern is the ability to incorporate a variety of colors. You can create a multi-colored square by alternating different hues in each round, or use a gradient effect for a unique look. Bold, contrasting colors can make the design pop, while softer tones can give the square a more understated, elegant appearance.
Beyond the basic double crochet, you can add decorative stitches like puff stitches, shell stitches, or picot stitches to your granny squares. These textured stitches will give your squares more dimension and interest.
While the traditional granny square is square-shaped, there are many variations. You can create granny hexagons, triangles, or even circles. Each shape brings a new dimension to your crochet project.
For a personal touch, consider adding embellishments like buttons, beads, or small fabric flowers to your granny squares. These additions can make your project more unique and give it a handmade, special quality.
The most common use for the Crochet Granny Square – pattern is to make blankets. Simply join multiple granny squares together in a layout that you prefer. You can create a traditional row-and-column pattern or try more intricate designs like joining the squares in a spiral.
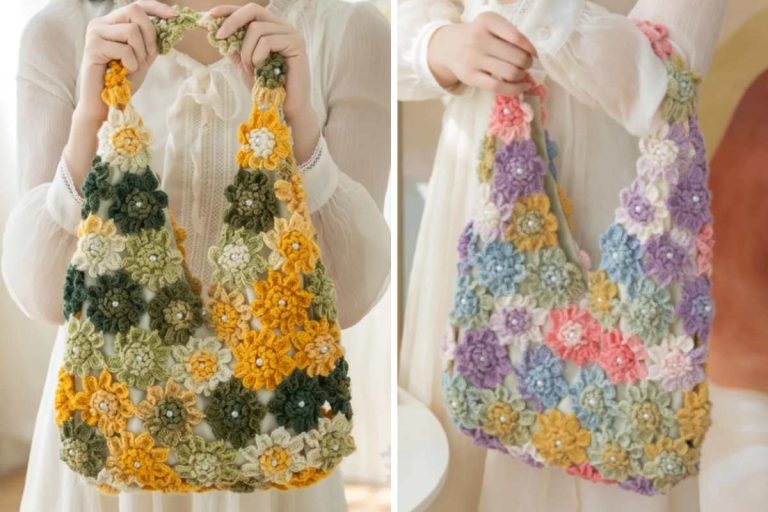
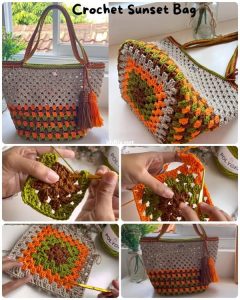
Another creative way to use the Crochet Granny Square – pattern is by incorporating the squares into a bag or purse. Create several squares, and then join them to form the sides of the bag. Add a sturdy handle and lining for a finished, functional accessory.
To ensure your Crochet Granny Square – pattern projects turn out beautifully, consider the following tips:
To ensure that your squares are uniform in size, it’s important to maintain consistent tension. If your stitches are too tight, your squares will be smaller, and if they’re too loose, they will be larger. Practice to find the perfect tension for your project.
Always count your stitches at the end of each round to ensure your granny square is symmetrical and balanced. If you miss a stitch or add extra stitches, it can throw off the shape of your square.
Weaving in ends might seem tedious, but it’s essential for a polished finish. Be sure to weave in all yarn ends securely to prevent unraveling and to keep your project looking clean.
If you’re new to crochet, consider starting with a small square and gradually increasing the size. This will help you gain confidence and practice your technique.
When joining granny squares, be sure to use a technique that results in a neat and sturdy connection. Popular methods include whip stitch, slip stitch, or the join-as-you-go method.
Finally, remember to enjoy the process. Crochet is meant to be a relaxing and creative outlet. Don’t rush through the steps—take your time and savor the act of creating something beautiful with your hands.
The time it takes to crochet a granny square depends on the size and complexity of the design, as well as your skill level. On average, it may take anywhere from 15 minutes to an hour to complete one square.
Yes, you can use different yarn weights to create granny squares, but be sure to adjust your hook size accordingly to match the yarn.
There are several methods for joining granny squares, including whip stitch, slip stitch, and join-as-you-go. Choose the method that works best for your project.
Yes, granny squares can be used to create items like sweaters, cardigans, and skirts. They add a cozy, vintage touch to any outfit.
Start with simple designs and focus on perfecting your technique before moving on to more complex patterns. Practice is key!
Yes, you can crochet a blanket using just one type of granny square, or you can mix and match different designs to create variety and texture.
The Crochet Granny Square – pattern is a timeless and versatile design that can be used for a wide range of crochet projects. Whether you’re making a blanket, bag, or accessory, understanding the basics of the granny square opens up endless possibilities for creativity.
By following the instructions, experimenting with colors, and incorporating your own personal touch, you can create something truly unique and beautiful. We hope you’ve found this guide helpful—please feel free to share your thoughts and suggestions in the comments! Happy crocheting!