String Bag With Floral Motif - Tutorial

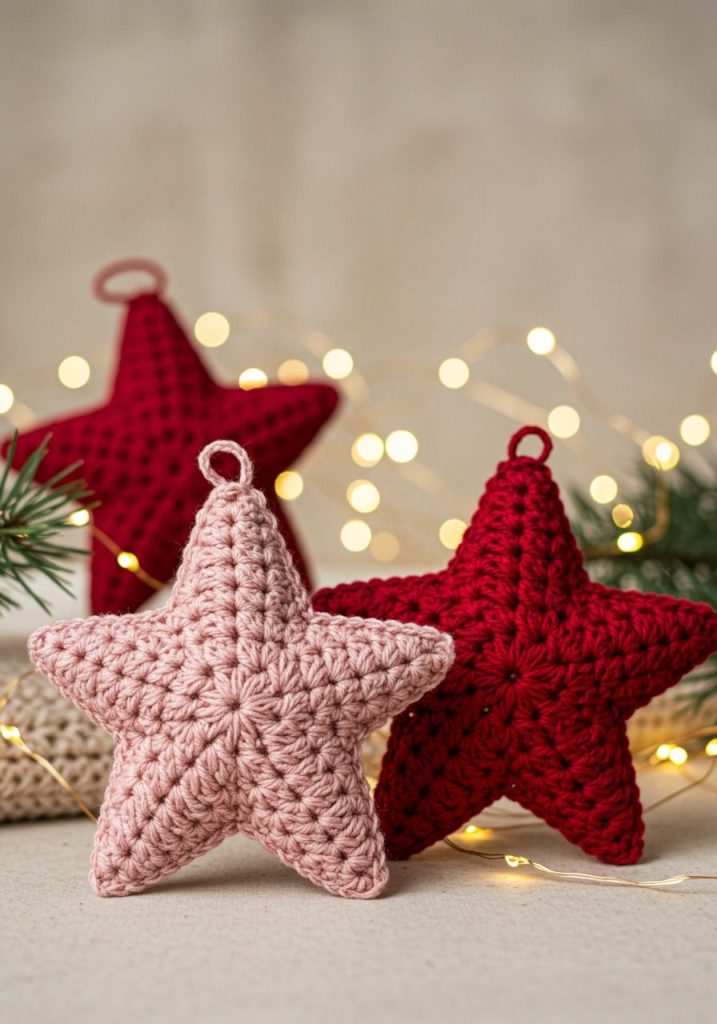
Creating a Crochet star – Pattern is one of the most delightful and satisfying projects for both beginner and experienced crocheters. These little stars are not only fun to make but also incredibly versatile—perfect for holiday decorations, baby mobiles, garlands, gift toppers, or even keychains.
The best part? They’re quick to finish and don’t require much yarn. If you have leftover yarn from previous projects, you can easily turn them into beautiful crochet stars in just minutes. Whether you prefer a flat, five-pointed star or a puffy 3D version, this pattern gives you endless ways to express creativity.
In this article, we’ll walk you through all the essential steps to master the Crochet star – Pattern—from selecting the right materials to customizing your stars for different seasons and purposes. Let’s dive into the colorful and cozy world of crochet stars!
To start your Crochet star – Pattern, you’ll need only a handful of simple supplies. Most of them are items you may already have if you crochet regularly. This makes the project accessible, budget-friendly, and perfect for last-minute crafting.
First and foremost, choose your yarn. You can use almost any weight or type—cotton, acrylic, wool, or blends. Thinner yarns will give you daintier stars, while thicker yarns create chunkier, more visible ones. For beginners, worsted weight yarn (medium #4) is often the easiest to handle.
Next, pick a suitable crochet hook. The hook size depends on your yarn, but using a slightly smaller hook than recommended can help your stars keep their shape better. For worsted weight yarn, a 4.0 mm to 5.0 mm hook works great.
You’ll also need a yarn needle to weave in ends and a pair of sharp scissors. If you’re making 3D stars, you might also want a small amount of fiberfill stuffing.
Optional items include stitch markers, especially if you’re working in rounds or trying a more intricate Crochet star – Pattern. You can also use beads, buttons, or sequins if you want to embellish your stars.
Lastly, having a printed or digital version of your chosen Crochet star – Pattern is helpful for staying on track. Some crafters even create their own version after experimenting with a few styles.
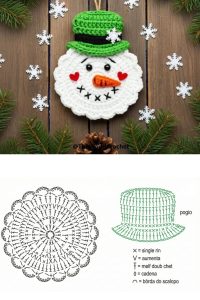
At its core, the Crochet star – Pattern follows a simple sequence of stitches that radiate outward from a central ring. While there are many variations, most start with a magic ring or a chain loop and build the points of the star from that center.
The first round typically forms a small circle using basic stitches such as single crochet (sc), half-double crochet (hdc), or double crochet (dc). This forms the foundation that will hold the star points.
The second round is where the magic happens—this is where you begin shaping the points. Each point usually consists of a combination of increasing and decreasing stitches, such as dc, treble crochet (tr), and slip stitches to taper the ends.
Consistency in stitch tension is important. If your tension is too loose, the points may flop; too tight, and they might curl unnaturally. Blocking the star after finishing can help even out these inconsistencies.
If you’re creating a 3D version of the Crochet star – Pattern, you’ll crochet two identical stars and then stitch them together, adding fiberfill inside to give it puffiness. This method is perfect for hanging ornaments or baby toys.
Remember to fasten off securely and weave in all yarn ends neatly. A well-finished edge adds polish to even the simplest crochet star.
Once you’ve mastered the basic Crochet star – Pattern, it opens up a universe of possibilities for how and where to use your handcrafted stars. Their small size and simple construction make them ideal for a wide range of creative applications.
One of the most popular uses is as Christmas ornaments. Crochet stars look stunning hanging on a tree, especially when made in metallic yarns like gold, silver, or white. Add a small loop of thread or ribbon to hang them easily.
You can also create a beautiful garland by stringing together several stars in complementary colors. This is perfect for nursery decor, party backdrops, or even seasonal home accents.
If you’re making gifts, consider using a crochet star as a handmade tag topper. Attach it to a wrapped present or jar for a warm, personalized touch. It’s a lovely way to show extra care in your gift-giving.
Another creative idea is using crochet stars in baby mobiles. Since they’re lightweight and soft, they’re ideal for hanging above a crib. Use pastel shades or colors that match the nursery theme.
For practical fun, you can also use star motifs to embellish clothing, tote bags, or blankets. Sew or glue them onto fabric, or use them as appliqués in patchwork projects.
Finally, these stars make cute and fast-selling items at craft fairs. They’re quick to produce in bulk, especially with your own twist on the Crochet star – Pattern, and perfect for all seasons.
One of the joys of using the Crochet star – Pattern is how easy it is to personalize. Once you’re familiar with the basic steps, experimenting with different variations becomes both easy and fun.
Start by playing with yarn types. Try variegated yarns for multicolored stars, or use gradient yarn to give your star an ombré effect. Textured yarns like boucle or velvet can create soft, plush versions.
You can also modify the number of points on your star. Most crochet stars have five points, but you can try six or eight for a snowflake-inspired look, especially for winter or holiday decorations.
Add sparkle by incorporating metallic thread, sequins, or even beads into the points. These decorative elements make your crochet star stand out, especially for festive occasions.
Try double-layering your stars. Make two stars—one slightly smaller than the other—and stitch them together in offset layers to create a dimensional flower-like effect.
Another great idea is to mix star sizes. Make a set of stars in small, medium, and large, and use them together in a mobile, wall hanging, or garland for visual interest.
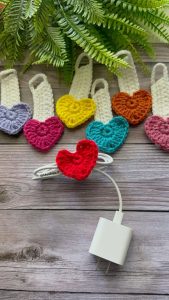
Lastly, turn your crochet star into a pin, brooch, or keychain by adding a simple backing or hardware attachment. These make adorable, handmade accessories you can wear or gift.
Q1: Is the Crochet star – Pattern good for beginners?
Yes, the Crochet star – Pattern is perfect for beginners. It uses basic stitches and can be completed quickly, which is great for practice and building confidence.
Q2: How long does it take to make a crochet star?
Most small stars take 10 to 30 minutes to complete, depending on complexity and your crochet speed. Larger or more detailed stars may take longer.
Q3: Can I use any type of yarn for crochet stars?
Yes, you can use any yarn, though medium-weight cotton or acrylic yarn is recommended for clarity and shape. Thinner yarn creates more delicate stars, while thicker yarn gives bold results.
Q4: How do I block a crochet star?
To block a star, lightly spray it with water and pin it into shape on a foam board or towel. Let it dry completely before removing the pins. This helps to define the points and even out stitches.
Q5: Are crochet stars washable?
Yes, if made with washable yarn. Cotton and acrylic yarns are usually machine washable, but always check the yarn label. Avoid washing stars with beads or embellishments in machines.
Q6: Can I sell items made using the Crochet star – Pattern?
Absolutely. Most free or paid patterns allow for handmade items to be sold, though it’s good etiquette to credit the designer if you’re using someone else’s published pattern.
The Crochet star – Pattern is a charming, simple, and endlessly versatile project that adds a handmade touch to any space or occasion. From festive ornaments and cozy nursery decor to stylish accessories and heartfelt gifts, crochet stars can do it all.
Throughout this article, we covered the materials you’ll need, the steps to make your stars, creative ways to use them, and tips for personalization. The process is quick, enjoyable, and perfect for both seasoned crocheters and newcomers.
We’d love to hear your thoughts—have you tried the Crochet star – Pattern before? Share your experience, suggestions, or even a photo of your finished project. Your feedback helps us grow and inspire more makers in the community. Happy crocheting!

