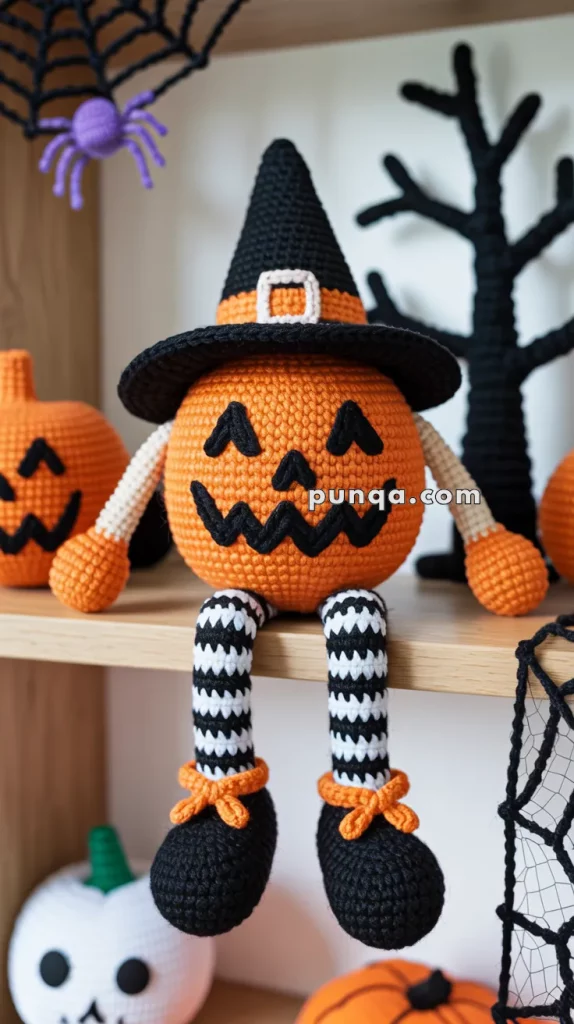
Amigurumi Pumpkin Witch Doll - Pattern

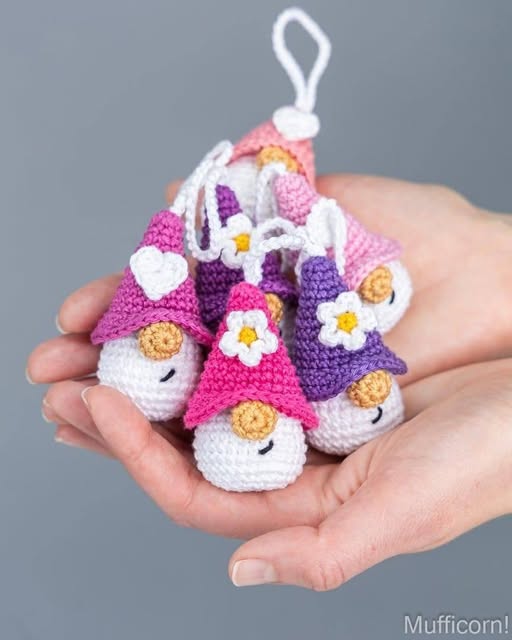
If you’re yearning to infuse your holiday décor with a touch of whimsical charm, the Crochet Gingerbread Gnome – Pattern is your perfect seasonal crafting project. This delightful combination of cozy gnome vibes and festive gingerbread flair yields an adorable decoration or gift that’s sure to bring smiles to any room.
Crocheting gnomes has captured hearts in recent years, largely due to their charming beards, tall hats, and sweet simplicity. Blend that with gingerbread colors—like warm browns, reds, and cream—and you’ve got an irresistibly festive motif. The Crochet Gingerbread Gnome – Pattern lets you make a magical, handmade piece that can adorn mantels, shelves, or become a treasured stocking stuffer.
In this guide, we’ll walk through everything you need: from gathering supplies and following the pattern step-by-step, to adding personalization and caring for your finished gnome. We’ll also explore creative variations of the design, answer common questions in an FAQ, and share a conclusion with an invitation for your own ideas.

To create your Crochet Gingerbread Gnome – Pattern, start by assembling the essential supplies for a smooth crafting experience that respects your budget and comfort.
Begin with yarn—the color palette is key: warm brown or tan for the body, cream or white for the beard, red or green for accents, and maybe a pop of white or pink for the nose and hat trim. Worsted weight yarn works beautifully, as it gives enough body to the gnome while keeping stitches defined.
Select an appropriate crochet hook—typically a 4.0mm or 4.5mm (G or 7). Choosing a slightly smaller size than the yarn recommendation helps achieve tighter stitches, so the stuffing doesn’t show through.
Gather other essentials: a yarn needle for weaving and sewing components, scissors, and stitch markers if you’re working in rounds. Don’t forget toy stuffing and safety eyes—or you can opt for embroidered eyes for a toddler-friendly alternative.
Optional but delightful extras include buttons for boots, a tiny bell for the hat tip, or pipe cleaner arms inside the beard for added poseability and whimsy.
Lastly, have your Crochet Gingerbread Gnome – Pattern printed or open on a screen. Clear visibility of instructions helps maintain consistency and ensures your final gnome looks as joyful as you envision.
With materials in hand, let’s bring your Crochet Gingerbread Gnome – Pattern to life—one stitch and step at a time.
Once you’ve mastered the basic Crochet Gingerbread Gnome – Pattern, the fun really begins—customizing and making each gnome your own.
Your handcrafted Crochet Gingerbread Gnome – Pattern deserves care so it can be cherished year after year. Here are some practical tips.
Q1: Is the Crochet Gingerbread Gnome Pattern beginner-friendly?
Yes! It uses basic stitches with fun shaping. Even if you’re new to amigurumi or gnome projects, this pattern is manageable and rewarding.
Q2: How long does it take to make one gnome?
Depending on your pace and detail level, most crafters complete a gnome in 3 to 6 hours across a weekend.
Q3: What yarn is best for the pattern?
A medium worsted-weight yarn is the most commonly used. It offers good structure and stitch definition. Bulky yarns feel plush but require bigger hooks and may obscure details.
Q4: Are safety eyes necessary?
Not strictly. They give classic gnome charm, but for child-safe versions, felt or embroidered eyes are safer and just as appealing.
Q5: Can I customize the size of the gnome?
Yes! Choosing thicker or thinner yarns, adjusting hook sizes, or scaling the crochet base can create gnomes from tiny ornaments to shelf-sized décor.
Q6: Can I sell gnomes made with this pattern?
Absolutely, especially if it’s your own design. If using someone else’s published pattern, check their terms—but handcrafted items are often approved for small-scale sale with proper credit.
The Crochet Gingerbread Gnome – Pattern blends cozy holiday charm with creative crochet fun. From selecting materials to shaping your gnome’s snuggly form, this pattern brings festive cheer and personalization to your crafting table.
We’ve covered essential tools, step-by-step instructions, imaginative variations, and care tips that help make your gnome both beautiful and long-lasting. Now it’s your turn—will you give your gnome a candy cane, Santa hat, or heart embroidery?
We’d love to hear your thoughts, experiences, and creative spins on this pattern! Share your sincere feedback or suggestions below to inspire fellow crafters and continue the festive magic.

