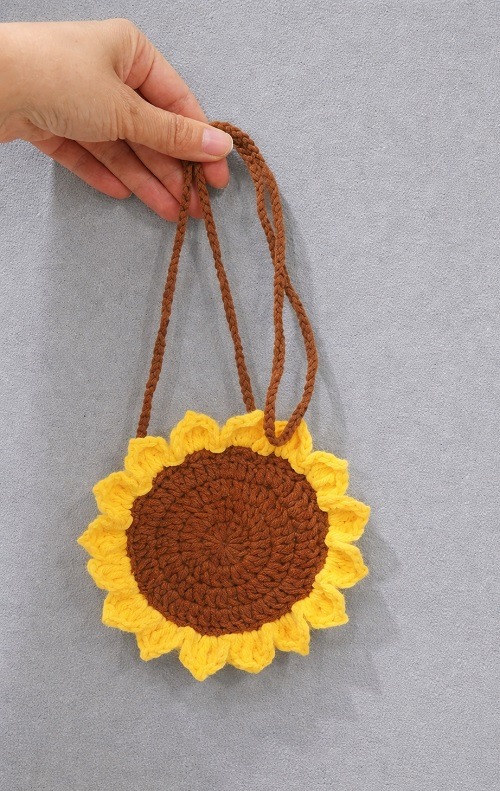
String Bag With Floral Motif - Tutorial

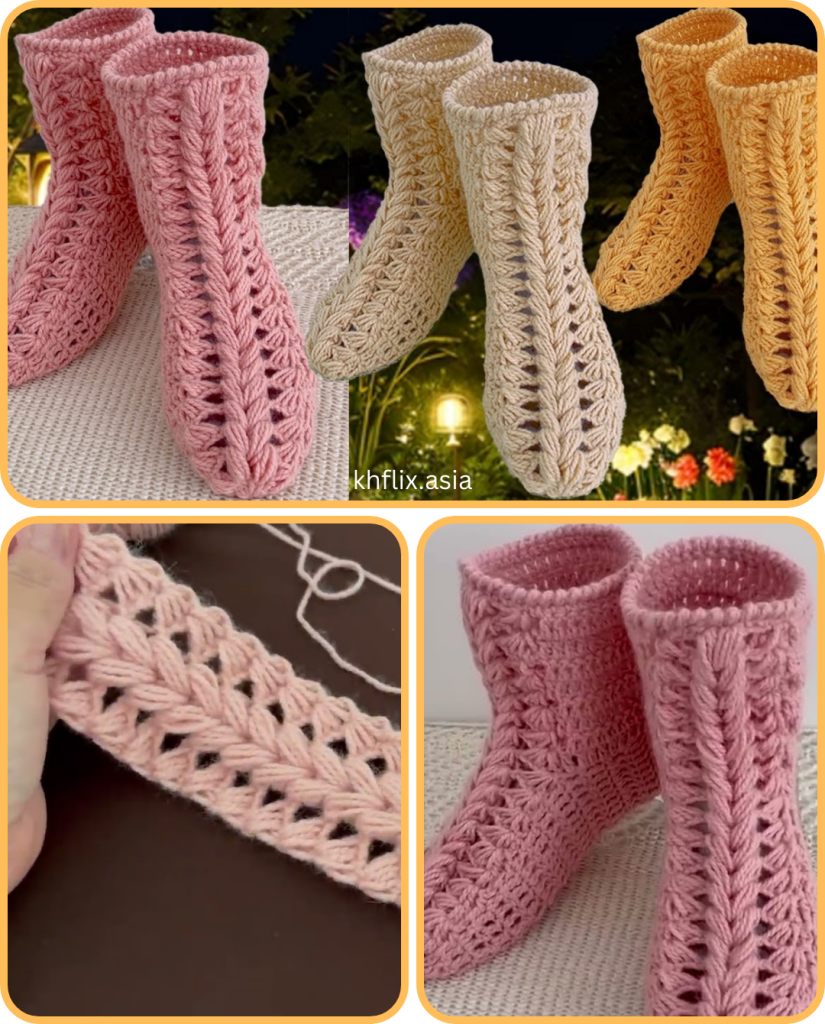
The beautiful art of crocheting allows us to turn simple yarn into stunning, functional fashion—and nothing showcases that better than the Crochet boots with 3D embossed braided stitch – Pattern. These cozy, eye-catching boots combine both style and practicality, making them perfect for cold weather or as luxurious handmade gifts. With their deeply textured surface and rich braided design, these crochet boots bring dimension, comfort, and elegance to everyday footwear.
The 3D embossed braided stitch is what truly sets these boots apart. Unlike basic flat stitches, this technique gives the fabric a sculpted, raised look, mimicking classic knitted cables but with the signature charm of crochet. The result is not only visually striking but also incredibly warm and snug—ideal for lounging around the house or wearing with confidence outdoors (when properly lined and soled).
In this article, you’ll learn why this design is so popular, what materials are needed, how to approach the project, and how to make your boots unique. You’ll also find answers to the most frequently asked questions about the Crochet boots with 3D embossed braided stitch – Pattern and a conclusion to summarize everything we’ve covered. Whether you’re a beginner or a seasoned crocheter, this is a project worth exploring.
The demand for stylish, handmade footwear has increased dramatically, and the Crochet boots with 3D embossed braided stitch – Pattern fits that niche perfectly. They offer a blend of fashion and function, all created with your own two hands.
One major reason these boots are loved is the texture. The 3D embossed braided stitch creates a dramatic visual impact that elevates the look far beyond basic crochet patterns. It mimics classic cable knitting, making the boots appear intricate and high-end.
These boots are also practical. When made with warm, dense yarn and lined properly, they can be used as cozy indoor slippers or even outdoor boots with a non-slip sole. Many crafters add leather or rubber bottoms to increase durability.
Crochet boots are fully customizable. You can change colors, add buttons, or modify the height and width. Whether you want ankle boots or tall ones that reach mid-calf, this pattern adapts easily to your personal style.
Gifting handmade crochet boots is another reason for their popularity. They’re thoughtful, personal, and sure to impress. Perfect for birthdays, holidays, or just a surprise for someone special.
Lastly, these boots are a satisfying project. The stitchwork is slightly more advanced but incredibly rewarding. Watching the embossed pattern come to life row by row brings a deep sense of accomplishment.
To start the Crochet boots with 3D embossed braided stitch – Pattern, you’ll need to gather specific materials that support structure, warmth, and stitch definition. These materials are typically easy to find at craft stores or online.
The first essential is yarn. A thick, high-quality worsted or bulky-weight yarn is recommended for boots. Acrylic blends or wool yarns work best for warmth and stretch. Choose a solid color to highlight the embossed stitch details clearly.
Next is your crochet hook. The pattern typically uses a hook size between 5.0 mm and 6.5 mm, depending on your yarn thickness. Using a slightly smaller hook than recommended helps maintain a tighter fabric, which is crucial for form-fitting boots.
You’ll need stitch markers to keep track of where your 3D embossed braids begin and end. Because this stitch involves front post and back post stitches, staying aligned row by row is essential for a clean finish.
A yarn needle is also required for weaving in ends and stitching parts together. When the boots are complete, this helps ensure everything stays secure and polished.
Optional but useful: non-slip sole pads or rubber sheets if you plan to wear the boots outside. You can also sew on a fabric or fleece lining to add extra warmth and comfort inside the boots.
Finally, if you’re aiming for a professional finish, consider adding decorative buttons or leather straps to accent your design. These small touches make your Crochet boots with 3D embossed braided stitch – Pattern even more personal and stylish.
The highlight of the Crochet boots with 3D embossed braided stitch – Pattern is the stitch itself. While it looks complex, it’s actually based on foundational crochet techniques, mainly post stitches and cable-like crosses.
The 3D embossed braided stitch uses front post double crochets (FPdc) and back post double crochets (BPdc) to raise sections of your fabric. These stitches are worked around the post of the stitch from the previous row, rather than into the top loops.
By alternating and crossing these stitches strategically, you can mimic the look of a braid or cable. The embossed appearance comes from the depth created by overlapping front post stitches across multiple rows.
Most patterns will include charts or written instructions that explain when to “cross” a stitch or skip a space. Once you understand the rhythm, the pattern becomes intuitive and satisfying.
This stitch creates a dense, stretchy texture—perfect for boots that need to hug your feet and legs without slipping off. The added bulk of the raised stitches also means extra warmth.
Practice the 3D embossed braided stitch on a swatch before applying it to your boots. This gives you the chance to get comfortable with the movement and tension required to make the pattern look symmetrical.
The good news is that once you’ve mastered it, you can apply the 3D embossed braided stitch to other projects too, like scarves, hats, or even sweaters. It’s a versatile technique worth learning for any crochet enthusiast.
One of the best things about the Crochet boots with 3D embossed braided stitch – Pattern is the level of customization possible. From size to color to height, you can truly make these boots your own.
To get the perfect fit, start by measuring your foot length and width. Adjust your foundation chain and increase or decrease stitch counts to match your size. Crochet is very forgiving, so you can tweak things easily as you go.
If you’re making tall boots, add rows to the shaft section using the same 3D stitch or switch to a ribbed pattern for more stretch. You can also fold the top down for a cuffed style or leave it straight for a sleek look.
Color choice can completely change the style. Neutrals like gray, beige, and cream give your boots a modern, minimalist vibe. Brighter shades like mustard or burgundy make a bold statement and show off the stitch detail.
Add embellishments like wood buttons, toggle clasps, or faux fur trim. These extras turn a great project into a show-stopping piece. Don’t be afraid to experiment with accents that reflect your personality.
Lining your boots with fleece, flannel, or even crocheted insoles can take comfort to the next level. This is especially useful if you plan to wear them often in colder months.
And lastly, if you’re making a gift, personalize them with initials, a tag, or a matching pair for a child. The adaptability of the Crochet boots with 3D embossed braided stitch – Pattern makes it a fun and heartfelt project for all occasions.
Q1: Are these crochet boots wearable outside the home?
Yes, if you add a durable sole like leather or rubber, your Crochet boots with 3D embossed braided stitch – Pattern can be worn outdoors. Just make sure to line them for comfort and weather resistance.
Q2: Is the 3D embossed braided stitch difficult for beginners?
It’s intermediate, but many beginners can learn it with practice. Start with tutorials or swatches to get comfortable before beginning the full project.
Q3: Can I wash these crochet boots?
Hand washing is recommended to preserve the stitch definition. Use cold water and lay flat to dry. Avoid machine washing unless your yarn is labeled as machine-safe.
Q4: What’s the best yarn for this pattern?
Use worsted or bulky-weight yarn with good stitch definition. Wool blends or acrylic are both excellent options. Avoid fuzzy yarns as they hide the embossed effect.
Q5: How long does it take to make a pair of crochet boots?
Depending on your skill level, it can take anywhere from 6 to 12 hours total. The embossed stitch takes more time than simple stitches, but the result is worth it.
Q6: Can I make these boots in children’s sizes?
Absolutely. Just adjust the stitch count and row numbers to fit smaller feet. You can also use lighter-weight yarn for a more delicate, child-friendly version.
The Crochet boots with 3D embossed braided stitch – Pattern combine elegance, function, and personal expression into one incredible crochet project. From the detailed texture of the 3D braid to the cozy fit and endless customization options, these boots offer a deeply rewarding experience for crocheters at any level.
By understanding the materials, practicing the stitch, and embracing the creative flexibility of the design, you can create footwear that is stylish, warm, and entirely unique. Whether for yourself or someone special, this project is both useful and
beautiful.
If you’ve enjoyed this guide, we’d love to hear from you. Leave your honest opinion and suggestions in the comments below. Your feedback helps us continue to create more inspiring crochet content for the community!

