
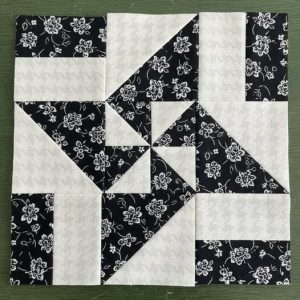
Log Cabin Quilt Block - Tutorial

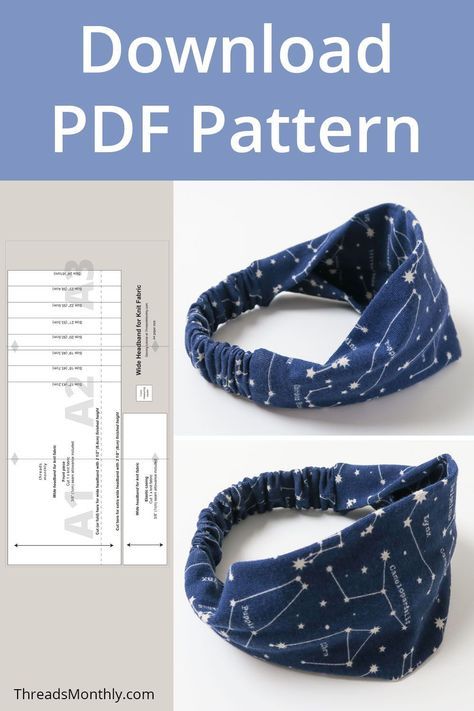
If you’re looking for a stylish, comfortable, and practical DIY accessory, learning how to make a wide headband with elastic – pattern is a perfect project to dive into. Not only is it beginner-friendly, but it’s also highly customizable and useful for everything from workouts to bad hair days. In this guide, you’ll learn step-by-step how to create your own wide fabric headband that’s comfortable, stretchy, and stays in place all day.
The great thing about making your own headband is the ability to choose the exact fabric, width, and design that suits your personal style. Whether you’re sewing for yourself, a gift, or even starting a small handmade business, this how to make a wide headband with elastic – pattern tutorial has all the details to get you started. Plus, it’s a great way to use up fabric scraps and create sustainable accessories.
This sewing project is ideal for both beginners and experienced crafters. It requires minimal supplies, takes very little time to complete, and results in something truly functional and cute. Keep reading to learn how to make a wide headband with elastic – pattern that fits perfectly and adds a handmade flair to your outfit.
Before you begin sewing, gather the necessary materials to complete your project successfully. Having everything prepped and ready will make the entire process faster and more enjoyable.
First and foremost, you’ll need fabric. Lightweight knit fabric like cotton jersey, spandex blends, or bamboo stretch fabric works best. These materials are soft, stretchy, and ideal for comfortable headbands that won’t slip or feel too tight.
You’ll also need a piece of elastic, preferably 1/2 inch to 1 inch wide. The elastic helps keep the headband secure on your head without causing discomfort. You’ll only need a short piece—about 4 to 6 inches depending on your head size.
In addition to fabric and elastic, gather basic sewing tools. These include scissors or a rotary cutter, pins or clips, a sewing machine (or needle and thread if hand-sewing), and an iron for pressing your seams.
A ruler or fabric tape measure is also necessary to ensure accurate measurements. Consistency is key when you want your headband to fit properly.
Some optional but helpful items include a fabric marking pen to help guide your sewing and a walking foot attachment for your sewing machine if you’re working with very stretchy material.
Now that you’ve gathered your supplies, it’s time to start sewing. Follow these steps to create your own wide headband with elastic that’s both stylish and practical.
Start by cutting your fabric. You’ll need one long rectangle for the main headband and one small rectangle for the fabric that wraps around the elastic. A good starting size for the main piece is 18 to 20 inches long by 6 to 8 inches wide. The smaller piece should be about 6 inches long and 2 inches wide.
Fold the main fabric rectangle in half lengthwise, right sides together. Pin or clip it in place. Sew along the long edge with a 1/4″ seam allowance, creating a long fabric tube.
Turn the tube right side out and press it flat with the seam running down the center or side. This becomes the body of your wide headband.
Next, fold the smaller rectangle lengthwise, right sides together, and sew the long edge just like you did with the larger piece. Turn it right side out and insert the elastic into this tube. Use a safety pin to help guide the elastic through.
Secure both ends of the elastic with a few stitches so it doesn’t slip out. Then, overlap the two ends of your main fabric tube and sandwich the elastic piece between them. Make sure the ends are aligned and the elastic piece is centered.
Sew across the joined layers securely. You may want to sew a second line for reinforcement. Turn the seam inside the main band, and your wide headband with elastic is ready to wear!
One of the best parts of learning how to make a wide headband with elastic – pattern is the flexibility to make it your own. With a little creativity, you can make headbands for different seasons, outfits, or moods.
First, consider fabric prints and colors. Floral patterns are great for spring, while bold solid colors can match gym outfits. Don’t shy away from experimenting with stripes, polka dots, or even textured fabric like ribbed knit.
Adjust the width of the headband to your liking. If you want a turban-style look, go wider. For a more subtle accessory, make it narrower. Just keep in mind that wider bands provide more coverage and often stay in place better.
Add embellishments like small bows, fabric flowers, or decorative stitching. You can even insert a twist in the front of the headband for a trendy, boho-chic vibe. This is done by simply folding the fabric in a figure-eight before attaching the elastic section.
Want to make it reversible? Use two coordinating fabrics and sew them together, turning the headband inside out to show either side depending on your mood or outfit.
You can also make matching sets—for example, headbands that coordinate with face masks, scrunchies, or even casual tops. This is a great gift idea for friends or a practical product for selling in online craft shops.
Finally, if you’re making these for kids, just scale down the dimensions and use fun, colorful prints that they’ll love. You can also use soft elastic for younger children to avoid discomfort.
After you’ve made your wide headband with elastic, it’s important to care for it properly so it lasts through regular use and washing.
Always check the care instructions for the fabric you’ve used. Most knit and jersey fabrics are machine washable, but it’s best to wash on a gentle cycle and let them air dry to maintain their shape and elasticity.
Avoid using bleach or harsh detergents, especially on vibrant prints. These can cause the fabric to fade or weaken over time. A mild detergent works best for preserving colors and stretch.
Store your headbands flat or lightly rolled in a drawer. Avoid folding them in tight spots or cramming them in bags, as this can cause creases or misshape the elastic.
If your headband feels too tight, try increasing the main band length by 1-2 inches next time. Likewise, if it feels loose or slides off, shorten the elastic portion slightly for a snugger fit.
Sometimes, fabrics can stretch out over time. If your headband becomes too loose, you can open the seam, replace the elastic, and sew it back again—no need to make a new one.
Lastly, don’t worry if your first attempt isn’t perfect. Like any sewing project, practice improves results. You’ll quickly find the ideal measurements and techniques that work best for your hair and head shape.
Q1: What fabric is best for making a wide headband with elastic?
Stretchy knit fabrics like cotton jersey, spandex blends, and bamboo knit are ideal. They’re soft, breathable, and conform comfortably to the head.
Q2: How long should the elastic be in a wide headband?
Typically, 4 to 6 inches of elastic works well, but it depends on your head size. Test fit before sewing the final seam to ensure comfort.
Q3: Can I sew a headband by hand instead of using a machine?
Yes, you can hand-stitch it, especially if you use strong thread and small stitches. A sewing machine just speeds up the process and gives a cleaner finish.
Q4: Will the headband slip off during wear?
Not if it’s sized correctly and made with good-quality elastic. Choosing the right fabric (not too slick) and securing the fit can prevent slipping.
Q5: Is this project suitable for beginners?
Absolutely. How to make a wide headband with elastic – pattern is a great beginner sewing project that teaches basic skills like straight stitching and tube turning.
Q6: Can I sell the headbands I make using this pattern?
Yes, handmade headbands are popular craft fair and online store items. Just make sure your items are well-made and photographed nicely for best results.
Now you’ve learned how to make a wide headband with elastic – pattern, from gathering materials and sewing it together to customizing and caring for your finished piece. Whether you’re crafting for personal use or exploring a creative business idea, this is a fun and functional sewing project anyone can enjoy.
We hope you found this tutorial helpful and easy to follow. If you’ve tried this project, please leave your honest opinion and share any feedback or ideas for improvements. What did you love? What would you change? Your suggestions help us make better tutorials for everyone. Happy sewing!


