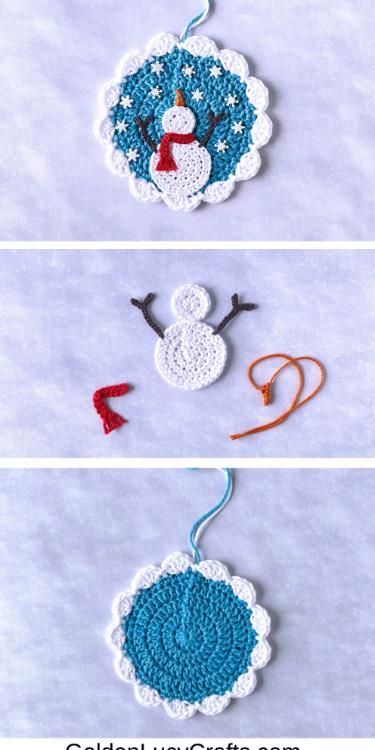
Crochet Winter Ornaments - Pattern

When it comes to holiday decorations, small details can make a big impact—and a Christmas Coaster – Pattern is the perfect way to add a handmade, festive touch to your holiday setup. Whether you’re setting the table for a family dinner or sipping hot cocoa by the fire, these charming coasters not only protect your surfaces but also bring warmth and personality to your space.
Crocheting or crafting your own Christmas coasters is a fun and satisfying project, especially during the busy holiday season when quick and meaningful handmade gifts are appreciated. From classic red and green designs to snowflakes, trees, or Santa-inspired motifs, there’s no limit to the creativity you can pour into each piece. Plus, these patterns are beginner-friendly and work up quickly, making them a go-to holiday craft.
In this article, we’ll explore the best ways to approach a Christmas Coaster – Pattern, including materials, customization tips, and step-by-step guidance. Whether you’re a seasoned crocheter or someone just getting started with holiday crafting, you’ll find everything you need here to create beautiful and functional festive coasters.
A Christmas Coaster – Pattern is the ideal holiday project for anyone who wants to add seasonal charm to their home without taking on a time-consuming or expensive craft. These small yet meaningful items can brighten up any table or countertop, while also offering plenty of creative freedom.
First, coasters are incredibly practical. They protect your furniture from hot drinks, condensation, and spills—something especially useful during holiday parties and family gatherings where drinks are often flowing.
Second, Christmas coasters are quick to make. Unlike larger projects like blankets or scarves, a single coaster can be completed in under an hour depending on your skill level. This makes them perfect for busy crafters who want quick wins.
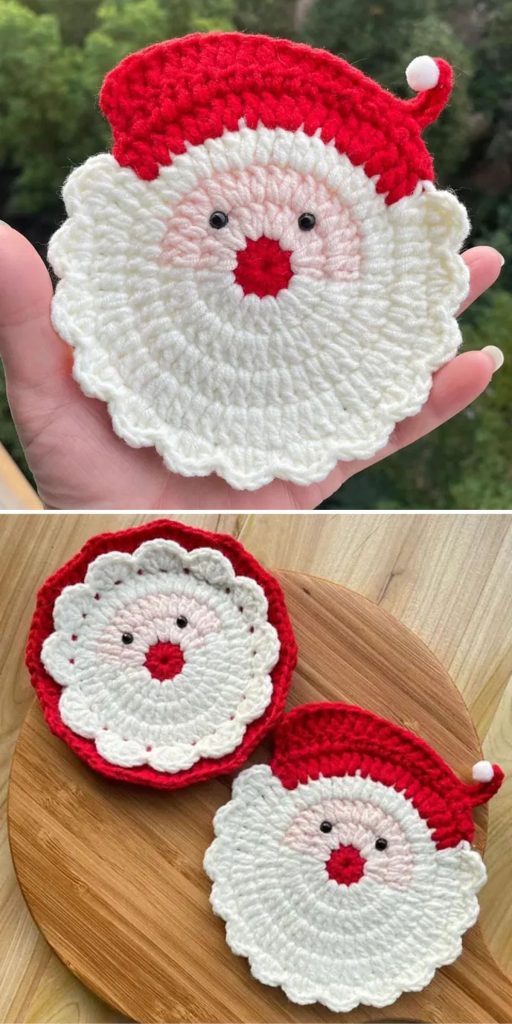
Third, the variety of Christmas Coaster – Pattern options available is endless. You can create Santa hats, snowflakes, candy canes, ornaments, Christmas trees, and more—all in coaster form. This versatility keeps the project exciting and lets you try different themes or color schemes.
Fourth, they make great gifts. Handmade gifts always feel more special, and a set of Christmas coasters wrapped with a festive ribbon is thoughtful, affordable, and easy to personalize.
Fifth, coasters are beginner-friendly. If you’re new to crochet, knitting, or crafting, a coaster is a small-scale way to build your skills without feeling overwhelmed. It’s a manageable and motivating introduction to handmade holiday decor.
Lastly, a Christmas Coaster – Pattern adds that magical holiday spirit to every room. Place them in the living room, dining area, kitchen, or even in guest bedrooms to spread cheer throughout your home.
Starting a Christmas Coaster – Pattern is simple, and you likely already have many of the necessary materials on hand. Gathering the right tools will ensure your project goes smoothly and your finished product looks festive and polished.
First, yarn is essential. Choose a worsted weight cotton yarn, which is absorbent and durable—perfect for coasters. Traditional Christmas colors like red, green, white, and gold are always a hit, but don’t be afraid to explore pastels, metallics, or neutrals for a modern twist.
Next, you’ll need a crochet hook or knitting needles that match your yarn. Typically, a 4mm to 5mm crochet hook works well for coaster projects. Always check the yarn label for recommended sizing.
You’ll also need scissors and a yarn needle. Scissors are used to trim the yarn after finishing, while the yarn needle is useful for weaving in loose ends and stitching on any embellishments or pieces, such as snowflakes or stars.
For more detailed designs, consider stitch markers to keep track of your rounds or sections. These help maintain consistency and can prevent mistakes, especially for beginners.
If your Christmas Coaster – Pattern includes color changes or embellishments, you may also want buttons, beads, or felt pieces. These decorative items add texture and charm to your final product.
Finally, blocking supplies like pins and a soft mat can help shape your finished coasters evenly. After a light steam or spritz of water, blocking ensures your coaster lays flat and presents beautifully as part of your holiday decor or gift set.
One of the best parts of working with a Christmas Coaster – Pattern is the creative freedom you get. Whether you’re following a written pattern or designing your own, there are countless ways to make your coasters festive and uniquely yours.
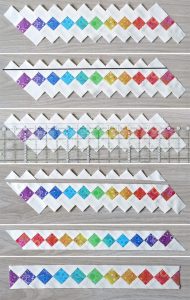
Start with color combinations. Red and green are classics, but try mixing in cream, silver, blue, or even plaid designs to match your home’s holiday theme. You can create a color story that runs throughout your entire holiday decor.
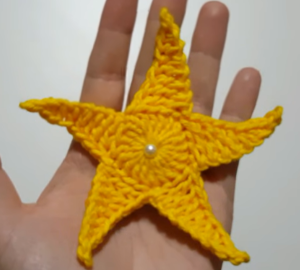
Next, think about shapes. While round coasters are most common, you can also make star-shaped coasters, Christmas tree silhouettes, or snowflake-inspired pieces. These not only look great but allow you to explore different stitching techniques.
Add embellishments for extra character. A Santa coaster can have a white yarn beard, while a snowman can include a little button nose or scarf. Felt pieces, sequins, or embroidery thread can add layers of detail that bring your design to life.
Consider incorporating textures. Use popcorn stitches or bobbles to give your coaster a 3D effect. This works well for wreaths or ornament-style patterns where depth enhances the look.
Personalization is another great option. You can stitch initials, a short holiday greeting, or even the year into the coaster design. This adds a special touch, especially if you’re giving them as gifts.
Lastly, create coaster sets with a theme. Make a set of four coasters: one Santa, one reindeer, one snowman, and one Christmas tree. It’s a fun way to keep the project interesting while giving each piece its own personality.
Even though a Christmas Coaster – Pattern is beginner-friendly, there are a few helpful tips to ensure you get the best possible results. Attention to detail and proper technique will make your coasters durable, attractive, and holiday-ready.
First, read through the entire pattern before you begin. This gives you a full understanding of the steps involved and highlights any techniques or stitches you might want to practice beforehand.
Second, always create a gauge swatch if the pattern suggests one. While it may seem unnecessary for small projects, matching the pattern’s gauge ensures the coaster will come out the intended size and shape.
Third, count your stitches. Especially in circular or shaped designs, missing a stitch can throw off the symmetry and result in a coaster that curls or warps. Use stitch markers to help you stay on track.
Fourth, practice neat color changes if your pattern includes them. Switching yarn colors cleanly helps maintain a professional look. Try to weave in ends as you go so the back stays tidy and the coaster lies flat.
Fifth, don’t skip the blocking stage. Lightly blocking your finished coaster helps it hold its shape and look crisp. It’s an extra step, but it makes a noticeable difference in the finished product.
Finally, have fun and don’t stress perfection. Handmade items carry charm because of their slight imperfections. Your unique spin on a Christmas Coaster – Pattern is what will make it special.
Q1: Are Christmas coasters suitable for beginners?
Yes! Most Christmas Coaster – Pattern options are designed to be beginner-friendly, using basic stitches and minimal shaping. It’s a great starting point for new crafters.
Q2: What’s the best yarn to use for Christmas coasters?
Cotton yarn is ideal due to its absorbency and durability. Acrylic can be used for decorative purposes, but cotton is better for functionality.
Q3: How long does it take to make a Christmas coaster?
Typically, one coaster takes between 30 minutes to 1 hour depending on the complexity of the pattern and your skill level.
Q4: Can I sell coasters made from a pattern I found online?
Always check the pattern’s licensing terms. Some free and paid patterns allow for commercial use with credit to the designer; others are for personal use only.
Q5: How do I care for handmade Christmas coasters?
If made with cotton yarn, coasters can be hand or machine washed gently. Lay flat to dry to maintain their shape and prevent fraying.
Q6: Can I design my own Christmas coaster patterns?
Absolutely! Many crafters start with basic shapes and build their own designs. It’s a fun and creative way to personalize your holiday decor.
The Christmas Coaster – Pattern is a festive, easy, and fulfilling craft that brings handmade charm to your holiday season. Whether you’re decorating your own home, looking for quick DIY gifts, or just enjoying some creative downtime, these coasters are the perfect project.
We’ve covered everything from materials and pattern tips to customization ideas and common questions, giving you all the tools you need to get started confidently. As you work through your own creations, remember that the joy of crafting is in the process as much
