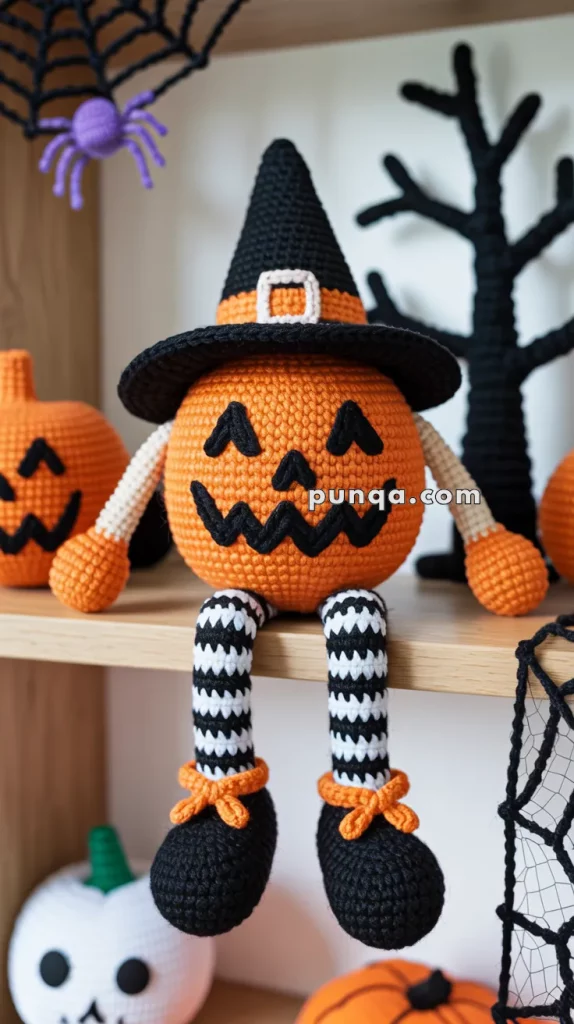
Amigurumi Pumpkin Witch Doll - Pattern

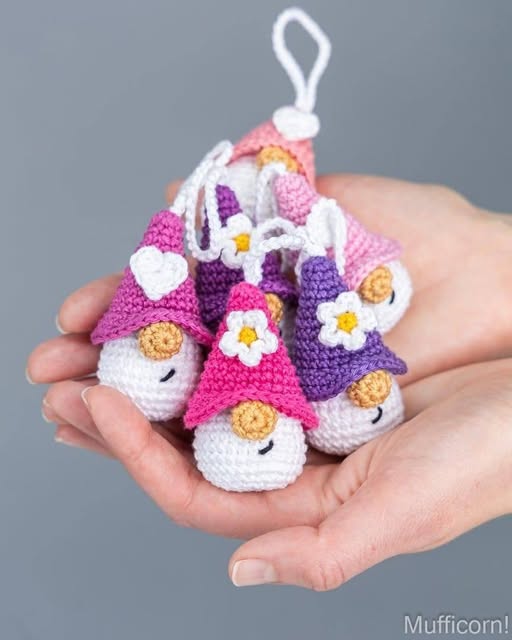
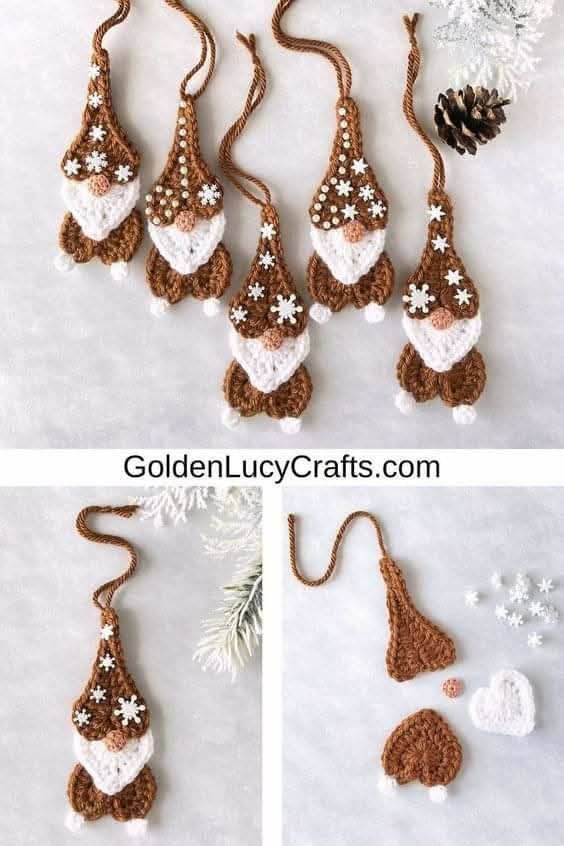
If you’re looking for a small and adorable project to add a whimsical touch to your crochet collection, the Mini Crochet Gnomes – Pattern is a perfect choice. These charming little characters are incredibly fun to make and offer endless creative possibilities with colors, accessories, and themes.
The Mini Crochet Gnomes – Pattern is suitable for both beginners and experienced crocheters. Whether you want to create festive decorations, unique gifts, or just a cute desk companion, these gnomes are quick to complete and incredibly rewarding. Their compact size also makes them great for craft fairs or online shops.
In this detailed guide, we’ll walk you through everything you need to know to create your own mini crochet gnome. From materials and techniques to styling ideas and selling tips, this pattern is sure to inspire your creativity and bring a little magic to your crochet projects.
The rise in popularity of the Mini Crochet Gnomes – Pattern can be credited to their irresistible cuteness and versatility. Gnomes have long been associated with folklore, luck, and seasonal decor, making them appealing to a wide range of people.
One reason these crochet gnomes are loved is that they’re fast to make. Unlike large amigurumi dolls or intricate home decor items, mini gnomes can be crocheted in an evening. This makes them excellent projects for crafters with limited time.
Another major reason is customization. You can easily change the gnome’s beard, hat, color palette, or size to suit any occasion. From Valentine’s Day to Christmas, or even a birthday-themed gnome, the options are endless.
These mini gnomes are also beginner-friendly. Basic stitches and minimal shaping mean that even novice crocheters can create an impressive final product. It’s a great way to build skills while crafting something delightful.
The gnomes make perfect stocking stuffers, party favors, and thoughtful gifts. Add a loop to turn them into keychains or ornaments, or place them in a potted plant for an unexpected surprise.
Crafters also love how easy it is to turn this pattern into a small business opportunity. People adore handmade items with character, and mini gnomes are a hit at craft fairs, on Etsy, and in gift boutiques.
To begin your Mini Crochet Gnomes – Pattern, you only need a few basic supplies. The materials are affordable and easy to find, and many crocheters already have them in their stash.
Start with yarn. You’ll need worsted weight or DK yarn in at least three colors—typically one for the hat, one for the body, and a neutral shade for the beard or face. Cotton or acrylic yarns both work well. You can even use textured yarn for beards to give them a fuzzy effect.
A 3.0mm to 4.0mm crochet hook is ideal for a tight stitch that keeps your stuffing hidden. Using a smaller hook helps your gnome maintain its shape and prevents gaps between stitches.
You’ll also need stuffing. Polyester fiberfill is most commonly used and available in craft stores. Make sure to stuff your gnome firmly so it stands or sits without collapsing.
Safety eyes can be added, but are optional. Many mini gnome designs don’t use eyes at all—the hat covers most of the face, with only a nose peeking out. You can crochet a small ball or use a wooden bead for the nose.
To finish your gnome, you’ll need a tapestry needle for sewing the parts together and weaving in yarn ends. Scissors and stitch markers can help manage your yarn and track stitch counts.
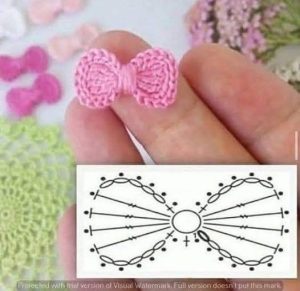
Finally, consider small embellishments like buttons, flowers, or bows to personalize your gnome. These little touches can turn a simple figure into a seasonal character or personalized gift.
Let’s break down the process of creating the Mini Crochet Gnomes – Pattern into manageable steps. You’ll be making the body, hat, nose, and beard separately, then sewing them together.
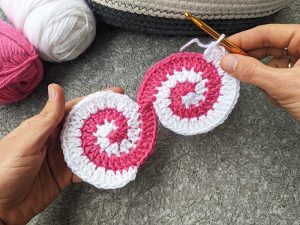
Start with the body. Using your chosen body color, create a magic ring and work in continuous rounds using single crochet stitches. Gradually increase to shape a rounded base, then continue straight up to form a cylinder. Add stuffing as you go.
The hat is created similarly, starting with a small circle and increasing gradually before decreasing again to form a tall, pointed cone. Use fun colors or stripes to give your gnome personality.
The nose can be made with a simple crochet sphere, just a few rounds in a skin-toned or neutral yarn. You can also use a small wooden bead or felt ball for a faster finish.
The beard is where you can get creative. Cut strands of white or grey yarn and loop them into the front stitches below the hat. Trim the yarn to shape the beard into a point, circle, or messy style. You can also crochet a flat triangle for a stylized beard.
Assemble your gnome by sewing the hat onto the top of the body, positioning it low enough to hide the eyes. Stitch the nose just under the brim, centered. Attach the beard beneath the nose.
Once everything is secured, you can add finishing touches. A little heart applique, flower, or tiny crochet prop (like a mushroom or flag) adds even more charm to your Mini Crochet Gnomes – Pattern.
Once your mini crochet gnomes are assembled, the real fun begins—decorating and showcasing them! These tiny characters can be used in countless creative ways throughout the year.
Display them around the house for a playful touch. Add them to shelves, mantels, or tiered trays. Place them inside glass jars or shadow boxes for seasonal displays that get people talking.
Attach a loop to the top of the hat to turn your gnome into an ornament. Hang them on a holiday tree, rearview mirror, or doorknob. This is a great way to turn your Mini Crochet Gnomes – Pattern into a year-round craft.
Use your gnome as a personalized gift topper. Tying one onto a wrapped present makes any gift extra special. It can also double as a keepsake for the recipient to remember the occasion.
Looking to sell your crochet gnomes? Create themed collections—like a spring garden set, Halloween gnomes, or patriotic characters for the Fourth of July. These unique designs appeal to a wide customer base.
Don’t forget presentation. Package your gnomes in small gift boxes or fabric bags with custom tags. A polished presentation adds value and encourages repeat buyers, especially for handmade markets and online orders.
If you’re selling online, take clear, well-lit photos from multiple angles. Show your gnomes in action—on a shelf, in a gift box, or being held. Share the story behind the pattern to connect with your audience emotionally.
Q1: Are mini crochet gnomes beginner-friendly?
Yes! The Mini Crochet Gnomes – Pattern uses basic stitches and simple construction, making it a great choice for beginners looking for a fun and rewarding project.
Q2: How long does it take to make a mini crochet gnome?
Most mini gnomes can be completed in 1–2 hours, depending on your skill level and the complexity of decorations.
Q3: What yarn is best for making mini crochet gnomes?
Worsted weight acrylic or cotton yarn works well. Textured yarns like faux fur or boucle can be used for beards to create unique textures.
Q4: Do I need to use safety eyes for the gnome?
No. Many Mini Crochet Gnomes – Pattern styles skip eyes completely and cover the face with a hat, only showing the nose and beard.
Q5: Can I make themed gnomes for holidays or events?
Absolutely! Gnomes are perfect for holiday themes. Use red and green for Christmas, pastels for Easter, or spooky shades for Halloween.
Q6: Can I sell gnomes made with this pattern?
Yes, you can sell finished gnomes. Always respect the original pattern designer’s terms if you’re using a copyrighted pattern, and give credit if required.
The Mini Crochet Gnomes – Pattern is a fun, creative, and deeply satisfying project for crafters of all levels. With just a bit of yarn and imagination, you can bring these charming little characters to life—and make them your own.
From learning the basics to customizing, decorating, and even selling your gnomes, this guide has walked you through each step of the journey. Whether for yourself, a gift, or your small business, these tiny gnomes pack big personality.

