
Log Cabin Quilt Block - Tutorial

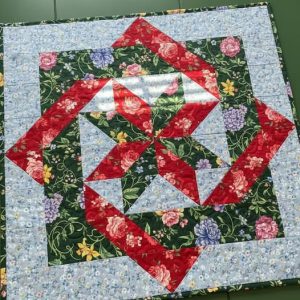
If you’re looking for a charming and meaningful sewing project, the Jewel Heart Quilt Tutorial – Pattern is a beautiful way to express love through handmade artistry. This quilt combines the elegance of jewel-toned fabrics with the universally loved heart motif, creating a striking design that’s both cozy and heartfelt. Whether you’re an experienced quilter or a dedicated beginner, this project is accessible, fun, and incredibly rewarding.
The Jewel Heart Quilt Tutorial – Pattern makes for a perfect gift for weddings, anniversaries, Valentine’s Day, or simply to show someone you care. Its vibrant colors and bold heart shapes capture attention, while the warmth of a handmade quilt brings comfort and sentiment. The versatility of the pattern means you can tailor the size and fabric palette to match any occasion or home décor.
In this article, we’ll guide you through the process of making your own jewel heart quilt—from selecting your fabrics to piecing together your blocks and assembling the final product. With clear instructions, practical tips, and ideas for customization, you’ll feel confident creating a masterpiece that’s as meaningful as it is beautiful.
Before diving into the sewing process, it’s essential to gather your supplies and plan your project. The Jewel Heart Quilt Tutorial – Pattern is beginner-friendly but does require careful preparation to ensure the shapes and colors come together beautifully.
You’ll need a selection of jewel-toned fabrics—think ruby red, emerald green, sapphire blue, amethyst purple, and topaz yellow. Choose cotton quilting fabric for best results, and feel free to use fat quarters or scraps for a scrappy look.
Next, select a neutral background fabric, such as white, light gray, or black, depending on how much contrast you want with your hearts. This background will help the hearts pop and give your quilt a clean, cohesive look.
For batting, choose a quality cotton or cotton/poly blend. You’ll also need backing fabric, binding fabric, thread, rotary cutter, cutting mat, quilting ruler, pins or clips, and of course, a sewing machine.
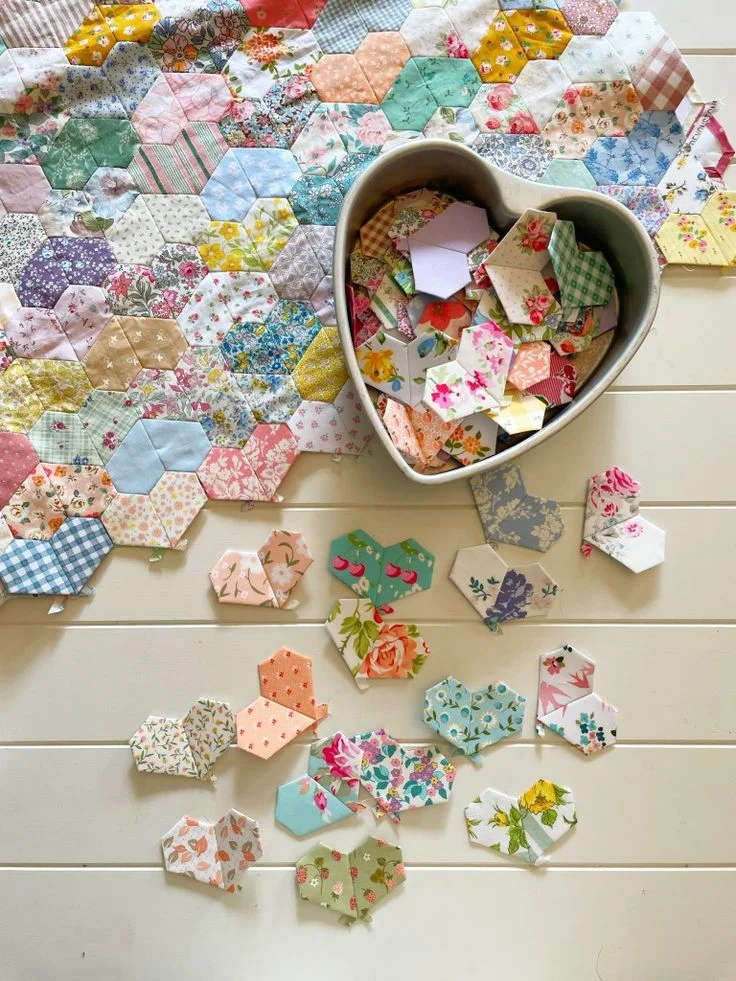
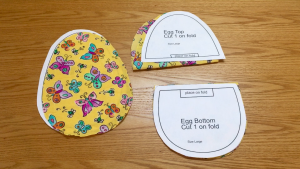
Print or draw out the heart block template. Each block in the Jewel Heart Quilt Tutorial – Pattern is made from simple geometric shapes—half-square triangles (HSTs), rectangles, and squares—assembled into a heart silhouette. Many free heart block patterns are available online, or you can draft your own.
Decide on your quilt size and layout. A baby quilt might use 9 heart blocks (3×3), while a throw quilt may use 20 or more. Once you know how many blocks you need, calculate the amount of fabric required for each color.
Finally, prewash your fabrics to prevent shrinking and color bleeding. Iron them flat and start cutting according to your block layout. With everything prepped, you’re ready to move on to construction.
The magic of the Jewel Heart Quilt Tutorial – Pattern lies in its heart blocks. They are easy to sew and allow for endless creative combinations with fabric placement. Here’s how to piece your first heart.
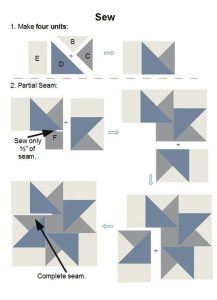
Each heart block is made up of squares and half-square triangles (HSTs). To create an HST, place two fabric squares (one jewel tone and one background) right sides together. Draw a diagonal line on the back of one square and sew ¼ inch on either side of the line. Cut along the drawn line and press open to reveal two HSTs.
For each block, you’ll need four HSTs to form the curved top edges of the heart. The bottom half of the heart is made using rectangles and squares that form the point. Follow your block layout diagram carefully as you assemble the pieces.
Lay out your pieces in a 4×4 or 5×5 grid depending on your block size. Once you’re happy with the placement, begin sewing each row together. Press your seams to one side or open them flat for a crisp finish.
Sew the rows together to complete your heart block. Make sure all seams are aligned and points are sharp. Press the block well and square it up using your quilting ruler, trimming any uneven edges.
Repeat this process for each heart block you want in your quilt. Mix and match jewel tones to create a vibrant, gem-inspired layout. As you go, lay out your blocks on a design wall or floor to test different arrangements.
Whether you go for a gradient rainbow of jewel tones or a random mix, each heart block brings you closer to a quilt that radiates warmth and love.
Once your heart blocks are complete, it’s time to arrange and sew them into your quilt top. This is where your vision for the Jewel Heart Quilt Tutorial – Pattern truly comes to life.
Start by laying out all your heart blocks in the desired arrangement. Make sure the colors are balanced across the quilt—spread out similar tones so they don’t cluster in one area. If you’re using sashing, lay out the sashing strips between the blocks for an accurate preview.
Sashing (the strips between blocks) is optional but can give each block room to breathe and help define the individual hearts. Use white, gray, or another subtle color for sashing if you want a clean, modern look.
Once you’re happy with the layout, begin sewing the blocks together row by row. Press your seams carefully, alternating directions between rows to help with alignment when you join them.
After sewing all rows, attach them to each other to complete the quilt top. Take your time here to make sure everything lines up nicely—especially the corners and heart shapes.
Add borders if desired. A simple solid border can frame the hearts beautifully, while a pieced border using leftover scraps can give your quilt a whimsical, patchwork feel.
With the quilt top done, you’re ready for basting. This involves layering your quilt top, batting, and backing fabric and securing them together with pins, spray adhesive, or thread before quilting.
The final steps of the Jewel Heart Quilt Tutorial – Pattern are all about finishing your masterpiece and adding the personal touches that make it shine. Whether you quilt by hand or machine, this stage completes your quilt’s transformation from fabric to heirloom.
Choose a quilting pattern that complements your blocks. You can stitch in the ditch (along the seams), echo the shape of the hearts, or use free-motion quilting with swirls, feathers, or hearts.
Start quilting from the center outward, smoothing out wrinkles as you go. Take your time and adjust your quilt under the needle frequently to prevent puckering.
Once quilting is complete, it’s time to trim the quilt sandwich. Use a rotary cutter and ruler to square up the edges and prepare for binding.
Cut and attach your binding using your favorite method. Double-fold binding works well for durability. Sew it to the front of the quilt and fold it over to the back, securing with machine stitching or hand sewing.
Add a quilt label to commemorate the project. Include your name, the date, the occasion, or a sweet message. This step is often overlooked but makes a big difference in the quilt’s personal value.
Now give your quilt a final press, photograph your beautiful creation, and wrap it up for gifting—or drape it over your couch to admire daily. You’ve brought the Jewel Heart Quilt Tutorial – Pattern to life with love and creativity.
Q1: Is the Jewel Heart Quilt suitable for beginners?
Yes! The pattern uses basic shapes like squares and triangles, making it perfect for beginners who want to practice piecing and layout skills.
Q2: What size is the finished quilt?
The final size depends on the number and size of heart blocks. A baby quilt might be 36″x36″, while a throw could be 60″x72″ or larger.
Q3: Can I use pre-cuts like charm packs or jelly rolls?
Absolutely! Charm packs work great for the heart blocks, and jelly rolls can be used for sashing or borders.
Q4: How do I keep my heart points from getting cut off?
Accurate ¼” seams and careful pressing are key. Use a scant ¼” seam allowance and always square up blocks before assembly.
Q5: Is it necessary to use jewel tones?
No, you can use any color palette you love. Pastels, brights, or monochrome schemes all look beautiful with this pattern.
Q6: How should I quilt the finished piece?
You can stitch in the ditch, echo the heart shapes, or use decorative free-motion quilting. Choose a style that fits your skill level and design goals.
The Jewel Heart Quilt Tutorial – Pattern is a heartwarming, joyful quilting project that combines creativity with emotional expression. With its bold design, vibrant colors, and symbolic heart motif, it’s a perfect choice for creating something truly meaningful—whether as a gift or a personal treasure.
In this article, we’ve walked through everything from planning and cutting to piecing, quilting, and customizing your project. With patience and care, you’ll end up with a quilt that’s not only functional but also filled with love.
We’d love to hear from you! If you try this tutorial or have ideas for enhancing the design, please leave a sincere comment below. Your feedback helps inspire others and builds
a wonderful creative community. Happy quilting! 🧵❤️✨


