
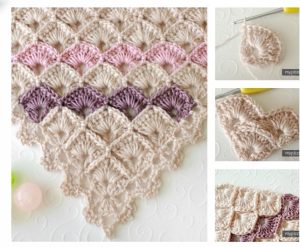
Crochet Flower - Tutorial

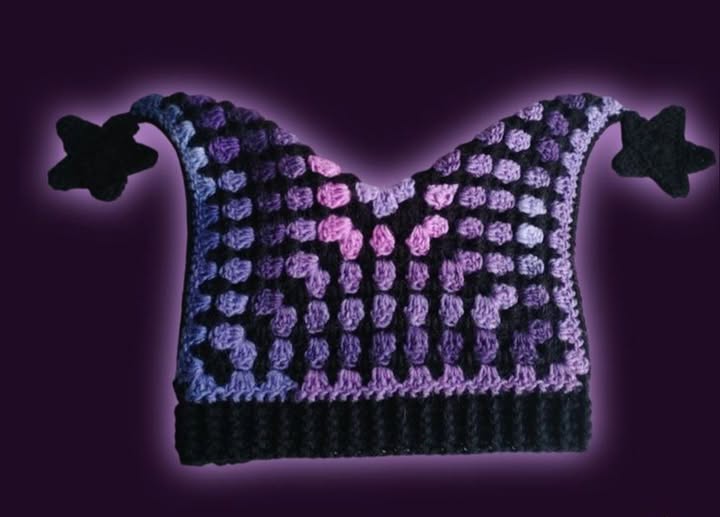
Finding the perfect Crocheted jester hat – Pattern is like discovering a gateway to a world of whimsy, color, and medieval-inspired fashion. Whether you are preparing for a Renaissance fair, a themed costume party, or simply want to add a dash of eccentric joy to your winter wardrobe, this specific design offers a unique challenge that goes beyond the standard beanie. The jester hat, characterized by its multiple points and often adorned with bells, has a long history of bringing smiles to faces, and creating one with your own hands makes the experience even more rewarding.
The beauty of a Crocheted jester hat – Pattern lies in its geometric complexity and the endless possibilities for customization through color blocking. Unlike traditional hats that follow a simple crown-to-brim construction, the jester style requires a deep understanding of increases and decreases to create those iconic tapering horns. For many crafters, this project serves as a fantastic way to utilize “scrap yarn” or bright, contrasting skeins that have been sitting in the stash, as the tradition of the “motley” fool encourages a mismatched and vibrant aesthetic.
In the following guide, we will explore the technical nuances of the Crocheted jester hat – Pattern, breaking down everything from yarn selection to the final decorative touches. We will look at how to ensure a perfect fit for any head size and how to maintain the structural integrity of the points so they don’t flop over unintentionally. By the end of this article, you will have a comprehensive understanding of how to execute this crochet project with professional precision while maintaining that playful spirit that makes the jester hat such a beloved accessory.
When beginning your Crocheted jester hat – Pattern, the choice of fiber is the most critical decision you will make. A medium-weight (worsted) acrylic or wool blend is usually the best choice because these fibers provide the necessary “memory” to hold the shape of the points. While cotton is breathable, it can be heavy and may cause the horns of the hat to sag under their own weight, which can detract from the crisp silhouette of the jester design.
The hook size you choose for your Crocheted jester hat – Pattern should ideally be slightly smaller than what the yarn label recommends. By using a smaller hook, you create a denser, stiffer fabric that acts as a natural support for the tapering points. This “tight gauge” technique ensures that the stitches are close together, preventing the stuffing (if you choose to use any) from peeking through the gaps and keeping the cold wind out.
Color selection is where the Crocheted jester hat – Pattern truly comes to life, traditionally using a two-tone or four-tone “checkerboard” approach. You will need at least two contrasting colors to achieve the classic look, often alternating them between the different points and the headband. Many modern makers are also experimenting with variegated yarns or ombre transitions to give this medieval crochet pattern a contemporary and artistic twist.
In addition to yarn, you will need a few specific notions to finish your Crocheted jester hat – Pattern properly. A set of small bells, often called “jingle bells,” is a must-have for the tips of the points to provide that signature sound. You might also want to have a small amount of polyester fiberfill on hand if you prefer your hat points to stand perfectly upright and firm, though many patterns are designed to be self-supporting through stitch work alone.
Stitch markers are your best friend when working on a Crocheted jester hat – Pattern because the construction often involves working in continuous rounds. Since you will be managing multiple points that eventually join at the headband, keeping track of your increase rounds is essential for symmetry. Without markers, it is very easy to lose your place, resulting in one horn being significantly longer or wider than the others, which can throw off the balance of the hat.
Lastly, consider the durability of your materials if you plan to wear the hat to outdoor events like festivals. Look for yarns that are labeled as machine washable or “easy care,” as the points of a Crocheted jester hat – Pattern can easily pick up dust or come into contact with face paint during festivities. Preparing with high-quality, resilient materials ensures that your hand-crocheted masterpiece remains a part of your costume trunk for many years to come.
The most defining feature of the Crocheted jester hat – Pattern is undoubtedly the points, or “horns,” which typically number two, three, or even five. Each point is usually started from the tip using a magic ring (also known as a magic circle) and worked downwards toward the head. This method allows you to start with a very small number of stitches and gradually increase to create a smooth, elegant taper that looks professional and clean.
To achieve the iconic curve often seen in a Crocheted jester hat – Pattern, you can utilize asymmetrical increases. Instead of increasing evenly around the circle, you can place more increases on one side of the round than the other, which forces the fabric to lean or “hook” in a specific direction. This technique adds a lot of character to the hat, making the points look more dynamic and less like simple traffic cones sitting on your head.
Joining the points is the most technical part of the Crocheted jester hat – Pattern and requires careful stitch counting. Once all individual points are completed to the same base diameter, they are aligned in a row or a circle and crocheted together into a single, large round. This transition creates the “body” of the hat and is the point where you will begin working the headband that secures the garment to the wearer’s forehead.
Precision in the sc (single crochet) or hdc (half double crochet) stitches is vital during the joining phase of the Crocheted jester hat – Pattern. If the tension varies between the different points, the headband may turn out lumpy or uneven. Many patterns suggest using a row of slip stitches or a sturdy border round immediately after joining to stabilize the fabric and provide a strong foundation for the remainder of the hat’s construction.
For those who want a more comfortable fit, the headband section of the Crocheted jester hat – Pattern can be worked in a ribbed stitch. Using front post and back post double crochet (fpdc/bpdc) creates a stretchy, elastic fabric that hugs the head securely without being too tight. This is especially important for jester hats because the weight of the points and bells can cause a standard flat-stitch headband to slide down over the eyes.
As you work toward the final rounds of your Crocheted jester hat – Pattern, you have the opportunity to add a “cuff” or brim. Some choose to leave it simple, while others add a decorative “zigzag” border that mirrors the points above. This repetitive geometric theme is what makes the jester aesthetic so visually satisfying and helps pull the entire design together into a cohesive, wearable piece of art.
One of the great things about a Crocheted jester hat – Pattern is its inherent scalability, making it easy to create versions for infants, children, and adults. To adjust the size, you simply modify the diameter of the base of the points before joining them together. By measuring the circumference of the intended wearer’s head and dividing that number by the number of points, you can calculate exactly how wide each point needs to be for a perfect fit.
For a toddler’s Crocheted jester hat – Pattern, you might opt for shorter points to ensure the hat isn’t too heavy for a small neck to support. Using lightweight yarn or a larger hook can also help keep the accessory airy and comfortable for a child who might be sensitive to heavy headwear. Safety is also a concern, so ensure that any bells or decorations are sewn on very securely to prevent them from becoming a choking hazard.
Adult versions of the Crocheted jester hat – Pattern often lean into more dramatic lengths and complex color patterns. You can even create a “Long Tail Jester” where the points reach down past the shoulders, acting almost like a built-in scarf. This level of customization is what makes handmade crochet so much better than store-bought options, as you can tailor the drama of the hat to the personality of the individual wearing it.
The “Motley” style is another popular variation within the Crocheted jester hat – Pattern world. This involves using a different color for every single “log” or section of the hat, creating a chaotic yet harmonious rainbow effect. It is a fantastic way to use up those small balls of leftover yarn from previous projects, turning waste into a high-energy fashion statement that is guaranteed to be a conversation starter.
If you prefer a more subtle look, you can work the Crocheted jester hat – Pattern in a single, solid neutral color like black, charcoal, or deep burgundy. This transforms the hat from a “clown” accessory into something more gothic or sophisticated, reminiscent of “Harlequin” fashion. This versatility shows that the jester silhouette doesn’t always have to be loud and bright; it can also be elegant and mysterious depending on your yarn choice.
Finally, don’t forget that the Crocheted jester hat – Pattern can be accessorized beyond just bells. You can add tassels, pom-poms, or even embroidery along the headband. Some crafters even incorporate “earflaps” into the design for extra warmth during winter festivals. The pattern is merely a blueprint; your creativity is the tool that will turn a basic set of instructions into a unique, one-of-a-kind garment that reflects your personal style.
The final touches on your Crocheted jester hat – Pattern are what separate a “hobby” project from a professional-grade costume piece. Blocking your finished hat is highly recommended, especially if the points feel a bit stiff or uneven. By pinning the hat to shape and lightly steaming it (or wet blocking), you allow the fibers to relax and settle into their final positions, which gives the crochet stitches a much more uniform and “expensive” appearance.
When it comes to attaching the bells to your Crocheted jester hat – Pattern, do not rely on just a single strand of yarn. Instead, use a matching embroidery floss or a doubled-up strand of strong thread to sew the bells through the fabric multiple times. Since the points of the hat will be moving constantly as the wearer walks, the bells are under a surprising amount of tension, and you don’t want to lose them in the middle of a crowded event.
If you find that the points of your Crocheted jester hat – Pattern are drooping more than you’d like, you can insert “floral wire” or a plastic boning into the edges of the horns. This hidden internal structure allows you to pose the points in different directions—curling them upward, downward, or to the side. This is a common trick used by professional cosplayers to maintain a “cartoony” or gravity-defying look throughout a long day of wear.
Cleaning your Crocheted jester hat – Pattern requires a gentle touch to preserve its shape and the integrity of the bells. Hand washing in cool water with a mild wool wash is the safest method. Avoid wringing the hat, as this can stretch the points out of shape; instead, roll the hat in a clean towel to remove excess moisture and then lay it flat to dry. If your hat has metal bells, make sure to dry them quickly to prevent any potential rusting.
Storage is another important factor for the longevity of your Crocheted jester hat – Pattern. Instead of folding it flat, which can create permanent creases in the points, consider stuffing the points with tissue paper and storing the hat in a breathable cotton bag. This keeps the points from being crushed and protects the yarn from moths or dust while it’s waiting for the next Renaissance fair or Halloween season to arrive.
By following these advanced tips, your Crocheted jester hat – Pattern will not only look incredible on the first day but will also stand the test of time. Crocheting is an act of patience and love, and taking these extra steps ensures that your hard work is preserved. Whether you are a master of the craft or a dedicated learner, the journey of creating this hat is just as much fun as the joy of wearing it and sharing that playful spirit with the world.
How long does it take to complete a Crocheted jester hat – Pattern?
For an intermediate crocheter, a standard three-point jester hat usually takes between 6 to 10 hours of active work. This varies based on the complexity of the color changes and whether you choose to add decorative borders or elaborate ribbing to the headband.
Can I use a larger hook to make the hat faster?
While a larger hook will make the project go by quicker, it may result in a “floppy” hat. The Crocheted jester hat – Pattern relies on a firm fabric to keep the points upright. If you use a large hook, you will likely need to stuff the points with fiberfill to prevent them from drooping.
How many colors of yarn should I buy?
A traditional “motley” jester hat looks best with at least two contrasting colors. However, for a truly authentic medieval look, four colors (alternating in quarters) are often used. You will typically need one skein of each color, which will be more than enough to finish the project.
Is this pattern suitable for someone who only knows basic stitches?
Yes! Most Crocheted jester hat – Patterns primarily use the single crochet (sc) stitch. The only “advanced” parts are the magic ring and knowing how to increase and decrease. If you can do those, you can definitely make this hat.
What size bells should I use for the tips?
Bells ranging from 10mm to 20mm are the most common. You want them to be large enough to make a clear sound but small enough that they don’t weigh down the tips of the hat excessively.
How do I make the points stand up without wire?
The key is to use a smaller hook to create a very tight stitch gauge and to use a yarn with good “structure” like a wool-acrylic blend. You can also lightly stuff the points with a small amount of lightweight stuffing to give them a permanent “full” look.
In summary, the Crocheted jester hat – Pattern is a delightful project that combines technical skill with pure, unadulterated fun. Throughout this article, we have explored the essential materials needed to create a sturdy and vibrant hat, the geometric secrets of constructing those iconic points, and the ways you can customize the size and style for anyone from a toddler to a seasoned festival-goer. We also discussed the importance of finishing techniques like blocking and proper storage to ensure your creation lasts for years.
This pattern is more than just a piece of clothing; it is a celebration of history, humor, and the incredible versatility of the crochet hook. We hope this guide has inspired you to pick up your yarn and start your own jester journey.Please leave your sincere opinion and any suggestions in the comments below! We would love to know what colors you chose for your hat or if you have any unique tips for making those points stand tall. Your feedback helps us grow and provides valuable insights for the entire crafting community.


