
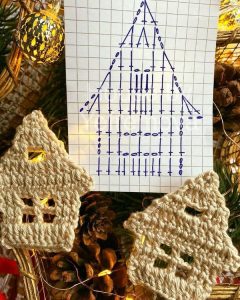
Crochet Flower - Tutorial

Mastering a crochet square – Pattern is often considered the “rite of passage” for any aspiring fiber artist, serving as the fundamental building block for countless creative projects. The crochet square – Pattern is celebrated for its geometric simplicity and its incredible versatility, allowing crafters to transform small portions of yarn into expansive masterpieces like blankets, cardigans, and home decor. Whether you are aiming for a traditional vintage aesthetic or a sleek modern look, understanding the core principles of the crochet square – Pattern is essential for expanding your technical repertoire and gaining confidence in your stitching abilities.
The beauty of a crochet square – Pattern lies in its portability and the satisfaction of completing a modular unit in a short amount of time. Each crochet square – Pattern you create acts as a canvas for experimenting with color theory, texture, and complex stitch combinations without the overwhelming commitment of a large-scale project. By focusing on one crochet square – Pattern at a time, you can refine your tension, practice new techniques like the magic ring, and master the art of working in the round, all while building a collection of blocks that will eventually be joined into a cohesive final product.
In this comprehensive guide, we will delve deep into the world of the crochet square – Pattern, exploring the best materials to use, the step-by-step techniques for achieving perfect corners, and creative ways to join your squares together. We will also discuss how to troubleshoot common issues like “wavy” edges or curling corners, ensuring that every crochet square – Pattern you produce is perfectly flat and symmetrical. From the classic granny square to more intricate afghan blocks, this article is designed to be your ultimate resource for everything related to this iconic and beloved crochet staple.
Choosing the right yarn weight is the first critical step in successfully executing a crochet square – Pattern. For beginners, a medium worsted weight yarn (Category 4) is highly recommended because it offers excellent stitch visibility and is easy to handle, ensuring that you can clearly see the “V” of each stitch as you work.
The fiber content of your yarn also plays a significant role in how your crochet square – Pattern behaves. 100% Cotton yarn is fantastic for squares intended for coasters or dishcloths because it is absorbent and holds its shape, while acrylic or wool blends are better suited for blankets due to their softness and warmth.
Matching your crochet hook size to your yarn is essential for maintaining the correct gauge in your crochet square – Pattern. If your hook is too small, the square will be stiff and dense; if it is too large, the stitches will be loose and floppy, which might cause the crochet square – Pattern to lose its geometric integrity.
Don’t forget to keep a pair of sharp embroidery scissors and a yarn needle (tapestry needle) nearby. A crochet square – Pattern often involves frequent color changes, meaning you will have multiple yarn tails to weave in; doing this securely and neatly is the secret to a professional-looking handmade project.
Using stitch markers can be incredibly helpful when working on a complex crochet square – Pattern, especially at the corners. Placing a marker in the corner chain space ensures you never miss an increase, which is vital for keeping the crochet square – Pattern perfectly square rather than accidentally turning it into a circle.
Finally, consider the role of color palettes in your design. A crochet square – Pattern can look completely different depending on whether you use high-contrast colors, monochromatic shades, or variegated yarn. Planning your colors in advance will help you visualize how the individual crochet square – Pattern units will look when joined.
The most popular way to start a crochet square – Pattern is with a magic ring (also known as a magic circle). This technique allows you to pull the center hole tight, creating a seamless and professional look that is much cleaner than the traditional method of chaining and joining in a loop.
As you progress through the rounds of a crochet square – Pattern, the “corners” are where the magic happens. A standard corner usually consists of a group of stitches, a chain space, and another group of stitches all worked into the same space, which forces the work to turn at a 90-degree angle.
Understanding stitch height is crucial for the geometry of a crochet square – Pattern. Most patterns utilize the double crochet stitch because it provides a good balance of height and drape, allowing the crochet square – Pattern to grow quickly while remaining flexible enough for garments and blankets.
Maintaining a consistent stitch count is the most important rule in any crochet square – Pattern. If you accidentally add or subtract a stitch on one of the four sides, the square will become lopsided. Counting your stitches at the end of every round is a best practice for crocheters of all levels.
When you transition between rounds in a crochet square – Pattern, the “slip stitch join” is the most common technique used to close the circle. For a more invisible look, some crafters prefer the standing stitch method, which eliminates the need for a starting chain and makes the beginning of the round look like every other stitch.
If your crochet square – Pattern begins to look like a bowl (curling upwards), it usually means your tension is too tight or you aren’t adding enough stitches at the corners. Conversely, if it looks wavy, you may be adding too many stitches. Adjusting your hook size or tension can fix these common crochet square – Pattern issues.
Once you are comfortable with the basics, you can explore the solid crochet square – Pattern. Unlike the traditional granny square with its “clusters” and gaps, a solid square uses a continuous row of stitches, resulting in a dense, warm fabric that is perfect for winter afghans and heavy cushions.
The textured crochet square – Pattern often incorporates post stitches (Front Post or Back Post stitches). These techniques create raised ridges and 3D effects on the surface of the square, adding a layer of sophisticated detail that makes your crochet square – Pattern look like a piece of modern art.
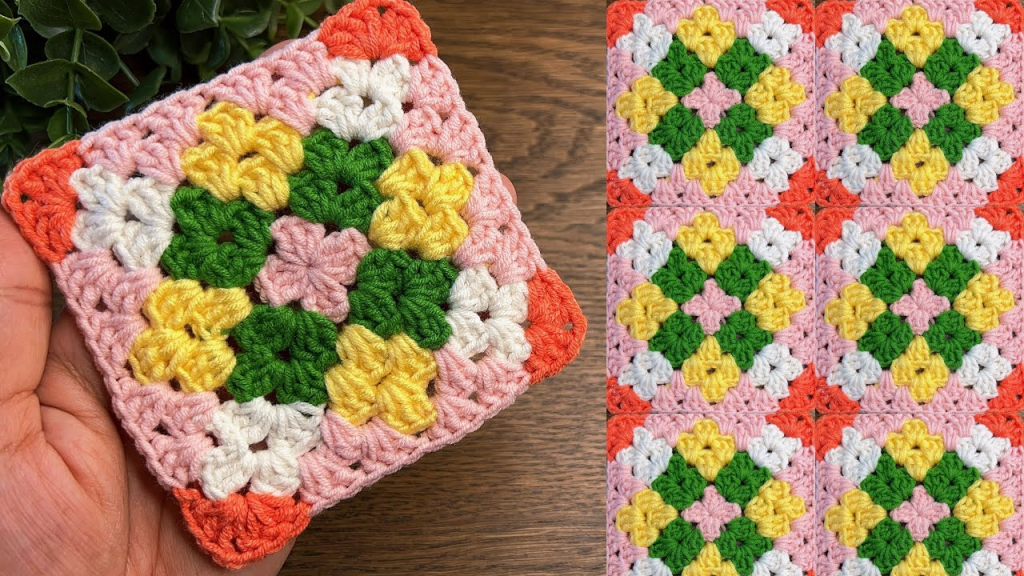
Another popular variation is the floral crochet square – Pattern. This involves starting with a 3D flower in the center (like a rose or a daisy) and then “squaring it off” by using taller stitches in the corners and shorter stitches in the middle of the sides to create a flat, square frame.
For those who love colorwork, the tapestry crochet square – Pattern allows you to “carry” multiple colors of yarn and switch between them to create intricate pictures or geometric symbols. This technique turns your crochet square – Pattern into a pixel-art masterpiece, perfect for themed blankets.
The corner-to-corner (C2C) method is a unique way to create a crochet square – Pattern. Instead of working in rounds from the center out, you work in diagonal rows, increasing until you reach the desired width and then decreasing back down, creating a beautiful textured “tile” effect.
Finally, the Victorian Lattice or Lacy crochet square – Pattern uses chains and picots to create an airy, delicate fabric. These squares are often used for summer wraps or elegant tablecloths, proving that the crochet square – Pattern can be just as refined and delicate as it is cozy and chunky.
The method you choose for joining crochet squares will significantly impact the final look of your project. The whip stitch is a simple, sewn join that is nearly invisible, while the slip stitch join creates a decorative, raised ridge that adds extra texture to the seams of your work.
For a more seamless finish, many quilter-crocheters prefer the Join-As-You-Go (JAYG) method. This involves joining the current crochet square – Pattern to the previous one during the final round of stitching, which eliminates the need for sewing at the end and ensures your blanket grows as you work.
Blocking is an essential final step for any crochet square – Pattern. By wetting your finished squares and pinning them to a blocking board at the exact same dimensions, you ensure that every square is uniform in size, making the joining process much easier and the final result more professional.
Adding a border to your joined squares is the perfect way to frame your project. A simple single crochet border can clean up the edges, while a more elaborate “scalloped” or “crab stitch” border can give your crochet square – Pattern project a sophisticated and complete appearance.
Don’t overlook the importance of weaving in ends properly. In a project made of many crochet square – Pattern units, there can be hundreds of tails. Weaving them in a zig-zag pattern with a yarn needle ensures they won’t pop out after washing, preserving the longevity of your handmade heirloom.
Finally, always consider the care instructions for the yarn you used. If your crochet square – Pattern is made of wool, it may require hand-washing, whereas acrylic squares can usually handle a gentle machine cycle. Proper care ensures that the hard work you put into your crochet square – Pattern lasts for decades to come.
How much yarn do I need for a single crochet square – Pattern?
The amount of yarn depends on the size of the square and the yarn weight. On average, a standard 4-inch (10cm) square in worsted weight yarn uses approximately 20 to 30 yards (18-27 meters). Always buy an extra skein to account for the yarn used in joining and borders.
Why is my crochet square – Pattern not perfectly square?
This usually happens due to inconsistent tension or a mistake in the corner increases. If you miss a chain or a stitch in one corner, the square will pull in that direction. Using stitch markers and counting your stitches for each side will help you maintain perfect symmetry.
Can I mix different brands of yarn in one project?
Yes, but only if they have the same yarn weight and fiber type. Even if two brands both say “worsted weight,” one might be slightly thicker than the other, which will result in different-sized squares. It is always best to stick to the same brand for a single crochet square – Pattern project.
What is the easiest way to join multiple squares?
The whip stitch is widely considered the easiest method for beginners because it uses a simple sewing motion with a yarn needle. However, the slip stitch join is also very popular because it allows you to stay with your crochet hook throughout the entire assembly process.
How do I make my crochet square – Pattern bigger?
To increase the size, simply continue adding rounds! A crochet square – Pattern is infinitely expandable; you just need to keep following the same increase pattern at the corners (usually two clusters separated by chains) while working one stitch into every stitch along the sides.
What can I make with a crochet square – Pattern besides blankets?
The possibilities are endless! You can join them to make tote bags, cardigans, pillow covers, wall hangings, coasters, or even summer tops. The modular nature of the crochet square – Pattern makes it the most versatile element in all of crochet.
In conclusion, we have explored the vast and creative world of the crochet square – Pattern, from the selection of high-quality yarns and hooks to the mastery of corners and advanced textures. We learned that while the basic structure is simple, the variations—ranging from solid blocks to intricate floral designs—offer a lifetime of artistic exploration.
By focusing on stitch consistency, utilizing techniques like blocking, and choosing the right joining method, you can transform individual squares into stunning, durable works of art. The crochet square – Pattern is truly the foundation of the craft, bridging the gap between simple stitches and complex, beautiful garments and home decor.


