
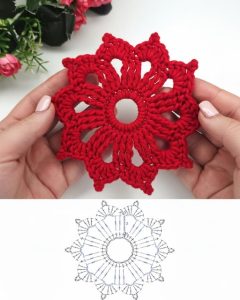
Crochet Flower - Tutorial

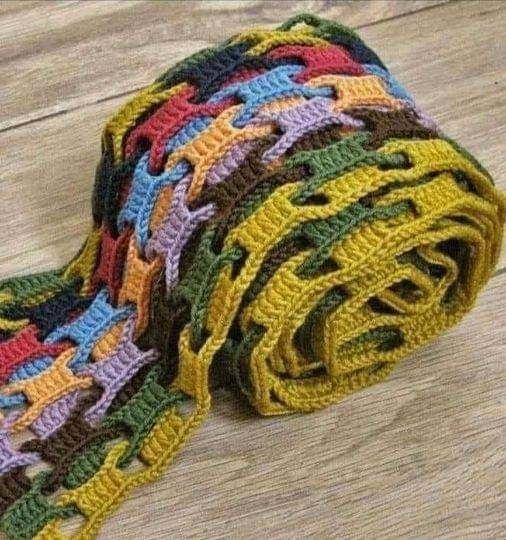
The The Point Wave Crochet Stitch- Pattern is one of the most visually captivating techniques in the world of fiber arts, offering a rhythmic, undulating texture that mimics the gentle ebb and flow of ocean waves. This specific Point Wave Crochet Stitch- Pattern is highly prized by crafters for its ability to transform simple yarn into a sophisticated fabric with a distinct architectural feel. Whether you are looking to create a statement home decor piece or a cozy wearable, mastering this unique crochet design will elevate your portfolio and provide you with a versatile tool for various projects.
Learning the Point Wave Crochet Stitch- Pattern requires a bit of patience and an eye for detail, as the stitch relies on a specific sequence of increases and decreases to achieve its “pointed” peaks and rounded valleys. Unlike standard flat stitches, this decorative crochet technique adds depth and dimension, making it perfect for those who enjoy textured crochet patterns. By alternating heights of stitches—ranging from single crochets to treble crochets—the Point Wave Crochet Stitch- Pattern creates a dynamic zig-zag effect that looks stunning in both solid colors and variegated yarns.
As you embark on this creative journey with the Point Wave Crochet Stitch- Pattern, it is essential to focus on tension control and stitch counting, as these are the pillars of a successful wave design. This article will guide you through the intricacies of the Point Wave Crochet Stitch- Pattern, exploring the best materials to use, step-by-step logic for the rows, and tips for professional finishing. By the end of this guide, you will not only understand how to execute the Point Wave Crochet Stitch- Pattern but also how to adapt it for different yarn weights and hook sizes to suit your specific vision.
The Point Wave Crochet Stitch- Pattern is fundamentally a variation of the classic ripple or chevron stitch, but it incorporates a sharper “point” at the apex of each wave. To start this intricate crochet project, you must first understand the concept of multiples in crochet, as the wave repeats depend on a specific number of foundation chains. Usually, this pattern works in multiples of 10 or 12, plus a few extra chains for the turning row, ensuring that each “point” aligns perfectly across the width of your fabric.
Choosing the right crochet hook size is the next critical step in mastering the Point Wave Crochet Stitch- Pattern. If your hook is too small, the fabric will become stiff and lose the fluid motion that makes the wave effect so appealing; conversely, a hook that is too large can make the points look messy and undefined. For a standard medium-weight yarn, a 5mm (H-8) hook is often recommended to maintain the perfect balance between structure and drape within the Point Wave Crochet Stitch- Pattern.
The “point” in the Point Wave Crochet Stitch- Pattern is created by grouping several stitches into a single chain or space at the peak, while the “valley” is formed by skipping stitches or using crochet decreases. This mathematical precision is what gives the Point Wave Crochet Stitch- Pattern its iconic look. Beginners should practice these increases and decreases on a small swatch before committing to a larger crochet blanket or garment to ensure their rhythm is consistent.
When selecting yarn for your Point Wave Crochet Stitch- Pattern, consider the fiber content carefully. Cotton yarn provides excellent stitch definition, which makes the “points” stand out sharply, whereas acrylic or wool blends offer more warmth and softness. If you want to highlight the geometric crochet style, using high-contrast colors for each row can make the Point Wave Crochet Stitch- Pattern pop, creating a bold visual statement that is hard to ignore.
One of the most common mistakes when working the Point Wave Crochet Stitch- Pattern is losing track of the middle stitch in the peak. To prevent this, many experienced crafters use stitch markers to identify the exact center of each wave, ensuring that the next row’s increases are placed accurately. This simple habit keeps the Point Wave Crochet Stitch- Pattern symmetrical and prevents the edges of your work from slanting or becoming uneven over time.
Finally, remember that the Point Wave Crochet Stitch- Pattern is a “hungry” stitch, meaning it consumes more yarn than a basic double crochet row. When planning your crochet supply list, it is wise to purchase an extra skein of yarn to avoid running out mid-project. This ensures that your Point Wave Crochet Stitch- Pattern remains consistent in dye lot and texture, resulting in a professional-grade finished piece that you can be proud to display or gift.
To begin the actual construction of the Point Wave Crochet Stitch- Pattern, you will start with a foundation chain that matches the required width of your project. The first row usually acts as a base, consisting of simple single crochet or double crochet stitches to stabilize the edge. Once the base is set, the second row introduces the wave logic, where you begin to vary the height of your stitches to create the rising and falling motion characteristic of the Point Wave Crochet Stitch- Pattern.
The transition from a valley to a peak in the Point Wave Crochet Stitch- Pattern is achieved by gradually increasing the stitch height. For example, you might move from a slip stitch to a half-double crochet, then a double crochet, and finally a treble crochet at the highest point. This graduation is the secret behind the “wave” in the Point Wave Crochet Stitch- Pattern, providing a smooth incline that is pleasing to the eye and satisfying to stitch.
At the very top of the wave, the Point Wave Crochet Stitch- Pattern requires a cluster of stitches—often three stitches worked into the same loop. This creates the “point” and allows the fabric to turn back downward toward the next valley. This specific crochet increase technique is what differentiates this pattern from more rounded ripples, giving the Point Wave Crochet Stitch- Pattern its modern and edgy aesthetic that works so well in contemporary home decor.
As you work your way down into the valley of the Point Wave Crochet Stitch- Pattern, you will do the opposite of the peak: you will decrease the height of the stitches or skip a specific number of chains. This “dip” provides the necessary contrast to the points, allowing the textural rhythm of the Point Wave Crochet Stitch- Pattern to establish itself. Maintaining a loose but firm grip on your yarn during these transitions is key to avoiding “holes” in the fabric where the stitches change height.
Row three of the Point Wave Crochet Stitch- Pattern often involves “stacking” the same stitches on top of the previous row or alternating colors to accentuate the waves. If you choose to change colors every two rows, the Point Wave Crochet Stitch- Pattern creates a beautiful striped effect that resembles a stormy sea or a mountain range. This colorwork in crochet is one of the most popular ways to utilize this pattern, as it highlights the complex geometry of the stitches.
Consistency is the soul of the Point Wave Crochet Stitch- Pattern. As you reach the end of each row, pay close attention to the turning chain, which must be the correct height to match the first stitch of the new row. If your turning chain is too short, the edges of your Point Wave Crochet Stitch- Pattern project will pull inward; if it’s too long, you’ll have unsightly loops. Mastery of these small details ensures that your handmade crochet item looks store-bought in its perfection.
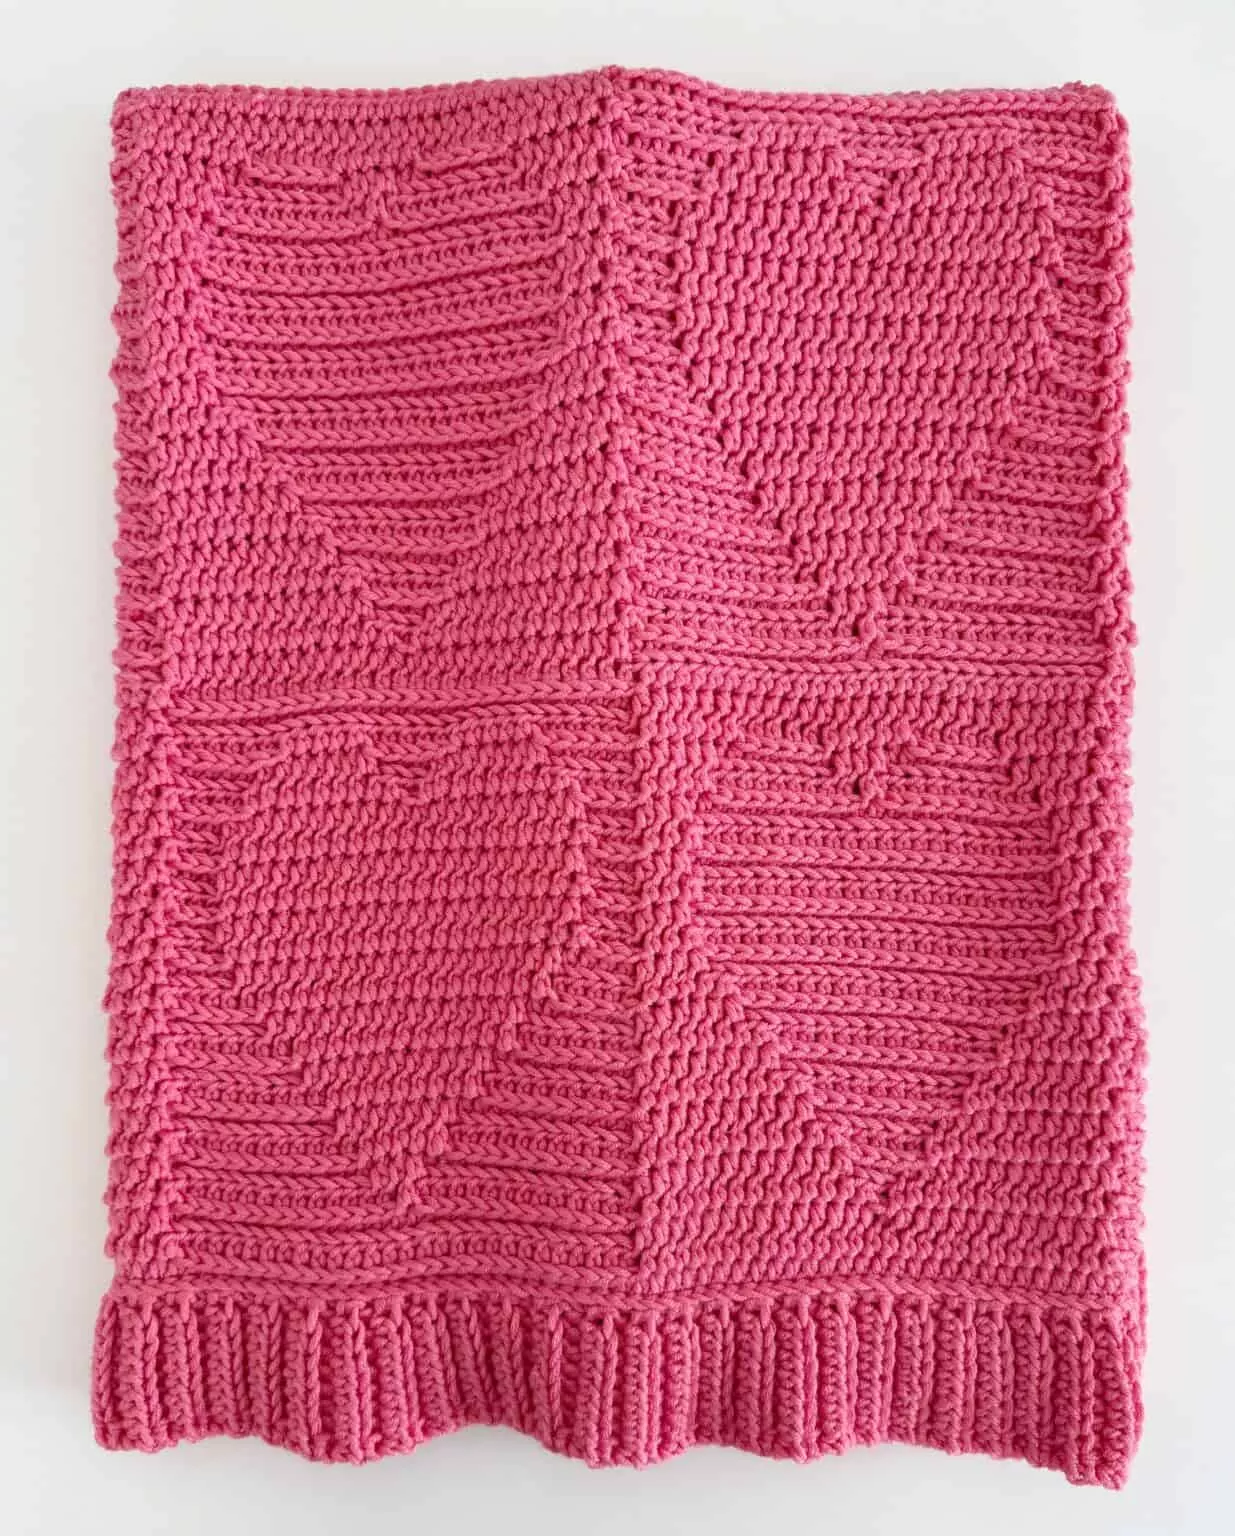
Once you are comfortable with the basic mechanics of the Point Wave Crochet Stitch- Pattern, you can begin to experiment with texture variations. For instance, working only in the back loops only (BLO) of the previous row adds a ribbed effect to the waves. This small adjustment gives the Point Wave Crochet Stitch- Pattern an even more three-dimensional appearance, making the points cast subtle shadows across the surface of the fabric.
Another way to enhance the Point Wave Crochet Stitch- Pattern is through the use of gradient yarns or “cakes.” These yarns transition slowly from one color to another, allowing the waves to shift shades naturally without the need for constant yarn cutting and weaving in ends. The long color changes in gradient yarn complement the wide stretches of the Point Wave Crochet Stitch- Pattern, resulting in a sophisticated, professional look with minimal effort.
Blocking is a crucial step for any project using the Point Wave Crochet Stitch- Pattern. Because of the varying stitch heights, the fabric may naturally curl or appear slightly distorted when first finished. Wet blocking or steam blocking your work will “set” the stitches, allowing the points to sharpen and the waves to settle into their final shape. This finishing touch is what separates an amateur crochet project from a high-quality heirloom piece.
For those looking to create garments like shawls or cardigans, the Point Wave Crochet Stitch- Pattern offers excellent drape. However, you must be careful with yarn weight; a bulky yarn might make the waves too heavy for a delicate shawl. Instead, try a fingering weight or lace weight yarn with a slightly larger hook to create an airy, ethereal version of the Point Wave Crochet Stitch- Pattern that flows beautifully when worn.
Incorporating beads into crochet is another advanced technique that pairs wonderfully with the Point Wave Crochet Stitch- Pattern. By placing a small glass bead at the “point” of each wave, you add weight and a touch of sparkle to your work. This is particularly effective for evening wraps or holiday-themed blankets, where the Point Wave Crochet Stitch- Pattern serves as a luxurious backdrop for the shimmering accents.
Lastly, always keep a crochet journal when working on a large Point Wave Crochet Stitch- Pattern project. Note down the hook size, the exact brand of yarn, and the number of chains you used. Because this pattern is so specific, having these notes will be invaluable if you decide to take a break and return to the project weeks later, or if you want to replicate the Point Wave Crochet Stitch- Pattern for a future gift.
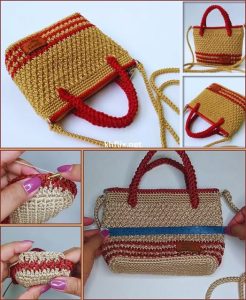
The versatility of the Point Wave Crochet Stitch- Pattern means it can be used for much more than just blankets. One creative application is in crochet fashion accessories, such as wide belts or headbands. Because the stitch is inherently sturdy due to the dense “points,” it holds its shape well, making the Point Wave Crochet Stitch- Pattern an ideal choice for items that need to withstand a bit of wear and tear while remaining stylish.
In the realm of home decor, the Point Wave Crochet Stitch- Pattern makes for stunning throw pillows. By creating two squares of the pattern and joining them together, you produce a high-texture cushion that adds a “designer” feel to any living room. The rhythmic nature of the Point Wave Crochet Stitch- Pattern is also quite meditative to work on, making these smaller projects perfect for relaxing evening crafting sessions.
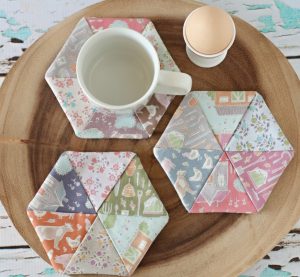
If you are a fan of functional crochet, consider using the Point Wave Crochet Stitch- Pattern for kitchen accessories like potholders or dish towels. When worked in 100% cotton, the ridges created by the “points” provide extra scrubbing power and heat resistance. The Point Wave Crochet Stitch- Pattern turns a mundane household item into a piece of art, proving that utility and beauty can go hand-in-hand in the world of modern crochet.
Baby blankets are perhaps the most popular use for the Point Wave Crochet Stitch- Pattern. The soft undulations are soothing to look at, and the variety of textures provides a tactile experience for developing infants. By using a washable baby yarn, you can ensure that the Point Wave Crochet Stitch- Pattern remains practical for parents while still offering a unique, handmade charm that stands out from mass-produced nursery items.
For the more adventurous crafter, the Point Wave Crochet Stitch- Pattern can be worked in a circle to create mandala-style rugs or wall hangings. This requires advanced knowledge of crochet math to ensure the waves expand correctly without buckling, but the result is a breathtaking radial version of the Point Wave Crochet Stitch- Pattern that serves as a focal point in any room. It’s a true testament to the flexibility of this classic stitch pattern.
Finally, don’t be afraid to mix the Point Wave Crochet Stitch- Pattern with other stitches. You could alternate five rows of waves with five rows of simple moss stitch or waffle stitch to create a “sampler” style blanket. This contrast highlights the elegance of the Point Wave Crochet Stitch- Pattern even further, allowing its unique peaks and valleys to shine against a simpler background, showcasing your skill as a versatile crochet artist.
Is the Point Wave Crochet Stitch- Pattern beginner-friendly?
While it is slightly more complex than a basic stripe, a motivated beginner who knows how to increase and decrease can certainly master the Point Wave Crochet Stitch- Pattern. It is recommended to start with a small swatch to get the hang of the stitch heights before starting a full project.
What is the best yarn for the Point Wave Crochet Stitch- Pattern?
A worsted weight cotton or acrylic yarn is usually best for this pattern because it offers the stitch definition needed to see the “points.” Avoid very “fuzzy” or “eyelash” yarns, as they will hide the beautiful geometry of the Point Wave Crochet Stitch- Pattern.
How do I calculate the foundation chain for the Point Wave Crochet Stitch- Pattern?
Most variations of the Point Wave Crochet Stitch- Pattern use a multiple of 10 or 12 stitches. To find your total, multiply the repeat number by how many waves you want, then add the recommended “turning chains” (usually 1-3 depending on the first stitch of the row).
Can I use the Point Wave Crochet Stitch- Pattern for a scarf?
Absolutely! The Point Wave Crochet Stitch- Pattern is excellent for scarves because it creates a decorative edge naturally at the ends of the rows. Just ensure your tension is consistent so the scarf doesn’t “flare” out at one end.
Why are my waves in the Point Wave Crochet Stitch- Pattern looking lopsided?
This usually happens if a stitch is missed in the “valley” or an extra stitch is added at the “peak.” Using stitch markers at the highest and lowest points of your Point Wave Crochet Stitch- Pattern will help you keep everything perfectly aligned.
How many colors should I use for the Point Wave Crochet Stitch- Pattern?
There are no rules, but the Point Wave Crochet Stitch- Pattern looks best with at least two alternating colors to define the rows. Some crafters use a different color for every row to create a “scrapghan” look, which is a great way to use up leftover yarn.
Mastering the Point Wave Crochet Stitch- Pattern is a rewarding milestone for any fiber artist. Throughout this guide, we have explored the foundational logic of the waves, the importance of stitch height variation, and the various ways to customize the Point Wave Crochet Stitch- Pattern using color and texture. We’ve learned that whether you are making a delicate shawl or a sturdy home accessory, the “points” and “valleys” of this pattern offer a timeless appeal that bridges the gap between traditional craft and modern design.
The journey of creating a Point Wave Crochet Stitch- Pattern project is as much about the process as it is about the finished product. The rhythmic nature of the stitches provides a relaxing escape, while the mathematical precision keeps your mind engaged. As you continue to practice, you’ll find that the Point Wave Crochet Stitch- Pattern becomes second nature, allowing you to experiment with different fibers and scales to create truly one-of-a-kind pieces.


