
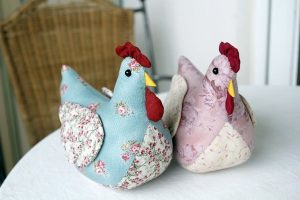
Patchwork Bird Tutorial

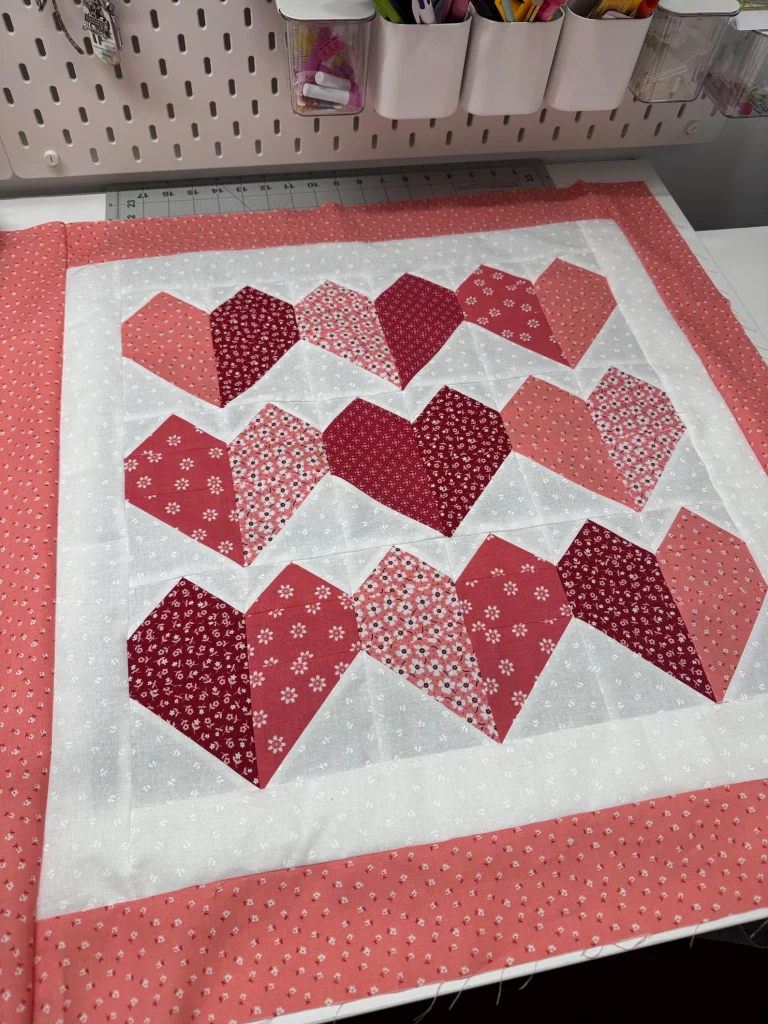
The Heart-shaped quilting block – Pattern is a timeless symbol of affection and warmth within the textile arts, offering a versatile design that resonates with both novice stitchers and master quilters alike. This iconic motif serves as the perfect foundation for a variety of projects, ranging from Valentine’s Day wall hangings to commemorative wedding quilts that celebrate lifelong unions. By mastering this specific design, you unlock the ability to express complex emotions through fabric, utilizing geometric precision to create a soft, curved aesthetic that brings a sense of comfort and personalized charm to any handmade creation.
Exploring the Heart-shaped quilting block – Pattern allows you to delve into the foundational techniques of patchwork, such as the “stitch and flip” method, which simplifies the process of creating diagonal lines without the need for complex templates. Whether you are using a vibrant red palette to signify passion or soft, muted pastels for a nursery project, this block acts as a creative canvas for your imagination. The beauty of this design lies in its scalability; you can create tiny heart “charms” for a table runner or oversized heart centers for a bold, modern bedspread, ensuring that your quilting repertoire remains fresh and inspired.
In this comprehensive guide to the Heart-shaped quilting block – Pattern, we will walk you through the essential materials, the technical construction phases, and the artistic choices that elevate a simple block into a gallery-worthy masterpiece. We will discuss the importance of seam allowance accuracy and how to choose fabrics that enhance the visual depth of the heart shape. This project is a celebration of “heart-led” crafting, providing you with the structural knowledge and creative confidence to build a handcrafted heirloom that will be cherished for generations as a testament to your skill and your love for the craft.
The first step in bringing your Heart-shaped quilting block – Pattern to life is selecting a high-quality quilter’s weight cotton that offers a stable weave and minimal fraying. Because the heart design relies on several intersecting diagonal seams, choosing a fabric with a bit of “body” ensures that your points remain sharp and your block stays square. For the heart itself, consider using a mix of tonal prints or solids that provide a rich, saturated look, while your background fabric should offer enough contrast to make the silhouette of the heart clearly visible from a distance.
When choosing a background for the Heart-shaped quilting block – Pattern, many modern quilters opt for “low-volume” prints—fabrics that are mostly white or cream with very subtle, tiny designs. This adds a layer of sophisticated texture to the quilt without distracting from the central heart motif. If you want a more dramatic effect, using a dark background like navy or charcoal can make a bright red heart appear to glow, creating a striking visual focal point that is perfect for contemporary home decor or artistic wall displays.
Your tool kit for the Heart-shaped quilting block – Pattern should include a sharp rotary cutter and a non-slip acrylic ruler, as precision is the key to successful patchwork. Even a minor cutting error can lead to a lopsided heart or a block that won’t lay flat. A quarter-inch sewing machine foot is also a vital asset, helping you maintain the consistent seam allowance necessary for all the pieces to align perfectly at the intersections. Investing in high-quality thread, such as a 50wt cotton, will ensure your seams are strong yet thin enough to prevent bulky buildup.
Color theory plays a significant role in how your Heart-shaped quilting block – Pattern interacts with the viewer’s eye. Using “warm” colors like reds, oranges, and pinks for the heart creates an inviting, energetic vibration. Conversely, a “cool” heart in shades of blue or lavender can signify peace and tranquility. If you are making a “scrappy” version, try to keep the color values consistent so that the heart shape remains recognizable amidst the variety of patterns and prints you choose to include in your design.
For those who want to add a touch of luxury to their Heart-shaped quilting block – Pattern, experimenting with different fabric textures like silk or velvet can yield stunning results. However, keep in mind that these fabrics require more careful handling and may need to be “stabilized” with a lightweight interfacing before cutting. Adding a subtle metallic thread for the top-stitching can also provide a “shimmer” effect, making your hand-stitched heart look like a precious jewel set within the fabric of your quilt.
Lastly, don’t overlook the importance of a high-quality iron and pressing mat. In the world of the Heart-shaped quilting block – Pattern, pressing is just as important as sewing. You will need to press your seams “away” from the light fabrics to prevent the seam allowance from showing through the front. A crisp, well-pressed block is much easier to assemble into a full quilt top, ensuring that your geometric heart motifs are uniform and professional in appearance, reflecting the care and attention you put into every step.
The most efficient way to construct a Heart-shaped quilting block – Pattern is the “stitch-and-flip” method, which eliminates the need to cut and sew tricky triangles. To create the rounded top of the heart, you place small squares of background fabric onto the corners of your larger heart rectangles. By sewing diagonally from corner to corner and then trimming the excess, you create a perfect “snowballed” corner. This technique is the secret to getting razor-sharp points and smooth angles without the stress of traditional template-based piecing.
Accuracy in the “stitch-and-flip” phase of the Heart-shaped quilting block – Pattern is paramount. Many quilters find it helpful to draw the diagonal line on the back of the small squares using a water-soluble fabric pen. This acts as a “flight path” for your needle, ensuring that you don’t veer off course. If you are making dozens of hearts, you can also use “diagonal seam tape” on your sewing machine’s bed to guide your fabric without the need for manual marking, which significantly speeds up the production of your blocks.
Once you have sewn the diagonal lines for your Heart-shaped quilting block – Pattern, the “pressing” stage begins. You should “set” your seam by pressing with the iron before flipping the fabric over and pressing it again. This helps the thread sink into the fibers and results in a much flatter block. If you are finding that your corners don’t quite reach the edge after flipping, try sewing just a “hair” to the outside of your marked line; this accounts for the space the fabric takes up when it is folded back over the seam line.
The bottom point of the Heart-shaped quilting block – Pattern is typically created by joining two larger mirrored units or by using the same stitch-and-flip method on a larger scale. This point is the “anchor” of the design and needs to be perfectly centered. If the bottom point is off-center, the entire heart will look tilted. Using fine glass-head pins to hold your intersections in place before sewing can help you achieve that perfect “V” shape at the bottom of the heart, ensuring a symmetrical and pleasing aesthetic.
Trimming is the final step in the construction of each unit within the Heart-shaped quilting block – Pattern. After flipping and pressing your corners, you must trim away the two layers of “waste” fabric behind the flip, leaving a quarter-inch seam allowance. Using a specialized trimming ruler can help you keep these allowances consistent. This step is essential for reducing bulk, as a quilt with too many layers of fabric at the intersections will be difficult to quilt later on, especially if you are using a domestic sewing machine.
Consistency in your “scant quarter-inch” seam is the thread that holds the Heart-shaped quilting block – Pattern together. A “scant” seam is just a thread-width narrower than a true quarter-inch, which allows for the fold of the fabric. Without this small adjustment, your finished block may end up slightly smaller than intended. By mastering this technical nuance, you ensure that every patchwork heart you create will fit perfectly with its neighbors, making the final assembly of your quilt top a smooth and enjoyable experience.
One of the most exciting aspects of the Heart-shaped quilting block – Pattern is the “secondary pattern” that emerges when you join multiple blocks together. For example, if you place four heart blocks so that their bottom points meet in the center, you create a “clover” or “floral” design. This versatility allows you to hide “secret hearts” within a larger geometric arrangement, adding a layer of artistic storytelling to your work that invites the viewer to look closer and discover the hidden motifs within the quilt.
For a more traditional look, you can arrange your Heart-shaped quilting block – Pattern in a “straight set” with sashing. Sashing refers to the strips of fabric that act as frames around each block. Using a contrasting sashing color can make the hearts appear to be “floating” in windows, providing a clean and organized appearance. Adding “cornerstones”—small squares where the sashing strips intersect—can further enhance the architectural structure of the quilt, allowing you to incorporate secondary colors that complement the heart motifs.
“On-point” layouts offer a more dynamic and modern take on the Heart-shaped quilting block – Pattern. By rotating the blocks 45 degrees so they sit like diamonds, you change the energy of the quilt from static to kinetic. This layout requires the use of “setting triangles” to fill the edges of the quilt top, but the result is a sophisticated, high-end look that is often seen in award-winning show quilts. It’s a great way to make a simple heart design look incredibly complex and professionally designed.
You can also experiment with “gradient” or “ombre” layouts using the Heart-shaped quilting block – Pattern. Arrange your blocks so that the heart colors transition from deep red at the bottom to a very pale pink at the top. This creates a “fading” effect that mimics a sunset or a heartbeat, adding a poetic and emotional dimension to the piece. This use of color gradients is very popular in modern quilting and allows you to use a wide variety of fabrics while maintaining a cohesive and intentional visual flow.
For a “scrappy” and eclectic vibe, try making every heart in your Heart-shaped quilting block – Pattern from a different fabric, but keep the background the same. This “controlled chaos” is a hallmark of the American quilting tradition, allowing you to use up small bits of favorite fabrics from previous projects. Each heart becomes a tiny memory, turning the finished quilt into a “memory jar” of your sewing history. This approach is perfect for “friendship quilts” where each person contributes a single, unique heart block to the collective project.
Finally, consider adding “appliqué” elements to your Heart-shaped quilting block – Pattern. You can sew smaller hearts onto the background of the larger pieced heart or add embroidered initials in the center of the block. These personalized embellishments make the quilt even more special, transforming a standard pattern into a one-of-a-kind gift. Whether you are adding a date, a name, or a secret message, these details ensure that your quilt is not just a blanket, but a meaningful piece of art that speaks from the heart.
Once your Heart-shaped quilting block – Pattern top is fully assembled, the “quilting” process—the stitching that holds the three layers together—begins. For a heart-themed project, “echo quilting” is a beautiful and symbolic choice. By stitching lines that follow the shape of the heart at increasing intervals, you create a “ripple” effect that makes the heart look as if it is radiating love outward. This technique adds incredible textural depth and emphasizes the central motif without overwhelming the design.
If you prefer a more modern finish for your Heart-shaped quilting block – Pattern, “straight-line quilting” or “matchstick quilting” can provide a sleek, contemporary feel. Using a walking foot on your machine, you can stitch vertical or horizontal lines across the entire quilt, ignoring the shapes of the blocks. This adds a “grid” texture that contrasts beautifully with the curves of the heart, resulting in a sophisticated home accessory that looks at home in a minimalist or urban interior design setting.
“Free-motion quilting” (FMQ) allows for even more creative expression with the Heart-shaped quilting block – Pattern. You can quilt swirling “wind” patterns, delicate “stipple” designs, or even small “micro-hearts” in the background areas. This juxtaposition of the structured, pieced hearts and the organic, flowing quilted lines creates a professional visual balance. FMQ is also a great way to “disguise” any minor piecing imperfections, as the dense texture of the stitches becomes the primary visual focus.
The “batting” you choose for your Heart-shaped quilting block – Pattern will affect the final look and feel of the quilt. A “low-loft” cotton batting will result in a flatter, more traditional quilt that is easy to fold and store. A “high-loft” polyester or wool batting will make your quilting stitches “pop” more prominently, giving the heart motifs a 3-dimensional, “puffy” quality. Consider the final use of the quilt—whether it’s for a bed or a wall hanging—when selecting your batting and finishing materials.
Binding is the final “frame” of your Heart-shaped quilting block – Pattern. A “bias binding” in a contrasting color or a classic stripe can add a final spark of energy to the edges. Ensure your binding is sewn on securely with neatly mitred corners for a crisp, professional look. This final step protects the edges of your handcrafted textile from wear and tear, ensuring that the love and labor you poured into the project are preserved for many years of use and enjoyment.
Ultimately, the Heart-shaped quilting block – Pattern is a testament to the maker’s spirit. Every stitch is a choice, and every block is a reflection of the person who created it. By following these professional tips and techniques, you are not just making a quilt; you are building a legacy of comfort and beauty. We hope this guide inspires you to start your own “heart-led” journey, filling your home and the lives of your loved ones with the timeless charm of handmade quilts.
1. Is the Heart-shaped quilting block – Pattern difficult for absolute beginners?
Not at all! This is one of the best “beginner-plus” blocks. Because it uses the “stitch-and-flip” method, you don’t have to worry about sewing on a bias edge, which is the most common challenge for new quilters. It’s a great way to build confidence with diagonal seams.
2. How do I make sure the “V” in my heart is perfectly sharp?
The secret is in the pinning. When you join the two halves of the Heart-shaped quilting block – Pattern, use a pin to find the exact intersection of your seams. If you sew exactly through that “cross,” your point will be perfectly aligned. Practice on a scrap piece first to get the feel of it!
3. What is the best size for a heart block?
The Heart-shaped quilting block – Pattern is very versatile. A 10-inch or 12-inch block is standard for bed quilts. However, 6-inch hearts are very popular for table runners or “baby quilts.” The smaller the block, the more “fiddly” the sewing becomes, so start larger if you are new to the craft.
4. Can I use “Charm Packs” for this pattern?
Yes! Charm Packs (pre-cut 5-inch squares) are perfect for making 4.5-inch heart blocks. Using pre-cuts saves time on cutting and ensures your colors are already coordinated, making this a fantastic “weekend project” for busy crafters who want a fast and beautiful result.
5. How do I care for my finished heart quilt?
To protect your handmade heirloom, wash it on a gentle cycle with “color catcher” sheets to prevent reds from bleeding into the white background. Dry it on a low heat setting or lay it flat to dry. Avoid direct sunlight for long periods, as it can fade the vibrant fabrics used in your heart blocks.
In this article, we have explored the sentimental and technical journey of creating a Heart-shaped quilting block – Pattern, from the initial selection of high-quality cotton fabrics to the precision of the “stitch-and-flip” construction method.
We discussed the importance of value contrast, the versatility of layouts like “on-point” and “sashing,” and the professional finishing techniques that ensure your quilt is both beautiful and durable. This pattern is a true “labor of love,” offering a meaningful way to celebrate life’s most precious moments through the tactile and timeless art of quilting.


