
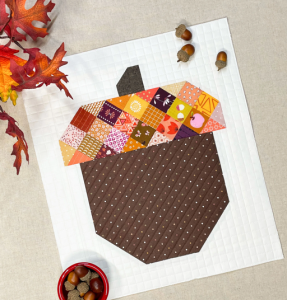
Patchwork Bird Tutorial

Creating a Patchwork Coaster – Pattern is one of the most delightful and satisfying ways to dive into the world of quilting without the overwhelming commitment of a full-sized blanket. These small yet functional pieces of art serve as the perfect canvas for practicing new techniques, testing color combinations, and adding a personalized touch to your living space. If you have been looking for a project that is quick to finish but offers high visual impact, mastering a Patchwork Coaster – Pattern is the ideal starting point for your creative journey.
The true charm of a Patchwork Coaster – Pattern lies in its ability to transform tiny fabric scraps into something both beautiful and useful. In an era where sustainability and “slow fashion” are becoming increasingly important, this project allows crafters to practice zero-waste sewing by utilizing every inch of their precious fabric stash. Whether you are a seasoned quilter looking for a weekend “palate cleanser” or a complete novice eager to learn the basics of machine sewing, the structured steps of a Patchwork Coaster – Pattern provide a clear and rewarding path to success.
Beyond their practicality, these handmade items make incredible gifts for housewarmings, weddings, or holiday stocking stuffers. By following a well-designed Patchwork Coaster – Pattern, you can customize the aesthetic to match any home decor, from rustic farmhouse vibes to sleek modern minimalism. Throughout this article, we will explore the essential materials, the technical construction phases, and the creative finishing touches that will elevate your Patchwork Coaster – Pattern from a simple scrap project to a professional-grade home accessory that protects your surfaces with style.
The foundation of a high-quality Patchwork Coaster – Pattern begins with the right choice of fabric. For best results, it is highly recommended to use 100% quilting cotton, as it is easy to handle, presses beautifully, and absorbs moisture well. Since coasters are meant to hold drinks, using natural fibers ensures that the heat from a coffee mug won’t damage the material. Choosing a variety of prints and solids will help the “patchwork” element of your Patchwork Coaster – Pattern really stand out against your tabletop.
In addition to your top fabrics, you will need a sturdy insulating layer to provide the coaster with body and heat resistance. Many quilters prefer using cotton batting or a specialized heat-resistant lining like Insul-Bright. This layer is what gives your Patchwork Coaster – Pattern its “quilted” feel and ensures that condensation from cold drinks or heat from hot ones doesn’t seep through to your delicate wooden furniture. Without a proper internal layer, the coaster would simply be a thin piece of cloth.
Precision cutting is the secret to a professional-looking Patchwork Coaster – Pattern, so investing in a rotary cutter and a self-healing mat is a wise move. Unlike traditional scissors, a rotary cutter allows you to slice through multiple layers of fabric with perfect accuracy. When working on a small scale, even a sixteenth of an inch can make a difference in how your corners align. Accurate cuts ensure that the geometric shapes in your Patchwork Coaster – Pattern look crisp and intentional rather than lopsided.
A specialized quilting ruler is another indispensable tool for this project. Look for a small acrylic ruler with clear grid markings, which will help you cut the tiny squares or triangles required for the Patchwork Coaster – Pattern. Using the ruler to square up your blocks after sewing is a professional technique that prevents the “wavy” edges often seen in beginner projects. Consistency in size across a set of four or six coasters makes the final collection look much more cohesive and high-end.
Don’t forget the importance of high-quality thread and a fresh sewing machine needle. For piecing together the small elements of a Patchwork Coaster – Pattern, a 50-weight cotton thread is ideal because it is thin enough to reduce bulk in the seams but strong enough to withstand daily use. A size 80/12 universal needle will work perfectly for the cotton layers. Using the right thread color—either matching the fabric or a neutral grey—ensures that the focus remains on the beautiful fabric design rather than the construction lines.
Lastly, having a reliable iron and pressing mat nearby is crucial for the success of your Patchwork Coaster – Pattern. In the world of quilting, “sewing” is only half the work; the other half is pressing. Each time you join two pieces of fabric, you must press the seam open or to one side to ensure the quilt top stays flat. A well-pressed Patchwork Coaster – Pattern is much easier to quilt and finish, resulting in a flat surface that won’t allow your glass to wobble or tip over when placed on the coaster.
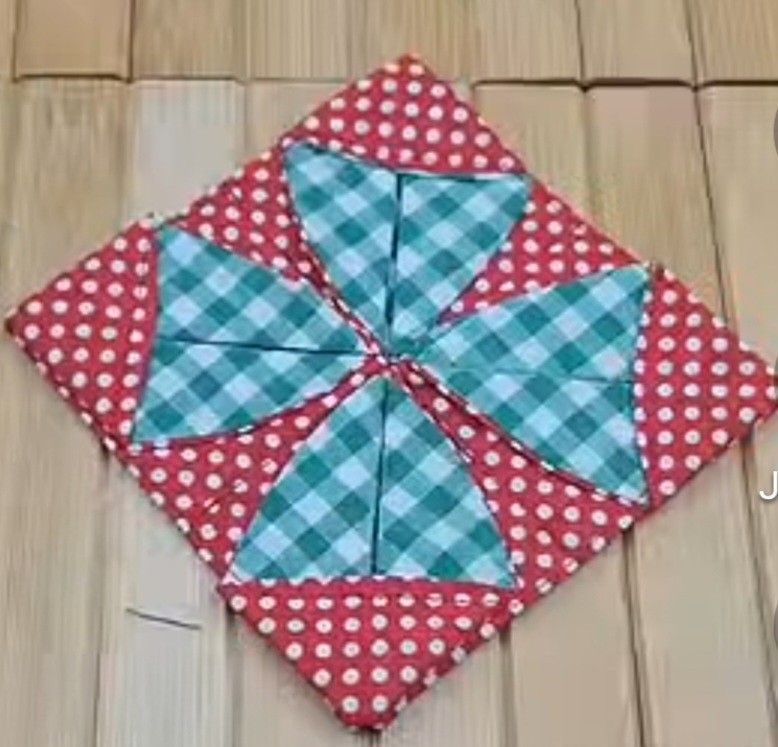
When starting your Patchwork Coaster – Pattern, you must decide on a layout, such as the classic four-patch or the more intricate nine-patch design. These traditional layouts involve sewing small squares together to form a larger square. For a Patchwork Coaster – Pattern, these squares are usually cut to 2.5 inches, resulting in a finished coaster that is roughly 4 to 5 inches wide. This size is standard because it accommodates everything from a delicate tea cup to a large sports bottle.
The “Quarter-Inch Seam” is the most important rule to follow when sewing your Patchwork Coaster – Pattern. Most quilting patterns are designed with this specific seam allowance in mind. If your seams are too wide, your finished coaster will be too small; if they are too narrow, the fabric might fray and pull apart. Many sewing machines have a specific quilting foot that helps you maintain this precise distance, which is vital for the symmetry of your Patchwork Coaster – Pattern.
To add more visual interest, you might consider the Half-Square Triangle (HST) technique within your Patchwork Coaster – Pattern. By sewing two squares together diagonally and cutting them apart, you create two blocks made of triangles. This allows you to create “star” or “zigzag” patterns that look much more complex than they actually are. Mastering HSTs opens up a world of geometric possibilities, allowing you to turn a simple Patchwork Coaster – Pattern into a miniature piece of modern art.
Another popular method for a Patchwork Coaster – Pattern is the Log Cabin style, where you sew strips of fabric around a central square in a spiral fashion. This is an excellent way to use up very thin strips of fabric (often called “strings”) that might otherwise be thrown away. The Log Cabin approach gives your coaster a traditional, cozy feel and is a great way to practice fabric graduation, moving from light colors in the center to dark colors on the outer edges.
For those who enjoy a bit of “improv,” the Crazy Quilt style is a fantastic variation for a Patchwork Coaster – Pattern. Instead of following strict measurements, you sew irregular scraps together at various angles. Once the scraps cover a certain area, you “trim down” the piece to the desired square size. This creates a unique, one-of-a-kind Patchwork Coaster – Pattern every time and is a stress-free way to experiment with different textures like linen, denim, or even silk.
Whichever piecing method you choose, the key to a successful Patchwork Coaster – Pattern is “nesting your seams.” This means pressing the seams of adjacent rows in opposite directions so that they “lock” together when you sew the rows together. This technique reduces bulk at the intersections and ensures that the corners of your patchwork meet perfectly. A Patchwork Coaster – Pattern with perfectly aligned corners is the hallmark of an attentive and skilled maker, elevating the quality of your handmade home goods.
Once your patchwork top is complete, it is time to create the “quilt sandwich” for your Patchwork Coaster – Pattern. This consists of three layers: your beautiful pieced top, the batting/insulator in the middle, and a single piece of backing fabric. For the backing of a Patchwork Coaster – Pattern, you can use a solid cotton or even a piece of felt or cork for extra grip on slippery surfaces. Basting these layers together with a few pins ensures they don’t shift during the quilting process.
The actual “quilting” of your Patchwork Coaster – Pattern is where you sew through all three layers to secure them. For a small project like this, “straight-line quilting” or “matchstick quilting” is very popular. You can use your sewing machine’s walking foot to sew parallel lines across the coaster. This not only adds a beautiful texture to the Patchwork Coaster – Pattern but also ensures that the batting doesn’t bunch up or shift when the coaster is eventually washed.
If you want to be more creative, you can try Free Motion Quilting (FMQ) on your Patchwork Coaster – Pattern. This involves dropping the feed dogs on your sewing machine and “drawing” with the needle. You could quilt small swirls, hearts, or even leaf patterns over the patchwork. Because the area is so small, a Patchwork Coaster – Pattern is the perfect place to practice FMQ without the fear of ruining a large, expensive quilt. It adds a wonderful “hand-drawn” quality to your work.
Another functional quilting choice for a Patchwork Coaster – Pattern is “quilting in the ditch.” This means sewing directly into the seams where the fabrics meet. It makes the quilting lines nearly invisible while still providing the necessary structure to hold the layers together. This is a great option if you want the patchwork design to be the star of the show without the distraction of additional decorative stitching lines crossing over your fabric patterns.
After quilting, you must “square up” your Patchwork Coaster – Pattern. Over the course of sewing and quilting, the fabric can sometimes shift or pull, making the square look a bit wonky. Using your rotary cutter and ruler one last time to trim the edges ensures that your coaster has perfectly straight sides and 90-degree corners. This step is essential before moving on to the binding or finishing stage, as it provides the clean canvas needed for a professional edge.
There are two main ways to finish the edges of a Patchwork Coaster – Pattern: the “birthing method” or “traditional binding.” The birthing method involves sewing the top and bottom right sides together, leaving a small hole, turning it right side out, and top-stitching the edge. Traditional binding involves sewing a separate strip of fabric around the perimeter, just like a large quilt. For a Patchwork Coaster – Pattern, the birthing method is often faster and results in a cleaner, modern look with less bulk.
To ensure your Patchwork Coaster – Pattern lasts for years, proper care is essential. Since they are made of cotton, most coasters can be machine washed on a cold, gentle cycle. However, to keep them looking brand new, air drying is recommended. If they become wrinkled after a wash, a quick press with a hot steam iron will restore their flat shape. Using a bit of fabric protector spray can also help repel liquids and prevent stains from coffee or wine.
Customizing your Patchwork Coaster – Pattern for seasonal holidays is a great way to rotate your home decor. You can make a set of “Spooky” coasters using orange and black fabrics for Halloween, or “Festive” ones with metallic reds and greens for the winter holidays. Because a Patchwork Coaster – Pattern uses so little fabric, it is an affordable way to celebrate every season without breaking the bank or requiring much storage space for decorations.
For a more functional variation, you can increase the scale of your Patchwork Coaster – Pattern to create a “Mug Rug.” A mug rug is slightly larger—usually a rectangle—and provides enough space for both a drink and a small snack like a cookie or a piece of toast. The construction process remains the same as the Patchwork Coaster – Pattern, but the larger size allows for more complex storytelling through fabric, such as a tiny landscape or a more detailed appliqué design.
Adding embroidery to your Patchwork Coaster – Pattern is another way to add a “wow” factor. You can hand-stitch initials, small flowers, or geometric borders over the finished patchwork. This combines the arts of quilting and embroidery, creating a multi-textured piece that feels very high-end. Hand-stitched details are often the difference between a “crafty” item and a “boutique” item, making your Patchwork Coaster – Pattern feel extra special for the recipient.
If you are looking for a more “boho” look, you can finish your Patchwork Coaster – Pattern with a fringe edge. Instead of turning the edges in, you leave the raw edges out and sew a line of stitching half an inch from the edge. After washing, the edges will fray naturally, creating a soft, textured border. This style works particularly well with denim or linen fabrics and gives the Patchwork Coaster – Pattern a relaxed, lived-in feel that is very popular in modern interior design.
Finally, consider the “theme” of your fabric. You can use your Patchwork Coaster – Pattern to commemorate a specific event, like using scraps from a baby’s first outfit or a wedding dress. This turns a simple household object into a memory quilt in miniature form. Every time you set your drink down, you are reminded of a special moment or person. This emotional connection is what truly makes a Patchwork Coaster – Pattern a masterpiece of personal expression and craft.
What is the best size for a Patchwork Coaster – Pattern?
Most quilters find that a finished size of 4.5″ x 4.5″ or 5″ x 5″ is the “sweet spot.” This is large enough to handle oversized mugs but small enough to look neat on a coffee table.
Do I really need heat-resistant batting for my coasters?
While standard cotton batting works for most drinks, if you frequently use very hot mugs, a layer of Insul-Bright is recommended. It has a metallicized polyester film that reflects heat back away from your furniture.
Can I use glue instead of sewing for the patchwork?
For a decorative item, you could use fabric glue, but for a functional Patchwork Coaster – Pattern, sewing is much better. Glue will not hold up well to the moisture and heat that a coaster typically encounters.
How do I stop my coasters from being slippery?
You can use a backing fabric with more texture, like wool felt or a thin layer of cork. Some crafters also apply small dots of clear silicone or “puffy paint” to the bottom of the coaster to give it more “grip” on glass tables.
How many scraps do I need for one coaster?
Surprisingly few! For a 4-patch Patchwork Coaster – Pattern, you only need four 2.5″ squares. This is why it’s the ultimate project for using up those “too small to save but too pretty to throw away” fabric remnants.
Is this project suitable for a child to learn to sew?
Yes! A Patchwork Coaster – Pattern is an excellent first project for kids. It teaches straight-line sewing, seam allowance, and pressing in a short amount of time, giving them a quick sense of accomplishment.
In this article, we have explored the wonderful world of the Patchwork Coaster – Pattern, covering everything from the importance of 100% quilting cotton and proper batting to the technical skills of the quarter-inch seam and various piecing layouts.
We’ve learned that whether you choose a traditional nine-patch or a modern improv style, the key to success lies in precision cutting and consistent pressing. These small projects are not just functional protectors for your furniture; they are expressions of creativity and sustainability that allow you to practice the timeless art of quilting on a manageable scale.


