
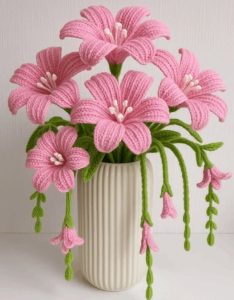
Crochet Flower - Tutorial

Finding the perfect Crochet pear coaster – Pattern is a fantastic way to blend functionality with a touch of whimsical kitchen decor. If you are looking to protect your wooden surfaces while adding a handmade, fruity charm to your dining room, this project is the ideal choice for any skill level. These coasters are not just practical; they serve as a conversation starter during coffee breaks and make for thoughtful, eco-friendly gifts for friends and family who appreciate artisanal craftsmanship.
Using a Crochet pear coaster – Pattern allows you to experiment with various shades of green, yellow, and even blush pinks to mimic the natural ripening of fruit. Because these items are small, they are perfect “scrap-buster” projects, meaning you can utilize leftover cotton yarn from larger projects. This guide will walk you through the essential elements of creating these durable accessories, ensuring your stitches are tight enough to absorb moisture while maintaining that iconic pear silhouette.
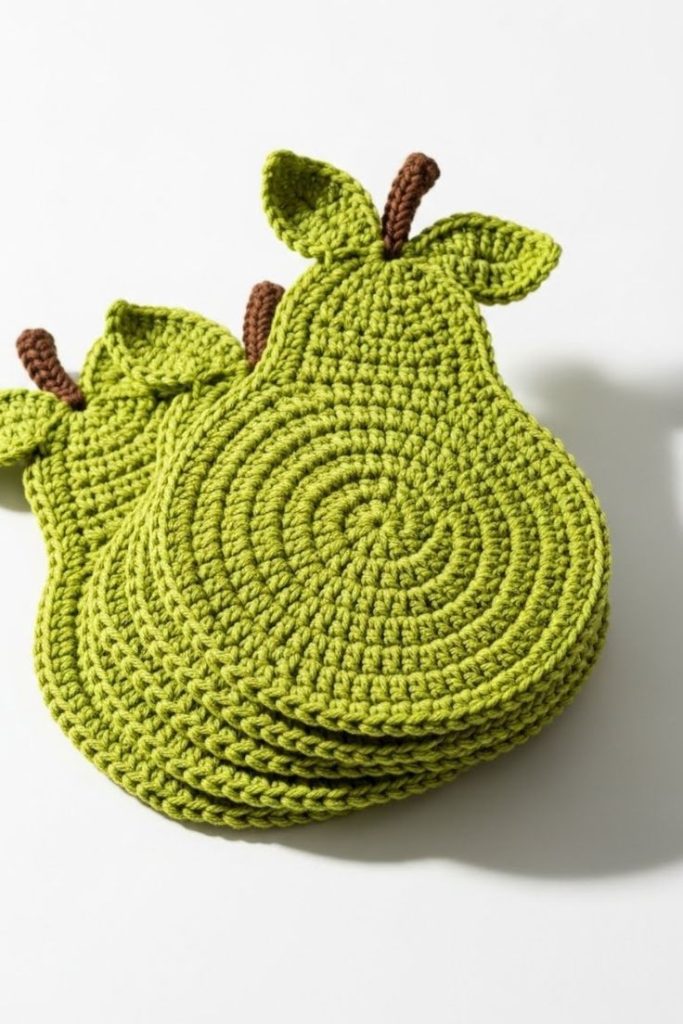
When you dive into a Crochet pear coaster – Pattern, you are engaging in a relaxing hobby that yields immediate, tangible results. The beauty of this specific design lies in its simplicity—a rounded bottom that tapers into a narrower neck, finished off with a tiny brown stem and a vibrant green leaf. In the following sections, we will explore the materials, techniques, and finishing touches required to master this crochet pattern and elevate your home styling game.
To begin your journey with a Crochet pear coaster – Pattern, the choice of yarn is your most critical decision. It is highly recommended to use 100% mercerized cotton yarn, as cotton is incredibly absorbent and heat-resistant. Unlike acrylic, which can melt under a hot mug or fail to soak up condensation, cotton stays firm and maintains its shape even after multiple washes.
The hook size is the next vital component for a successful pear coaster. Generally, a 3.5mm (E) or 4.0mm (G) crochet hook works best to create a dense fabric. You want your stitches to be close together so that no liquid seeps through the gaps onto your furniture. A smaller hook than what the yarn label suggests often helps achieve this “coaster-tight” tension.
Don’t forget the secondary colors for the details that make the Crochet pear coaster – Pattern pop. You will need a small amount of dark brown yarn for the stem and a bright leaf-green for the foliage. Having a sharp pair of scissors and a tapestry needle on hand is essential for weaving in those ends securely so the coaster doesn’t unravel during use.
Stitch markers can be incredibly helpful, especially if you are working in continuous rounds. Many crochet fruit patterns start with a magic ring, and marking the first stitch of every row ensures your pear stays symmetrical. Without markers, it is easy to lose track of your increases, which could result in a lopsided fruit shape.
In addition to tools, consider the surface you are protecting. If you want an extra-premium feel, some crafters choose to glue a thin layer of cork backing to the bottom of their completed Crocheted pear coaster – Pattern. This adds weight and an extra barrier of protection for high-end wood finishes, making your handmade item feel professional.
Lastly, prepare a clear workspace with good lighting. Since you will be working with single crochet, half-double crochet, and increases, being able to see your stitch definition clearly is key. Once you have gathered your cotton, hooks, and notions, you are officially ready to bring this charming DIY kitchen accessory to life.
Mastering a Crochet pear coaster – Pattern requires familiarity with a few fundamental stitches that create the pear’s unique geometry. The base of the pear usually starts with a magic circle, providing a seamless center. From there, you will primarily use the single crochet (sc) stitch to build a sturdy, flat circle that serves as the widest part of the fruit.
To transform a simple circle into a pear, you must utilize increases and decreases strategically. An increase (inc) involves placing two stitches into a single stitch from the previous row, which expands the work. In this Crochet pear coaster – Pattern, increases are concentrated at the bottom to create that plump, rounded look we associate with a ripe pear.
The “neck” of the pear is achieved by transition stitches like the half-double crochet (hdc) or double crochet (dc) in specific areas to add height without adding width. By changing the height of your stitches as you move toward the top, you create the signature taper. Understanding how to graduate these stitch heights is the secret to a professional-looking crochet coaster.
For the leaf detail often included in a Crochet pear coaster – Pattern, you will likely use the slip stitch (sl st) and chain (ch) techniques. A leaf is usually started with a short chain, followed by a sequence of stitches in varying heights (sc, hdc, dc, hdc, sc) worked around both sides of the chain. This creates a pointed, organic shape that adds realism to your project.
Tension control is a “hidden” skill when following this Pattern. If your tension is too loose, the coaster will be floppy; if it is too tight, it might curl upward like a bowl. Consistent tension ensures that the Crocheted pear coaster – Pattern lays perfectly flat on the table, providing a stable base for your drinks.
Finally, the fasten off technique is crucial. When finishing your pear, leaving a long tail allows you to sew the stem and leaf on more securely. A clean finish is what separates a beginner project from a high-quality handmade home decor item. Practice these stitches individually, and the assembly of the coaster will feel like a breeze.
The first phase of the Crochet pear coaster – Pattern focuses on the “body” of the fruit. Starting with your main color, you will work in rounds to create a flat disk. Usually, by round 5 or 6, you will stop increasing around the entire circle and only work back and forth or in partial rounds to extend the top part, creating the narrower neck of the pear.
Once the body is shaped, the Crocheted pear coaster – Pattern moves to the border. Adding a round of slip stitches or reverse single crochet (crab stitch) around the entire edge can give the coaster a finished, “piped” look. This step also helps the coaster maintain its structural integrity, preventing the edges from curling over time with repeated use.
The stem is typically a very simple addition. Using your brown yarn, you will join it to the center-top of the pear neck and work a short series of chain stitches. Working back down the chain with slip stitches creates a sturdy, thin stem. It’s a small detail, but it’s what makes the Crocheted pear coaster – Pattern instantly recognizable as fruit.
Next comes the leaf, which is the “cherry on top” for this crochet project. You can attach the leaf directly to the base of the stem. Most Crocheted pear coaster – Pattern instructions suggest sewing the leaf at a slight angle to give it a more natural, “just-picked” appearance. Using the same cotton yarn ensures the leaf is just as durable as the rest of the coaster.
After all the crocheting is done, weaving in the ends is the most important part of the Crocheted pear coaster – Pattern. Use your tapestry needle to hide the yarn tails within the thickest parts of the stitches. This ensures that the coaster looks beautiful from both sides and that no stray threads poke out when it gets wet from a cold glass.
The final step in construction is blocking. Even the best-made crocheted coaster can benefit from a little steam or water blocking. Pin your pear to a flat surface in the correct shape, mist it with water, and let it dry completely. This “sets” the stitches, ensuring your Crocheted pear coaster – Pattern stays flat and professional-looking for years to come.
One of the best things about a Crocheted pear coaster – Pattern is how easy it is to customize. You can create a “harvest set” by using different shades like golden yellow, burnt orange, and classic Bartlett green. This variety adds visual interest to your table setting and allows you to match your handmade coasters to the changing seasons or your specific kitchen palette.
You can also vary the size of your Crocheted pear coaster – Pattern by changing the yarn weight. For example, using a bulky yarn and a larger hook can turn the coaster pattern into a pear-shaped trivet for hot pots and pans. Conversely, using thin crochet thread can result in delicate, decorative motifs that could be used as appliques for towels or even Christmas tree ornaments.
For those who love a bit of personality, you can add “facial features” to your Crocheted pear coaster – Pattern. Using black embroidery thread to sew two little eyes and a smile turns a standard coaster into a “kawaii” or amigurumi-style coaster. This is particularly popular for kids’ rooms or as a fun way to encourage children to use coasters.
Consider the packaging if you are giving these as a gift. Tying a set of four pear coasters together with a piece of twine and a cinnamon stick makes for a beautiful, rustic presentation. Because the Crocheted pear coaster – Pattern is so unique, it stands out much more than standard square or circular store-bought options, showing the recipient that you put time and thought into their gift.
If you are an advanced crocheter, you can experiment with textured stitches within the Crocheted pear coaster – Pattern. Adding a few “bobble stitches” can mimic the bumpy texture of certain pear varieties, like the Bosc pear. This adds a tactile element to the coaster that makes it feel even more like a work of art rather than just a utility item.
Finally, don’t be afraid to mix and match the Crocheted pear coaster – Pattern with other fruit designs. A set featuring a pear, an apple, an orange, and a lemon creates a vibrant “fruit salad” theme for your patio or breakfast nook. This versatility is why fruit-themed crochet patterns remain a staple in the crafting community, offering endless opportunities for creativity and home improvement.
1. What is the best yarn for a Crocheted pear coaster – Pattern?
The best yarn is definitely 100% cotton. It absorbs moisture from cold drinks and resists heat from hot mugs without melting or losing its shape.
2. Is this pattern suitable for beginners?
Yes! If you know how to make a magic ring, single crochet, and increase, you can easily complete a Crocheted pear coaster – Pattern. It is a great project for practicing shape manipulation.
3. How long does it take to crochet one pear coaster?
For an intermediate crocheter, one coaster takes about 20 to 30 minutes. It is a very fast project, making it perfect for last-minute gifts.
4. Can I wash these coasters in the machine?
If you use cotton yarn, yes. However, to keep the shape of your Crocheted pear coaster – Pattern perfect, it is recommended to hand wash them in cool water and lay them flat to dry.
5. Why is my coaster curling up at the edges?
This usually happens if your tension is too tight or if you haven’t added enough increases in the rounded sections. Try using a slightly larger hook or loosening your grip on the yarn.
6. Do I need to block my coasters?
While not strictly necessary, blocking makes a huge difference. it flattens the stitches and ensures the pear shape is crisp and professional.
In this article, we have explored everything you need to know about creating a beautiful Crocheted pear coaster – Pattern. From selecting the right mercerized cotton yarn to mastering the specific increases and decreases that give the pear its iconic shape, you now have the knowledge to create a functional piece of art. We discussed the importance of tension, the joy of adding decorative leaves and stems, and how to customize your project for different seasons or gift-giving occasions.
These coasters are a perfect blend of utility and charm, proving that even the simplest crochet projects can have a huge impact on your home decor.


