
Crochet Flower - Tutorial

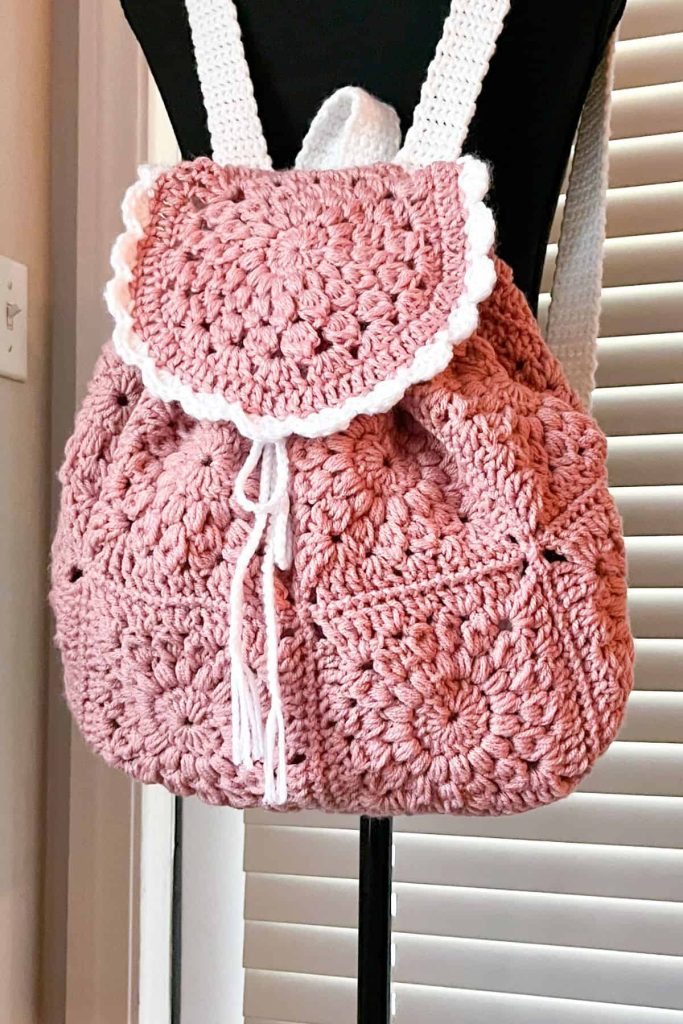
This Crochet Backpack Tutorial – Pattern is designed to guide you through the rewarding process of creating a functional, stylish, and durable accessory from scratch. Whether you are looking for a sustainable fashion statement or a personalized gift, crafting a crochet backpack allows you to blend utility with artistic expression. In this guide, we will explore the essential techniques, materials, and steps required to transform simple yarn into a high-quality handmade bag that rivals any store-bought alternative.
When you follow a Crochet Backpack Tutorial – Pattern, you aren’t just following instructions; you are mastering the art of tension, stitch definition, and structural integrity. The beauty of a DIY crochet project lies in the customization—you can choose your favorite fiber types, adjust the dimensions for a mini backpack or a full-sized rucksack, and add unique hardware like leather straps or magnetic snaps. Our goal is to provide a comprehensive roadmap that ensures your finished piece is both beautiful and sturdy enough for daily use.
Before diving into the stitches, it is vital to understand that a successful Crochet Backpack Tutorial – Pattern relies heavily on the choice of materials and stitch selection. Using a heavyweight cotton yarn or t-shirt yarn is often recommended to prevent the bag from stretching excessively when filled with items. Throughout this article, we will break down the complex parts of the construction, from the reinforced base to the drawstring closure, ensuring that even intermediate crocheters can achieve a professional result while enjoying the meditative flow of the craft.
The foundation of any great Crochet Backpack Tutorial – Pattern starts with selecting the right crochet hook size and yarn weight. For a backpack, you generally want a tighter gauge than you would use for a blanket or a scarf. This ensures the fabric is dense enough to hold its shape and keep small items from slipping through the stitches. We recommend using a hook slightly smaller than what the yarn label suggests to create a stiff, durable “fabric.”
In this Crochet Backpack Tutorial – Pattern, the base is the most critical component. Most patterns utilize a rectangular or oval base worked in single crochet stitches to provide a flat, solid surface. To add extra stability, many designers suggest using a plastic canvas insert or crocheting around a specialized leather base. This prevents the bottom of your crochet bag from sagging once you place your phone, wallet, or books inside.
The body of the backpack is where you can let your creativity shine using the Crochet Backpack Tutorial – Pattern. While single crochet provides the most durability, you can incorporate waistcoat stitches, bobble stitches, or alpine stitches to add texture and visual interest. Remember that more “open” stitches like the double crochet might require a fabric lining to ensure the backpack remains functional and secure for all your belongings.
A key element of the Crochet Backpack Tutorial – Pattern is the strap construction. Straps need to be incredibly strong because they bear the full weight of the bag. We recommend using the Romanian cord technique or thermal stitches, which create a thick, non-stretch strap. Alternatively, you can crochet over polypropylene webbing to ensure your handmade backpack remains comfortable on your shoulders even after hours of wear.
The closure system defined in a Crochet Backpack Tutorial – Pattern usually involves a drawstring and a flap. The drawstring is often a simple chain stitch or a braided cord passed through a row of eyelets or spaces in the upper rounds of the bag. The flap is then worked separately or attached to the back, providing a classic “rucksack” look while keeping your items safe from the elements.
Lastly, finishing touches in a Crochet Backpack Tutorial – Pattern include weaving in ends and adding accessories. You might choose to add tassels, buttons, or even embroidery to personalize the design. High-quality metal D-rings and swivel hooks can also be integrated to make the straps adjustable, giving your crochet project a polished, commercial-grade appearance that you can be proud to wear anywhere.
When following a Crochet Backpack Tutorial – Pattern, the yarn choice is your most important decision. Mercerized cotton is a top choice for many because it is strong, has a slight sheen, and doesn’t pill easily. Since a backpack faces friction and weight, you need a fiber that won’t lose its shape. Nylon cord or polypropylene yarn are also excellent alternatives if you want a waterproof or “outdoor-ready” crochet backpack.
T-shirt yarn is another popular medium for a Crochet Backpack Tutorial – Pattern. It works up very quickly due to its thickness and creates a very “on-trend” chunky look. However, keep in mind that t-shirt yarn can be heavy. If you are making a larger bag, the weight of the yarn itself plus your belongings might become a bit much, so consider this when choosing the size of your crochet pattern.
For those who prefer natural fibers, hemp or jute can be used within a Crochet Backpack Tutorial – Pattern to create an earthy, boho-style bag. These fibers are incredibly tough and have zero stretch, making them perfect for heavy-duty use. The only downside is they can be rough on the hands, so you might want to use a comfort-grip crochet hook and take frequent breaks during your crafting session.
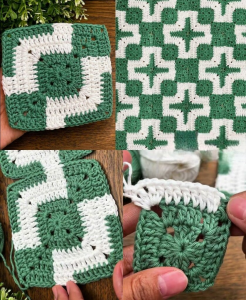
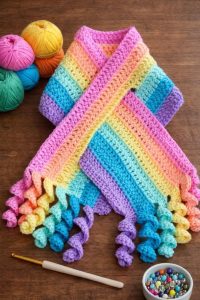
In a Crochet Backpack Tutorial – Pattern, colorwork can also play a huge role. You can use self-striping yarn to create effortless color transitions or use the tapestry crochet technique to create intricate geometric patterns. When using multiple colors, ensure your tension remains consistent so the backpack doesn’t warp. Consistent tension is the hallmark of a high-quality handmade accessory.
Don’t forget about washability when picking yarn for your Crochet Backpack Tutorial – Pattern. Backpacks tend to get dirty since they are often placed on the floor or taken on commutes. Choosing a machine-washable yarn (like a high-quality acrylic blend or treated cotton) ensures that your hard work stays looking fresh for years. Always check the care instructions on the yarn label before starting your project.
Finally, consider the stitch definition provided by your yarn in the Crochet Backpack Tutorial – Pattern. Some fuzzy or “halo” yarns can hide the beautiful detail of your stitches. For a backpack, you usually want “crisp” stitches that show off the texture. Smooth-spun yarns are best for highlighting the intricate work involved in a premium crochet pattern, making your craftsmanship the star of the show.
The first technical hurdle in a Crochet Backpack Tutorial – Pattern is often the magic ring or magic circle. This technique allows you to start your base without a hole in the center, which is vital for the integrity of a bag. Mastering this ensures your crochet base is tight and professional. If you find the magic ring difficult, a small chain loop can work, but the magic ring is the gold standard for seamless crochet.
Increasing and decreasing are fundamental skills needed for any Crochet Backpack Tutorial – Pattern. To shape the base and the transition to the walls of the bag, you must know how to place two stitches in one (increase). Conversely, if your pattern features a tapered top or specific flap shapes, you will need to master the invisible decrease to keep the surface of your crochet fabric smooth and aesthetically pleasing.
Another advanced technique often found in a Crochet Backpack Tutorial – Pattern is working in the back loops only (BLO). This is frequently used when transitioning from the bottom of the backpack to the sides. It creates a sharp “ridge” that helps the backpack stand upright. Understanding how to manipulate the loops of a stitch allows you to create structural lines that define the shape of your handmade gear.
Gauge swatching is something many avoid, but it is crucial for a Crochet Backpack Tutorial – Pattern. If your gauge is too loose, the backpack will be floppy and the stitches will stretch out under weight. By spending ten minutes making a sample square, you ensure that your final product matches the dimensions intended by the pattern designer, saving you hours of potential “frogging” (ripping out stitches) later.
The joining technique is another vital part of the Crochet Backpack Tutorial – Pattern. Most modern patterns are worked in continuous spirals to avoid a visible seam. However, if your pattern uses joined rounds, learning how to do an “invisible join” will significantly improve the look of your bag. This prevents the “slanted seam” look that can sometimes occur in circular crochet projects, giving it a more store-bought finish.
Lastly, let’s talk about blocking within the context of a Crochet Backpack Tutorial – Pattern. Once your pieces are finished, steam blocking or wet blocking can help “set” the stitches and flatten out any curling edges, especially on the backpack flap. This small extra step makes a world of difference, turning a homemade-looking item into a high-end crochet masterpiece that you will be excited to show off.
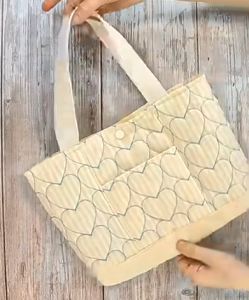
To truly elevate your Crochet Backpack Tutorial – Pattern, you should consider adding fabric lining. While not always mandatory, a lining prevents the crochet from stretching over time and protects the yarn from sharp objects like keys. Using a cotton fabric with a fun print can add a “hidden” element of style to your custom backpack, making the interior just as beautiful as the exterior.
Installing hardware is the next step in perfecting your Crochet Backpack Tutorial – Pattern. Items like magnetic snaps, buckles, and zippers provide a level of security that simple yarn closures cannot. You can easily sew these onto your crochet fabric using a standard needle and thread. These small metal accents also add weight and a “designer” feel to the finished crochet accessory.
Grommets or eyelets are fantastic additions to a Crochet Backpack Tutorial – Pattern. Instead of just poking the drawstring through the stitches, installing metal grommets provides a reinforced hole that won’t fray over time. This is especially useful for a heavy-duty backpack that will see a lot of opening and closing. It adds a rugged, industrial look that contrasts beautifully with the soft yarn texture.
Adding internal pockets is a functional upgrade to any Crochet Backpack Tutorial – Pattern. You can crochet small rectangles and sew them onto the lining or directly onto the inside of the bag. This helps organize smaller items like pens, lip balm, or a phone. A well-organized handmade bag is much more likely to become your go-to daily carry than one where everything gets lost at the bottom.
The strap attachment points are a critical area of focus in the Crochet Backpack Tutorial – Pattern. Instead of just sewing the straps directly to the bag, try using D-rings attached with small crochet tabs. This allows the straps to pivot and move with your body, increasing comfort and reducing the stress on the yarn. It is these small engineering details that separate a basic pattern from a professional-level design.
Finally, consider adding a personalized label to your finished Crochet Backpack Tutorial – Pattern project. Whether it’s a leather “Handmade” tag or a custom woven label with your name, it provides the final touch of branding. When people ask where you bought your bag, you can proudly point to the label and tell them it was a DIY crochet project made with love and precision.
1. Is a crochet backpack durable enough for school or work?
Yes, if you use the right materials. A Crochet Backpack Tutorial – Pattern that utilizes mercerized cotton, nylon, or t-shirt yarn will be quite sturdy. Additionally, adding a fabric lining is highly recommended to prevent the stitches from stretching under the weight of heavy books or a laptop.
2. How long does it take to complete a Crochet Backpack Tutorial – Pattern?
The timeframe varies based on your skill level and the yarn weight. A chunky yarn backpack can be finished in a weekend (about 8–12 hours), while a more intricate design using worsted weight yarn and detailed stitches might take 20–30 hours of active crochet time.
3. Can a beginner follow this Crochet Backpack Tutorial – Pattern?
While some backpacks are complex, many patterns are beginner-friendly. If you know how to chain, single crochet, and increase, you can complete a basic bag. The key is to start with a simple shape and avoid complex colorwork until you are more comfortable with bag construction.
4. How do I stop my crochet backpack from stretching?
The best ways to prevent stretching are using non-elastic yarn (like cotton), maintaining a tight gauge, and lining the bag with a non-stretch fabric. You should also use thermal stitches or reinforced cords for the straps, as these are the areas most prone to lengthening over time.
5. Can I wash my handmade crochet backpack?
Most crochet backpacks can be washed, but it depends on the yarn and hardware. If you used 100% cotton and no leather, you can usually hand wash it and lay it flat to dry. If you added leather straps or delicate hardware, spot cleaning is the safest method to maintain the bag’s integrity.
6. Do I need a sewing machine to line my backpack?
Not necessarily! While a sewing machine is faster, you can easily hand-sew a lining into your backpack using a running stitch or a backstitch. Since you are sewing into the yarn, the process is very forgiving and doesn’t require advanced tailoring skills.
In this Crochet Backpack Tutorial – Pattern, we have covered everything from the initial yarn selection and essential crochet techniques to the professional finishes that make a bag truly stand out.
We learned that the secret to a great handmade backpack lies in the details: a solid base, non-stretch straps, and the addition of functional hardware. By combining your creativity with these structured steps, you can create a piece of wearable art that is as practical as it is beautiful.


