
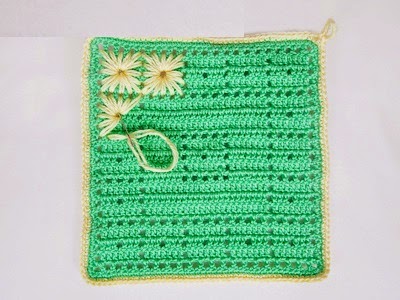
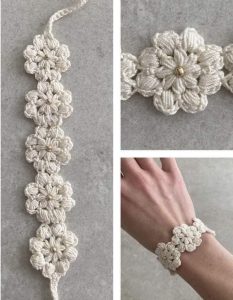
Crochet Flower - Tutorial

A trivet and a crochet trivet Tutorial – Pattern is the ultimate project for anyone looking to blend kitchen utility with the timeless charm of handmade decor. Whether you are an experienced crafter or a complete beginner, understanding how to create a durable, heat-resistant barrier for your surfaces is a fundamental skill that saves your furniture from heat damage while adding a splash of personality to your dining room. In this comprehensive guide, we will explore the nuances of selecting the right materials and mastering the specific stitches required to make a piece that is both functional and aesthetically pleasing.
When we talk about A trivet and a crochet trivet – Pattern, we are referring to a design that prioritizes thickness and heat distribution. Unlike a standard coaster, a trivet must be robust enough to handle heavy pots and high temperatures, which is why the choice of yarn and the density of the stitch pattern are the most critical factors in your success. By following a structured tutorial, you can ensure that your finished product doesn’t just look good on Instagram but actually performs its job in a busy, high-heat kitchen environment without melting or scorching.
Creating your own crocheted trivet allows for endless customization in terms of color palettes and textures, making it a perfect gift or a quick weekend project to refresh your home. This pattern is specifically designed to use accessible techniques while maintaining a high-end, professional finish that mimics boutique home goods. Throughout this article, we will break down every step of the process, ensuring you have a clear roadmap from the first slip knot to the final weave-in of your yarn ends, all while keeping SEO best practices in mind for those who love to share their crafts online.
The foundation of any successful A trivet and a crocheted trivet – Pattern begins with selecting 100% natural fibers like cotton, wool, or linen. Synthetic fibers such as acrylic or polyester are a major “no-go” for this project because they have low melting points and can fuse to the bottom of your hot pans. Cotton is widely considered the gold standard for crochet patterns in the kitchen because it is heat-resistant, absorbent, and easy to wash.
For this specific crocheted trivet, you will want to look for “Lily Sugar ‘n Cream” or similar worsted weight cotton yarns that offer a sturdy structure. A thicker yarn or even doubling up two strands of medium-weight yarn will provide the necessary elevation to protect your wooden or marble countertops. Choosing a vibrant color can turn a simple utility item into a statement piece, while neutral tones offer a modern, farmhouse aesthetic.
In addition to the yarn, your tutorial toolkit should include a crochet hook that is slightly smaller than what the yarn label recommends. For instance, if the yarn calls for a 5.0mm hook, using a 4.0mm or 4.5mm hook will create a tighter, denser fabric. This density is vital because it prevents heat from “leaking” through the gaps between stitches, ensuring your pattern remains a reliable heat barrier for years to come.
Don’t forget the essential notions like a tapestry needle, sharp scissors, and perhaps a few stitch markers to keep track of your rounds. If you are following a circular A trivet and a crocheted trivet – Pattern, stitch markers are lifesavers for identifying the start of each new row. Having these tools ready before you start ensures a smooth, frustration-free crafting experience that allows you to focus on the rhythm of the stitches.
A key part of SEO optimization for craft blogs is mentioning the specific weight of the yarn, often referred to as “Aran” or “Number 4” yarn. This helps fellow crafters find your tutorial when they are searching for projects that fit the supplies they already have in their stash. Being specific about your material choices adds authority to your guide and builds trust with your readers who are looking for professional results.
Finally, consider the environmental impact of your crocheted trivet. Using organic cotton or recycled textile yarns not only makes your kitchen more eco-friendly but also adds a unique story to your handmade item. High-quality materials ensure that your pattern stands the test of time, surviving multiple trips through the washing machine without losing its shape or heat-protective qualities, making it a truly sustainable home accessory.
To successfully execute A trivet and a crocheted trivet – Pattern, you must be comfortable with basic stitches like the single crochet (sc) and the half-double crochet (hdc). However, the secret to a great trivet often lies in more specialized textures like the thermal stitch or the bobble stitch. These techniques add physical height and air pockets to the fabric, which significantly improves the insulation properties of the finished item.
The thermal stitch is particularly famous in the world of crochet patterns for being incredibly thick and nearly indestructible. It involves working into the loops of the current row and the row below simultaneously, creating a double-thick wall of yarn. While it takes a bit more time and yarn than a standard stitch, the result is a professional-grade crocheted trivet that feels substantial and high-quality in the hand.
If you prefer a more decorative look, the waffle stitch is another fantastic option for this tutorial. It creates a grid of raised ridges that look beautiful and provide excellent grip for pots and pans. When writing or following a pattern, ensure you understand how to work around the “post” of a stitch (Front Post Double Crochet), as this is what creates that signature 3D texture that makes the trivet pop.
For those who enjoy circular designs, the magic ring (or magic circle) is the best way to start your A trivet and a crocheted trivet – Pattern. This technique allows you to pull the center hole completely shut, leaving no gap for heat to reach the table. Mastering the magic ring is a rite of passage for many crocheters and elevates the look of your project from “homemade” to “handcrafted boutique style.”
Consistency in tension is another vital aspect we must cover in this crocheted trivet guide. If your stitches are too loose, the trivet will be flimsy; if they are too tight, the fabric might curl or “bowl” up. Aim for a firm but flexible tension, ensuring that each stitch is uniform. This level of detail is what separates a mediocre pattern from a viral, highly-rated one that users will recommend to their friends.
Lastly, finishing techniques like the reverse single crochet (also known as the crab stitch) provide a beautiful, corded edge that reinforces the perimeter of your work. A strong edge prevents the trivet from stretching out of shape over time. Including these specific stitch names in your tutorial helps with search engine visibility, as many crafters search for projects based on the specific techniques they want to learn or practice.
Now let’s dive into the core of A trivet and a crocheted trivet – Pattern. To begin, you will create a foundation chain or a magic ring, depending on whether you want a square or round shape. For a standard 7-inch round trivet, start with 6 single crochets into a magic ring. This compact start ensures that the center of your crocheted trivet is solid and heat-resistant right from the very first stitch.
In the second round of your tutorial, you will perform an “increase” in every stitch, meaning you place two stitches into each single crochet from the previous round. This expands the circle while keeping it flat. If you notice your work starting to ruffle, you are adding too many stitches; if it starts to cup, you are not adding enough. Finding this balance is key to a perfect pattern that sits flush against the table.
Continue the expansion in the third round by following a sequence of (1 single crochet, 1 increase) repeated around. This mathematical progression is the backbone of all circular A trivet and a crocheted trivet – Pattern designs. By the time you reach the fifth or sixth round, you will see a sturdy disk forming. If you are using a thinner yarn, consider working in the back loops only to create decorative concentric ridges.
Once your crocheted trivet reaches about 6 inches in diameter, it is time to consider the border. A simple slip stitch border can add a clean finish, or you can go for something more ornate like a small scallop or picot edge. Remember that for a kitchen item, functionality is king—avoid overly large “lacy” holes where a pot leg could potentially slip through and touch the delicate surface underneath.
To finish the pattern, cut your yarn leaving a 6-inch tail. Use your tapestry needle to perform an “invisible join,” which mimics the look of a regular stitch and makes the start and end of your rounds impossible to find. Weaving in your ends securely is a step that many skip, but in this tutorial, we emphasize it because a trivet undergoes frequent movement and washing, so those ends need to stay put.
For those looking to optimize their blog for Google Adsense and SEO, including a “print-friendly” version of these steps or a downloadable PDF pattern can increase user engagement. Using clear, concise language and bolding key terms like increase, stitch count, and fasten off makes the instructions easy to skim while the user is actually crocheting, providing a better overall user experience.
Once you have completed A trivet and a crocheted trivet – Pattern, knowing how to care for it will ensure it lasts for years. Since you used 100% cotton, your crocheted trivet is likely machine washable. I recommend washing it in cold water on a delicate cycle and laying it flat to dry. Avoiding the dryer prevents the cotton fibers from shrinking excessively, which could cause your perfectly flat trivet to warp.
If you find that your trivet has lost its shape after heavy use, you can “block” it. This involves pinning the damp crocheted trivet to a foam board in the desired shape and letting it air dry. Blocking is a professional secret in the pattern world that turns a slightly wonky handmade item into a perfectly symmetrical piece of art. It’s a small extra step that makes a massive difference in the final presentation.
One popular variation of A trivet and a crocheted trivet – Pattern is making a “double-sided” version. You can crochet two identical circles and join them together with a round of single crochet around the edge. This creates an extra-thick pad that can handle even the heaviest cast-iron skillets. It also allows for fun color-blocking, where one side is a solid color and the other is variegated or striped.
You can also experiment with different shapes within the same tutorial framework. Square trivets are made by working in rows rather than rounds, using the same thermal stitch mentioned earlier for maximum thickness. Hexagon shapes are also trending in modern kitchen decor and can be achieved by placing specific increases at six points around your circle, turning the round edges into sharp, geometric corners.
Adding a small leather loop or a crocheted hanging tab to your pattern is a functional touch that allows you to store your trivets on wall hooks. This turns your kitchen tools into wall decor when they aren’t in use. When sharing your finished project online, using keywords like DIY kitchen decor and handmade gift ideas alongside A trivet and a crocheted trivet – Pattern will help attract a wider audience to your craft.
Finally, remember that practice makes perfect. Your first crocheted trivet might have a few imperfections, but that is the beauty of handmade items. As you become more comfortable with the tutorial, you can start experimenting with advanced textures and color-work. The versatility of this project makes it a staple for any crocheter’s repertoire, providing a satisfying blend of quick results and practical utility.
Can I use acrylic yarn for a crocheted trivet?
No, it is highly discouraged. Acrylic is a form of plastic and will melt when it comes into contact with high heat from pots and pans. Always stick to 100% cotton or wool for any A trivet and a crocheted trivet – Pattern.
What is the best size for a standard trivet?
Most functional trivets are between 7 and 9 inches in diameter. This size is large enough to support standard saucepans and dinner plates while still being easy to store in a kitchen drawer.
How much yarn do I need for this pattern?
A single 50g ball of worsted weight cotton is usually more than enough to complete one crocheted trivet. If you are making a double-thick version, you may need a second ball.
Is this pattern suitable for beginners?
Yes! This tutorial is designed to be beginner-friendly. As long as you know how to chain and single crochet, you can successfully create a beautiful and functional piece for your home.
Can I sell the items I make from this pattern?
Generally, most designers allow you to sell finished items made from their A trivet and a crocheted trivet – Pattern, but it is always polite to credit the source of the tutorial in your product listing.
How do I make my trivet extra thick?
You can use a thicker “t-shirt yarn,” double your strands of cotton yarn, or use a specific dense stitch like the thermal stitch or waistcoat stitch to increase the protective barrier.
In this article, we have explored the essential steps and techniques required to master A trivet and a crocheted trivet – Pattern. From choosing the right heat-resistant cotton yarn to mastering the dense stitches that protect your surfaces, you now have the knowledge to create a beautiful and practical kitchen accessory.
We covered the importance of material selection, the step-by-step logic of circular construction, and how to maintain your handmade items so they stay beautiful for years to come. Whether you are making these for your own home or as thoughtful gifts, the combination of utility and creativity makes this project a true winner.


