
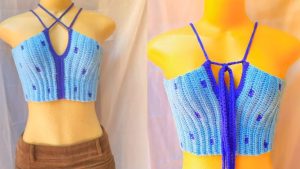
Crochet Flower - Tutorial

Finding the perfect Crochet square in the shape of a bullet- Pattern can be a game-changer for crafters looking to add a touch of modern edge or thematic flair to their blankets and pillows. This unique design deviates from the traditional floral or geometric motifs we usually see in the world of yarn, offering a sleek, cylindrical silhouette that represents speed and precision. Whether you are building a commemorative quilt or a pop-culture-inspired wall hanging, mastering this specific shape requires a blend of basic stitches and clever increases to capture that iconic pointed tip and flat base.
The beauty of the Crochet square in the shape of a bullet- Pattern lies in its versatility and the way it challenges your tension control. Unlike standard squares that grow uniformly from the center out, this pattern often utilizes tapestry crochet or surface slip stitches to define the “bullet” within the square frame. This ensures that the central motif pops against a contrasting background, making it a focal point of any larger project. It is an excellent way for intermediate crocheters to practice color changes and chart reading while producing something truly one-of-a-kind.
When you dive into the world of specialized motifs, having a reliable Crochet square in the shape of a bullet- Pattern is essential for maintaining consistency across multiple blocks. The technical aspect of creating the “bullet” involves transitioning from a rounded top to a straight body, which mimics the real-life structure of the object. By using high-quality worsted weight yarn and a suitable crochet hook size, you can ensure that your square remains flat and professional-looking. Let’s explore the essential steps, tools, and creative possibilities that this fascinating pattern brings to your crochet collection.
Choosing the right yarn is the first step in making your Crochet square in the shape of a bullet- Pattern look realistic and sharp. You will generally want a metallic grey or copper yarn for the bullet itself to give it that authentic look, while a solid background color like deep navy or black helps the shape stand out. A high-quality acrylic or cotton blend is recommended because it provides the stitch definition needed to keep the edges of the bullet crisp and clear.
Your crochet hook choice is equally important to the success of the Crochet square in the shape of a bullet- Pattern. If your stitches are too loose, the stuffing (if you’re making a 3D version) might peek through, or the shape might become distorted. Most crafters find that a 4.0mm or 5.0mm hook works best with standard yarn to create a firm, even fabric. Always check your gauge before starting to ensure your final square measures the intended size.
Don’t forget the smaller tools that make the Crochet square in the shape of a bullet- Pattern easier to manage. You will need a tapestry needle for weaving in ends, especially if you are doing frequent color changes. Sharp embroidery scissors are a must for clean cuts, and stitch markers are incredibly helpful for keeping track of the beginning of your rounds or the specific points where the bullet tip begins to taper.
The Crochet square in the shape of a bullet- Pattern often incorporates a mix of single crochet and half-double crochet stitches. Having these basics mastered will allow you to focus on the colorwork without struggling with the mechanics of the stitch. If you’re new to colorwork, consider using the intarsia crochet method, which prevents the yarn from carrying over the back and creates a much cleaner finish for your square.
Lighting is a frequently overlooked “material” when working on a complex Crochet square in the shape of a bullet- Pattern. Since you might be working with dark colors for the background, a good neck light or bright desk lamp will help you see your stitch definition clearly. This prevents mistakes in the “bullet” silhouette that could make the shape look uneven or lopsided once the square is finished.
Lastly, keep a measuring tape nearby as you work through the Crochet square in the shape of a bullet- Pattern. Consistency is key if you plan on joining these squares together later. Ensuring each block is exactly 6 or 8 inches (depending on your project) will save you a lot of headache during the assembly phase. Preparation is truly half the battle when it comes to intricate thematic crochet designs.
The foundation of the Crochet square in the shape of a bullet- Pattern usually starts with a chain stitch base that establishes the width of the square. You will work back and forth in rows, or in rounds if you prefer a traditional granny style, but most “picture” squares favor the row-by-row method. The initial rows will serve as the bottom border of your square before you introduce the “bullet” base using your secondary yarn color.
As you begin the “bullet” portion of the Crochet square in the shape of a bullet- Pattern, you will use color-changing techniques to transition from the background to the bullet. The base of the bullet is typically a flat rectangle, so you will maintain a consistent number of stitches for several rows. It is vital to pull your yarn through the last loop of the previous stitch to ensure a seamless color transition that looks professional.
The most challenging part of the Crochet square in the shape of a bullet- Pattern is the tapering of the tip. To achieve this, you will use decreases (sc2tog) on either side of the bullet shape as you move upward. This creates the pointed, aerodynamic look characteristic of a bullet. Following a crochet chart or a grid is highly recommended during this stage to ensure the symmetry of the tip is perfect.
Once the bullet shape is complete, the Crochet square in the shape of a bullet- Pattern requires you to fill in the remaining space with your background color. This “negative space” work is what actually turns the motif into a perfect square. You will work around the tip of the bullet, often using taller stitches like double crochet or treble crochet at the corners to maintain a sharp, 90-degree angle for the block.
After finishing the main body of the Crochet square in the shape of a bullet- Pattern, adding a border row is a great way to polish the piece. A simple row of single crochet around the entire perimeter in a neutral color can hide any slight imperfections along the edges. This also provides a sturdy “edge” for when you are ready to sew or slip-stitch your squares together into a larger blanket.
Finally, the blocking process is the secret weapon for a perfect Crochet square in the shape of a bullet- Pattern. By pinning your finished square to a blocking board and lightly steaming it, you relax the fibers and “set” the shape. This ensures the bullet looks straight and the square is perfectly symmetrical, which is crucial for any project that involves geometric alignment and clean lines.
To make your Crochet square in the shape of a bullet- Pattern truly stand out, consider using yarn under instead of yarn over for your single crochets. This technique creates a tighter, more “X” shaped stitch that is common in amigurumi. It reduces the gaps between stitches, ensuring that the bullet shape is solid and the background color doesn’t peek through the metallic sections of the motif.
Another way to elevate the Crochet square in the shape of a bullet- Pattern is through the use of surface crochet. If you find the color changing within the rows too difficult, you can crochet a plain square first and then “draw” the bullet onto the surface using slip stitches. This creates a raised, 3D effect that can look very striking and provides a much cleaner silhouette for those who struggle with traditional tapestry crochet.
Tension is everything when working on the Crochet square in the shape of a bullet- Pattern. If your tension varies, the bullet might look “wavy” or slanted. Try to keep a relaxed but consistent grip on your yarn. If you notice the square is starting to curl, it might be a sign that your color-carrying yarn (the “float”) is being pulled too tightly across the back of the work.
For a more realistic Crochet square in the shape of a bullet- Pattern, you can experiment with gradient yarns. Using a yarn that shifts from light silver to dark grey can mimic the way light reflects off a metal casing. This adds a level of depth and “shading” to your crochet work that simple flat colors can’t achieve, making the bullet look like it’s popping off the fabric.
When reading the Crochet square in the shape of a bullet- Pattern instructions, pay close attention to the turning chain. Some patterns count the turning chain as a stitch, while others do not. For a motif-heavy square like this, usually not counting the chain as a stitch results in straighter edges. Always double-check your stitch count at the end of every row to ensure the bullet remains centered.
Lastly, don’t be afraid to customize the Crochet square in the shape of a bullet- Pattern by adding embroidery. Using a bit of black thread to outline the bullet or adding a small “shine” mark with white yarn can add immense detail. These small touches transform a simple crochet project into a piece of fiber art, showing off your skill and attention to detail as a maker.
The most popular use for the Crochet square in the shape of a bullet- Pattern is a themed graphgan. By making dozens of these squares in different color combinations, you can assemble a large, cozy blanket that fits a specific aesthetic, such as a “Western” theme or a “Modern Action” style. Because the squares are modular, you can work on them one at a time, making it a great portable project.
You can also turn a single Crochet square in the shape of a bullet- Pattern into a pocket for a tote bag or a denim jacket. Simply crochet the square and then sew three sides of it onto your garment. It’s a functional and stylish way to show off your crochet skills. Using a mercerized cotton yarn for this purpose will ensure the pocket is durable and doesn’t stretch out too much with use.
For home decor, two of these squares can be joined together to create a mini throw pillow. Simply crochet a front and back (one with the Crochet square in the shape of a bullet- Pattern and one plain), sew three sides, stuff with polyfill, and close the final side. This makes for a great conversation piece on a sofa or a unique gift for someone who appreciates unconventional crochet designs.
If you enjoy smaller projects, you can use a thinner thread and a smaller hook to adapt the Crochet square in the shape of a bullet- Pattern into a coaster. Coasters are quick to make and allow you to practice the pattern multiple times before committing to a larger project. They also make excellent gifts when bundled in a set of four or six, showcasing the bullet motif in various “metallic” shades.
Wall hangings are another fantastic outlet for the Crochet square in the shape of a bullet- Pattern. You can attach a finished square to a wooden dowel and add some fringe at the bottom for a modern, boho-industrial look. This is a great way to use up scrap yarn while creating something that adds personality to an office or a creative studio space.
Finally, consider using the Crochet square in the shape of a bullet- Pattern as part of a crochet sampler blanket. Mixing this edgy motif with more traditional squares creates a fascinating contrast in textures and themes. It challenges the viewer’s perception of what crochet can be, moving it away from “grandma’s hobby” and into the realm of contemporary, personalized craft.
A medium-weight (category 4) acrylic or cotton yarn is usually the best choice. Acrylic is affordable and comes in many colors, while cotton provides excellent stitch definition which helps the bullet shape stay sharp.
This pattern is best suited for advanced beginners or intermediate crocheters. While the stitches are basic, the color changes and the tapering required to form the bullet shape require some experience with “carrying yarn” or following a graph.
Curling often happens because the tension is too tight or the edges don’t have enough stitches. For the Crochet square in the shape of a bullet- Pattern, make sure you are blocking your finished squares and using a hook size that matches your yarn weight perfectly.
Yes! You can scale the Crochet square in the shape of a bullet- Pattern by changing the yarn weight and hook size. Using chunky yarn will result in a much larger square, while embroidery floss can create a tiny, keychain-sized version.
The most seamless way to join your Crochet square in the shape of a bullet- Pattern blocks is the mattress stitch. This creates an invisible join. Alternatively, a slip stitch join creates a decorative ridge that can add extra texture to your finished project.
For a standard throw blanket using 6-inch squares, you would typically need about 80 to 100 squares. This depends on how large you want the blanket to be and whether you plan to add a wide border around the entire finished piece.
In this article, we have explored the intricate and rewarding process of creating a Crochet square in the shape of a bullet- Pattern. From selecting the right metallic yarns and ergonomic hooks to mastering the art of tapered decreases and colorwork, you now have the foundational knowledge to tackle this unique design.
We discussed how blocking and stitch definition play a crucial role in making your motif look professional, and we brainstormed various ways to use these squares, ranging from thematic blankets to modern wall hangings.


