Creating an Amigurumi Baby Dragon Crochet is an exciting project that will result in a cute and magical creation.
Whether you’re a seasoned crocheter or a beginner looking for a challenge, making an adorable baby dragon is an enjoyable and rewarding experience.
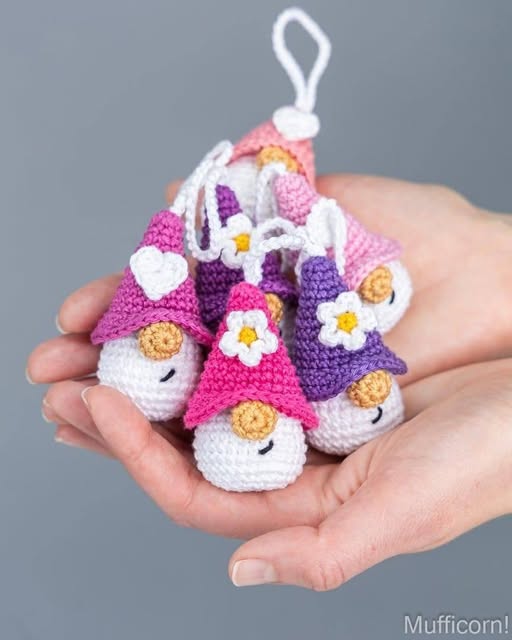
With its tiny wings, big eyes, and little claws, this crochet baby dragon is sure to steal hearts.
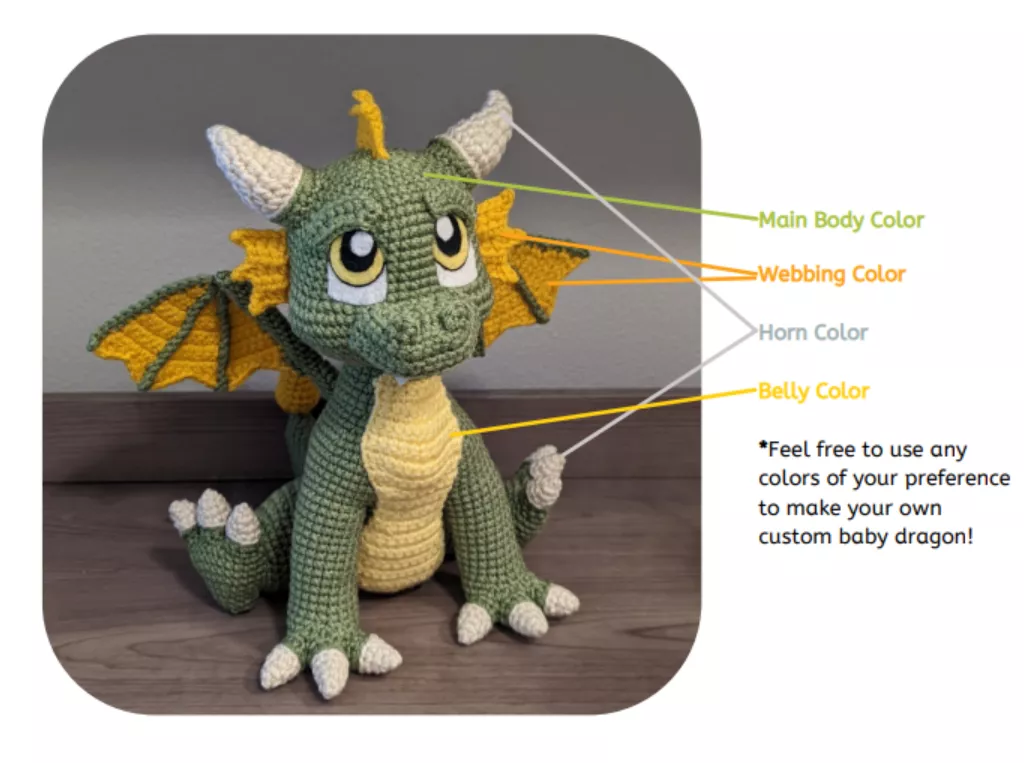
Image From Pinterest
In this guide, we’ll walk you through each step, providing you with the pattern and tips to make your own baby dragon amigurumi. We’ll cover everything, from the materials you’ll need to step-by-step instructions for creating the dragon’s head, body, wings, and more. Let’s dive in!
OTHER CROCHET PATTERNS HERE!
1. Materials Needed
Before starting your Amigurumi Baby Dragon, it’s important to gather the necessary materials. Having everything ready will make the process smoother and more enjoyable. Here’s a list of materials you’ll need:
- Yarn: Choose a medium-weight (worsted weight) yarn in your preferred dragon color. You can go for traditional dragon colors like green, red, or purple, or you can be creative with pastel hues, blues, or even multi-colored yarn.
- Crochet Hook: A 3.5mm to 4mm crochet hook works best for most amigurumi projects, including this baby dragon.
- Safety Eyes: Safety eyes, usually around 6mm or 8mm in size, will give your baby dragon a cute and expressive look. Make sure to position the eyes properly on the face.
- Polyester Fiberfill: This soft stuffing will help give your dragon its plush, huggable appearance and structure.
- Yarn Needle: A yarn needle is essential for sewing the pieces of your dragon together and weaving in any loose yarn ends.
- Scissors: A sharp pair of scissors is necessary for cutting yarn and trimming any excess.
- Stitch Marker: A stitch marker will help you keep track of your rounds, especially when working in continuous spirals, which is common for amigurumi.
- Thread for Embroidery: If you’d like to embroider a smile or any other facial features, you’ll need a bit of embroidery thread.
Now that you have all your materials ready, you’re set to start crocheting your Amigurumi Baby Dragon!
2. Basic Crochet Techniques
Before we begin with the pattern, let’s review a few basic crochet techniques you’ll need to create your baby dragon amigurumi. These are the core techniques for working in the round, shaping your pieces, and joining everything together.
- Magic Ring: The magic ring (or adjustable ring) is essential for beginning most amigurumi pieces in the round. It allows you to pull the loop tight, leaving no hole in the center. To make a magic ring, wrap the yarn around your fingers, insert your hook, and crochet into the ring.
- Single Crochet (SC): The single crochet stitch creates tight, dense fabric, perfect for amigurumi. To make a single crochet, insert the hook into a stitch, yarn over, and pull through both loops on the hook.
- Increase and Decrease: As you shape your baby dragon, you’ll need to increase or decrease the number of stitches. To increase, crochet two single crochets in one stitch. To decrease, crochet two single crochets together to reduce the stitch count.
- Working in a Spiral: Amigurumi is typically worked in a continuous spiral, which means you won’t join each round with a slip stitch. You’ll need a stitch marker to mark the beginning of each new round.
- Joining Pieces: After you’ve crocheted the individual parts of your dragon, you’ll need to sew them together using a yarn needle. Be sure to align the pieces correctly and stitch them securely.
Now that you’re familiar with the basics, it’s time to start crocheting your baby dragon!
3. Step-by-Step Instructions
Here are the step-by-step instructions to create your Amigurumi Baby Dragon. We’ll break the process down into parts, starting with the head, then the body, wings, and other features.
Head:
- Start with a magic ring, and crochet 6 single crochets into the ring. (6)
- Increase in each stitch around, making 12 single crochets. (12)
- Work one single crochet in the next stitch, then increase in the next stitch. Repeat around. (18)
- Work one single crochet in the next two stitches, then increase in the next stitch. Repeat around. (24)
- Continue working evenly (no increases or decreases) until the head is the desired size.
- Stuff the head lightly with polyester fiberfill.
- Begin decreasing by crocheting one single crochet in the next two stitches, then crocheting two stitches together. Repeat around, until the hole is closed.
- Attach the safety eyes to the head, making sure they’re evenly spaced. If you want, you can also embroider a smile or small details like nostrils.
Body:
- Start with a magic ring, and crochet 6 single crochets into the ring. (6)
- Increase in each stitch around, making 12 single crochets. (12)
- Work one single crochet in the next stitch, then increase in the next stitch. Repeat around. (18)
- Continue crocheting evenly until the body reaches the desired length.
- Begin decreasing as you approach the bottom of the body.
- Stuff the body lightly with polyester fiberfill.
- Attach the head securely to the body.
Wings (Make 2):
- Ch 7.
- Turn, and crochet one single crochet in each chain.
- In the next row, increase in the first and last stitch, and work one single crochet in the middle stitches.
- Continue working rows, increasing and decreasing to shape the wings until they are the desired size.
- Attach the wings to the sides of the dragon’s body, making sure they are centered.
Legs (Make 4):
- Start with a magic ring, and crochet 6 single crochets into the ring. (6)
- Increase in each stitch around to make 12 single crochets. (12)
- Work evenly for a few rows.
- Stuff the legs lightly with fiberfill.
- Attach the legs to the bottom of the body.
Tail:
- Ch 10, and work single crochets along the chain.
- Continue crocheting evenly until the tail is the desired length.
- Stuff the tail lightly and attach it to the back of the dragon’s body.
Ears (Make 2):
- Ch 4, and work 3 single crochets along the chain.
- Turn and crochet in rows until the ears are about 3-4 rows high.
- Attach the ears to the top of the dragon’s head.
4. Customization Tips
Once your Amigurumi Baby Dragon is complete, you may want to customize it even further to make it uniquely yours. Here are some fun ideas to get you started:
- Use Different Colors: You can create dragons in any color combination you like. For a more magical touch, try pastel hues like lavender, pink, or sky blue. You can even make a rainbow-colored dragon by changing yarn colors in each section.
- Add Details: For a more detailed look, consider adding spikes along the back of the dragon, or use felt to make additional features like scales or a more elaborate tail.
- Change the Size: Want a bigger or smaller dragon? Use thicker or thinner yarn, or adjust the number of rounds to scale the pattern to your liking.
- Create a Family: Make several baby dragons with different colored wings, horns, or accessories. You can even create a whole dragon family with different colors and sizes.
- Add Clothing: You could crochet a tiny scarf, vest, or even a little dragon armor to give your baby dragon more personality and style.
- Embroider Faces: Instead of using safety eyes, you can embroider the dragon’s eyes, mouth, and other features for a softer, more whimsical look.
FAQ
1. Can I make the baby dragon bigger or smaller? Yes! To make a larger dragon, simply use thicker yarn and a larger crochet hook. For a smaller one, use thinner yarn and a smaller hook.
2. How do I make the dragon’s wings stand up? If you want the wings to stand up, use a stiffer yarn or crochet a layer of felt to reinforce the wings. You can also add some wire inside the wings to help them hold their shape.
3. Can I change the dragon’s colors? Absolutely! Feel free to choose any colors that suit your taste. You can make a traditional green dragon or try out some creative combinations like pink, purple, or even a rainbow dragon.
4. Can I add horns to my dragon? Yes! You can crochet small horns and attach them to the top of the dragon’s head. Simply create a small cone shape with single crochets, stuff lightly, and sew it onto the head.
5. How do I attach the legs securely? When attaching the legs, make sure to sew them tightly and evenly to the bottom of the body. You can also stitch across the base of each leg to ensure they stay in place.
PATTERN HERE
Conclusion
Congratulations on completing your Amigurumi Baby Dragon Crochet! By following these steps, you’ve created a charming little dragon that’s sure to bring joy to anyone who sees it. With endless possibilities for customization, your baby dragon can reflect your personal style, making it truly one-of-a-kind. Feel free to share your finished creation and any additional ideas or suggestions in the comments below! Happy crocheting!
