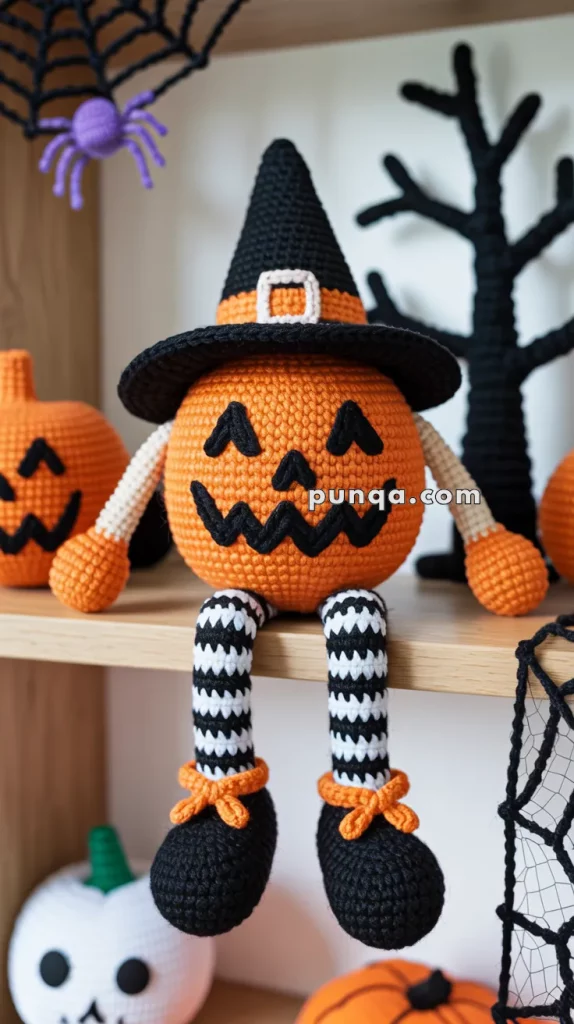
Amigurumi Pumpkin Witch Doll - Pattern

Creating an amigurumi lion crochet is a fantastic project for crocheters who want to bring to life the majestic power and beauty of this incredible animal.
Whether you’re a beginner or a seasoned crochet enthusiast, making a lion can be an enjoyable and rewarding experience.
In this comprehensive guide, we’ll walk you through the entire process, from gathering materials to putting the finishing touches on your little crochet lion.
By the end of this article, you’ll have all the instructions you need to create your very own lion that’s sure to stand proudly among your collection of amigurumi animals.
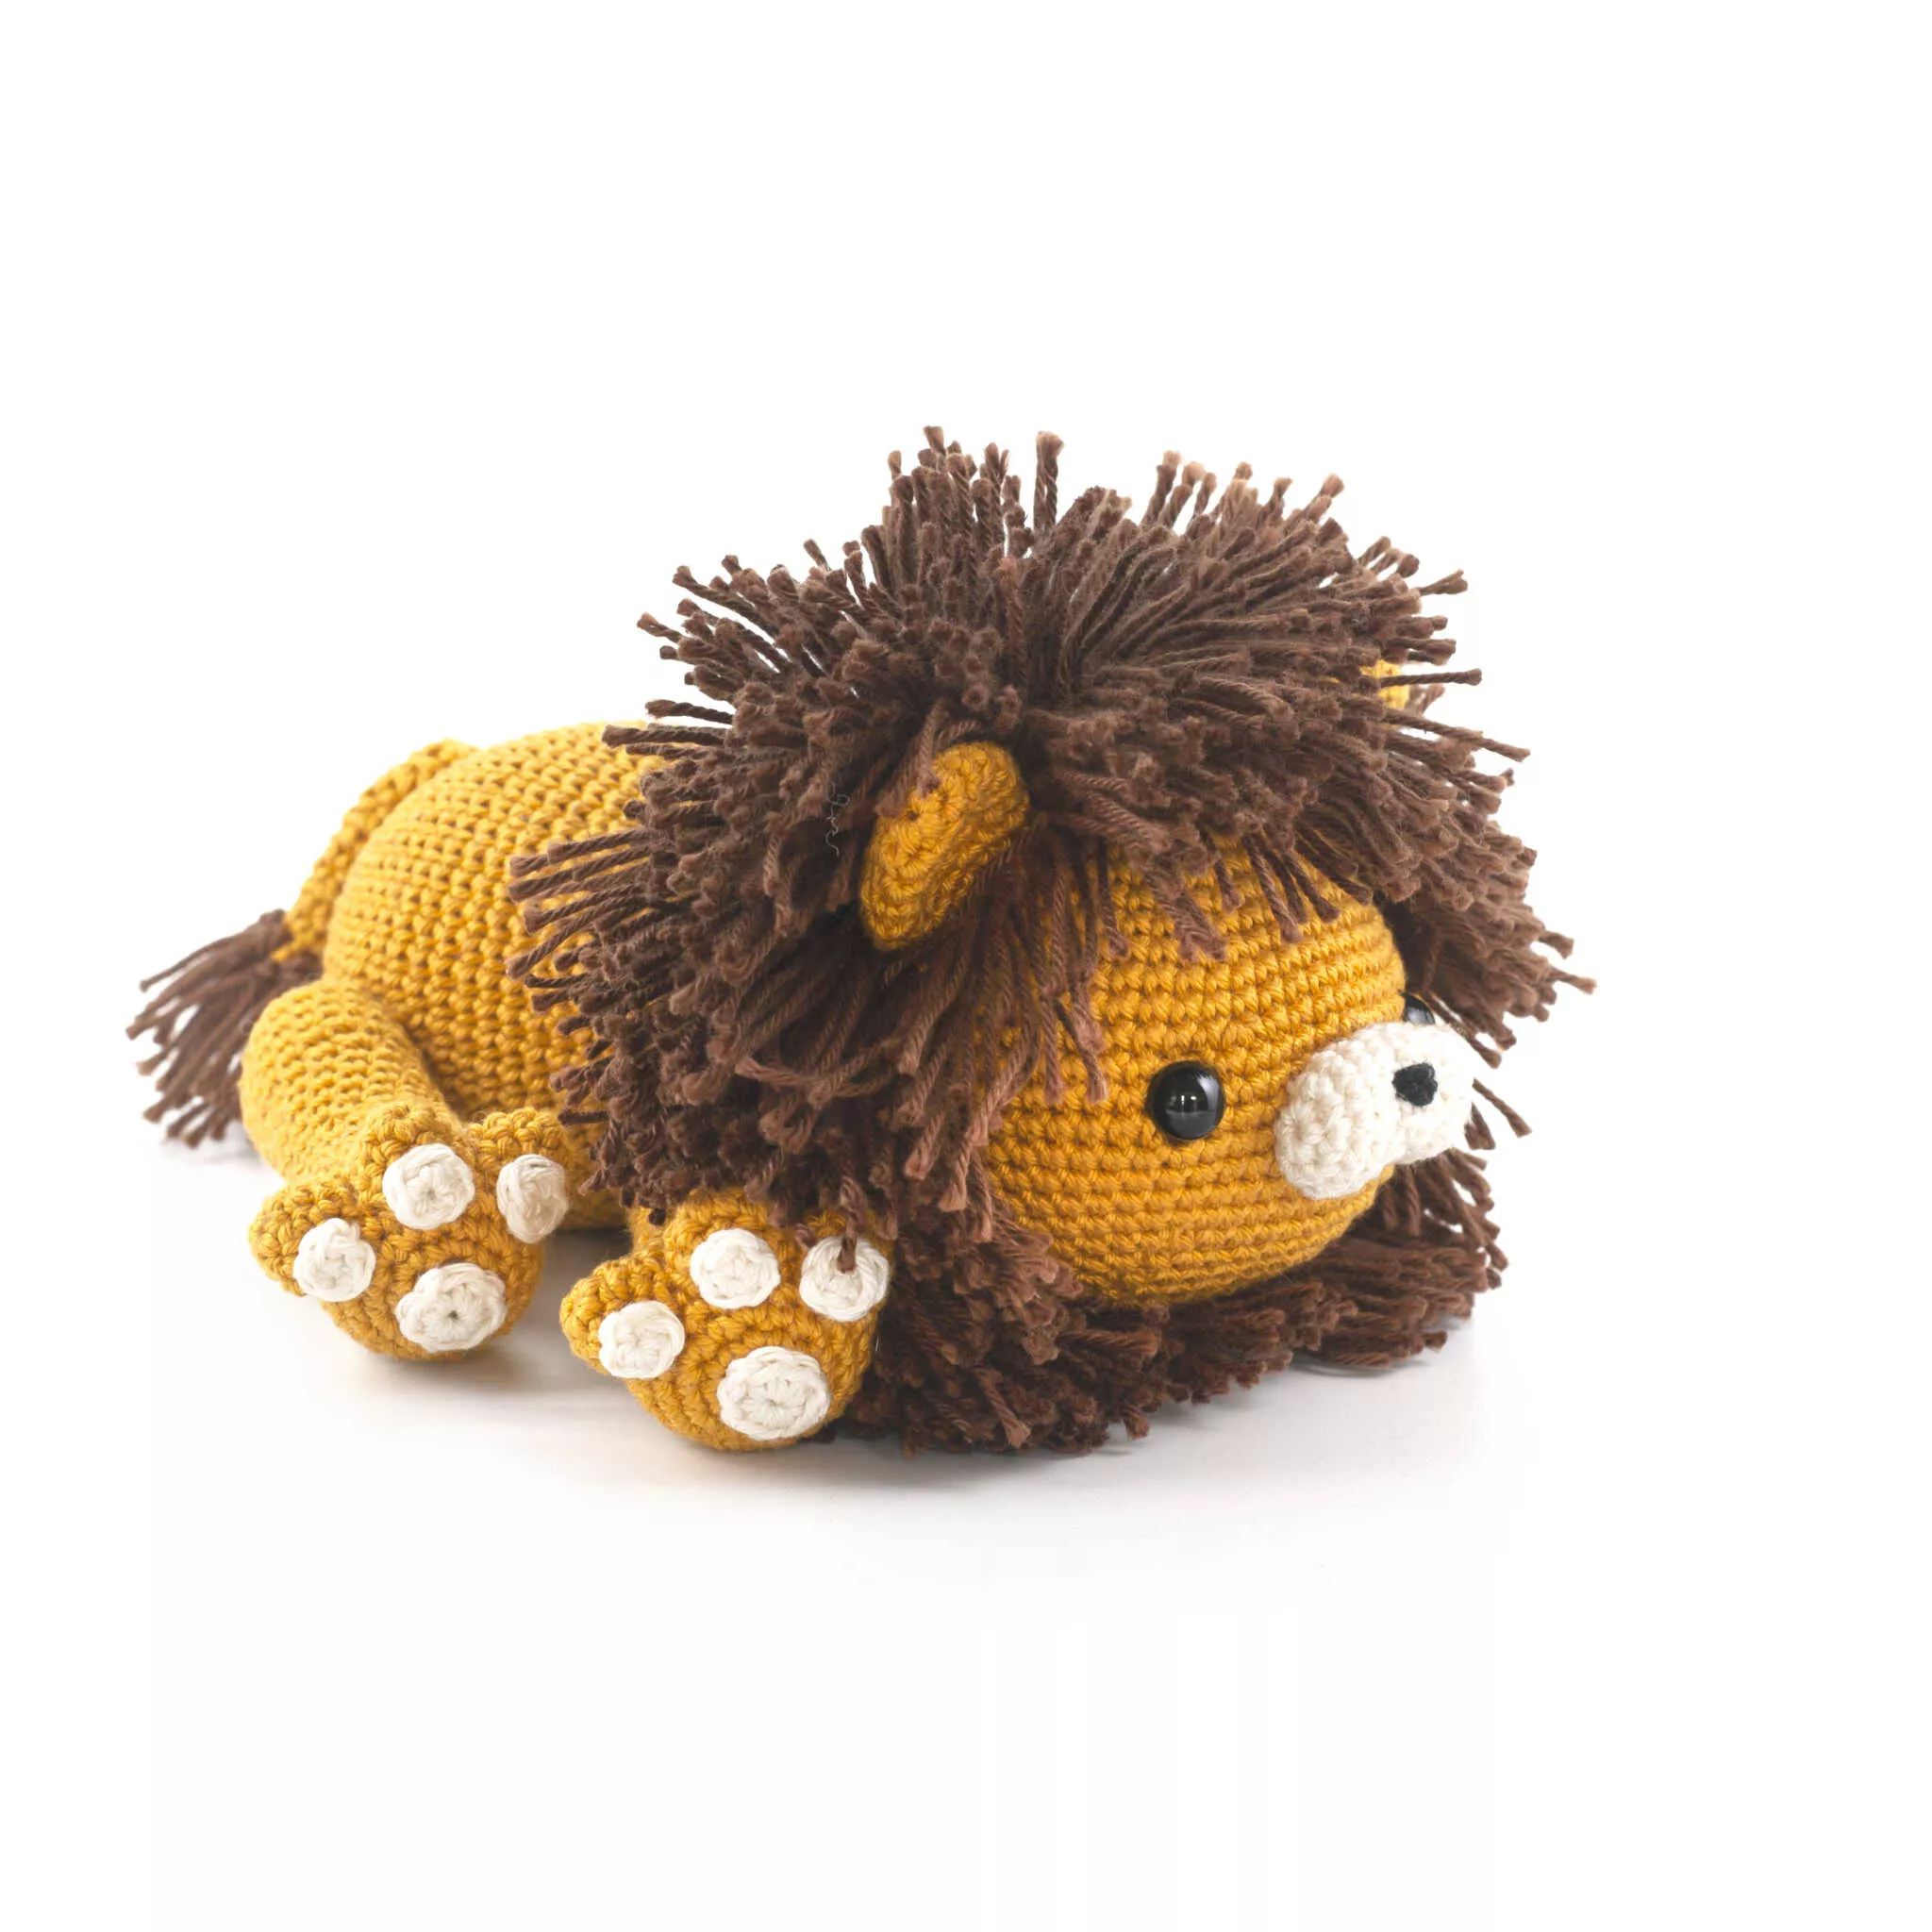
Image From Pinterest
The amigurumi lion is a perfect blend of creativity and craftsmanship. With its fluffy mane, sturdy body, and adorable face, it’s a timeless and charming piece. The lion also provides an opportunity to practice your crochet techniques such as shaping, increases, and decreases while also learning how to add detail to your animal creation.
Let’s dive right into the instructions so you can start crocheting your very own lion!
Before you begin, it’s essential to gather the materials you need to ensure a smooth crocheting experience. The right yarn, hook, and accessories will make the process much easier.
Yarn:
Crochet Hook:
A 3mm or 4mm hook is perfect for creating tight stitches for amigurumi. This size works well with the medium-weight yarn typically used for amigurumi projects.
Safety Eyes:
If you want your lion to have realistic eyes, safety eyes are a great option. They’re available in various sizes and add a polished finish to your amigurumi.
Fiberfill Stuffing:
To give your lion its shape, you’ll need polyester fiberfill or any other soft stuffing. Make sure to stuff the body, head, and limbs lightly, ensuring they hold their shape without being too firm.
Tapestry Needle:
You’ll need a tapestry needle to sew the parts together and weave in any loose yarn ends.
Once you’ve gathered all your materials, you’re ready to start crocheting the lion!
The first step in creating your amigurumi lion is crocheting the body and head. The body will serve as the base, while the head will provide the character and charm.
Crocheting the Body:
Crocheting the Head:
One of the most distinctive features of a lion is its mane, which adds that bold and regal look to the animal. The mane is an essential part of your amigurumi lion project, and it’s what gives your lion its majestic appearance.
Making the Mane:
The beauty of this project is that you can make the mane as thick or thin as you like, depending on your preference for the lion’s look.
Now that you’ve completed the body and mane, it’s time to add the final details that will bring your amigurumi lion to life. These features—eyes, nose, and ears—give the lion character and expression.
Crocheting the Ears:
Attaching Safety Eyes:
Place the safety eyes on the lion’s face, about halfway between the top of the head and the bottom of the chin. Position them symmetrically for a balanced look.
Making the Nose:
Use black yarn to crochet a small triangle for the lion’s nose. Attach it below the eyes, right in the center of the lion’s face.
Embroidering the Mouth:
Using black yarn, stitch a small “V” shape below the nose to form the mouth. You can also add little whiskers if you wish to enhance the lion’s expression.
1. What kind of yarn should I use for the lion’s body and mane? It’s best to use soft, medium-weight yarn for the body and a slightly fluffier yarn for the mane. Acrylic or cotton yarns are great choices for amigurumi because they’re easy to work with and hold their shape well.
2. How do I make the lion’s mane stand out? To make the mane stand out, you can use a fluffy yarn or even a different color to add layers and depth. You can also trim the yarn to make the mane look more even and full.
3. Can I adjust the size of the lion? Yes! You can adjust the size of your lion by using thicker or thinner yarn and corresponding crochet hook sizes. A larger hook and thicker yarn will result in a bigger lion, while thinner yarn will create a smaller version.
4. How do I make sure my lion is sturdy? To ensure your lion is sturdy, stuff it well with fiberfill, but not so much that it becomes stiff. A firm stuffing will help the lion hold its shape without being too bulky.
5. Can I make a female version of this lion? Absolutely! To create a female lion, you could modify the mane to be smaller and sleeker. You can also add accessories like a small crown or different-colored yarn to differentiate the male and female versions.
Creating your very own amigurumi lion crochet is a fulfilling project that’s both fun and educational. By following the steps in this guide, you’ll learn how to crochet the body, head, and features of your lion, with special attention to creating the stunning mane. Whether you’re a beginner or an experienced crocheter, Regal the Lion will add a sense of pride to your collection of amigurumi animals.
We hope this guide was helpful! Feel free to leave your feedback and share any suggestions you have. Your thoughts are always appreciated, and we can’t wait to hear how your lion turned out. Happy crocheting!