Creating a Crochet Little Jerry is a delightful and fun project, especially if you’re a fan of crocheting animals or characters.
Whether you are an experienced crocheter or a beginner, this project will provide you with a unique and adorable stuffed creation to add to your collection.
Little Jerry can be inspired by various sources, whether it’s a character from your favorite show or just an imaginative design, and making him as an amigurumi gives him that special charm.
In this guide, we will walk you through the steps of crocheting Little Jerry, from gathering materials to finishing touches. Let’s get started!
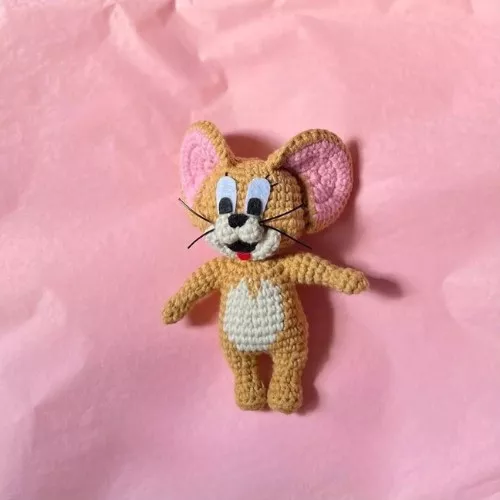
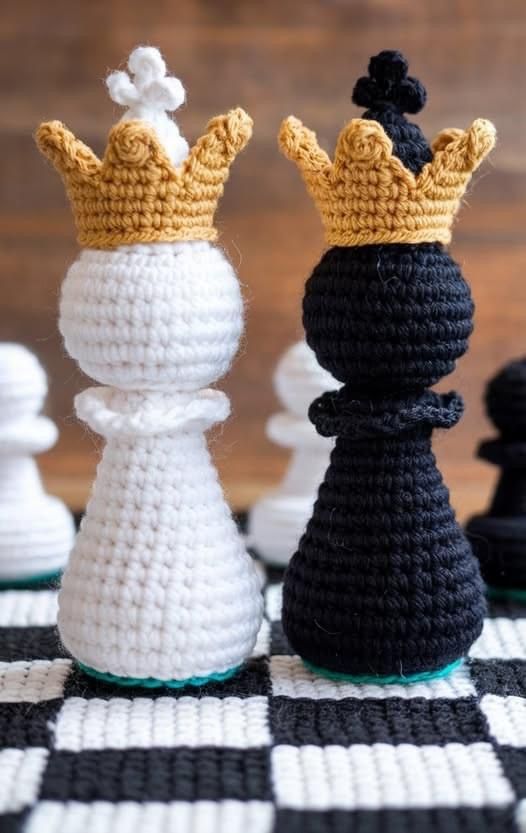
Image From Pinterest
Amigurumi, the Japanese art of crocheting small stuffed animals or characters, has gained global popularity. The technique involves crocheting in a spiral, which creates tightly woven stitches that can hold stuffing to form the shape of your creation. Crochet Little Jerry is the perfect project for anyone looking to craft a cute, lovable stuffed animal or character with a bit of personality and charm.
OTHER CROCHET PATTERNS HERE!
As you work through this pattern, you’ll learn about the basic techniques of amigurumi and how to apply them to create Little Jerry’s features, from his head to his limbs. By the end of the tutorial, you’ll have a lovable and detailed little crocheted friend!
1. Materials Needed
Before you dive into the world of crochet, it’s essential to gather all the materials you’ll need. Having everything prepared will help your crocheting process flow smoothly. Here’s a list of what you’ll need to get started on your Crochet Little Jerry:
- Yarn: Choose a medium-weight (worsted weight) yarn in the colors you want for Little Jerry. You’ll need main colors like brown, beige, or cream for the body and accents like dark brown, black, or other colors for the eyes, nose, and any clothing details.
- Crochet Hook: A 3.5mm to 4mm crochet hook is recommended. The size of the hook should be in accordance with your yarn thickness to create tight stitches that hold stuffing well.
- Safety Eyes: Safety eyes in sizes 6mm or 8mm are perfect for amigurumi projects like Little Jerry. They are safe for children if needed and help give your crochet creation a professional look.
- Polyester Fiberfill: This soft stuffing is what gives your Crochet Little Jerry its structure and plush feel. Be careful not to overstuff; you want the doll to be soft and squishy but not overly firm.
- Yarn Needle: A yarn needle helps with sewing the pieces of Little Jerry together, as well as weaving in any loose yarn ends.
- Scissors: A sharp pair of scissors is important for trimming any excess yarn as you finish up your project.
With all of these materials ready, you are now equipped to begin crocheting Little Jerry!
2. Basic Crochet Techniques
Before we get into the detailed steps, let’s briefly go over the basic crochet techniques you’ll use throughout the project. Understanding these techniques will make it easier to follow the pattern and create Little Jerry:
- Magic Ring: A magic ring, also called an adjustable loop, is used to begin crocheting in the round. It allows you to pull the loop tight, closing the center without leaving a hole. To make a magic ring, wrap the yarn around your fingers, insert your hook into the loop, and crochet into it.
- Single Crochet (SC): This is the most basic and commonly used stitch in amigurumi. It creates a dense and tight fabric, perfect for making small, stuffed toys. To make a single crochet, insert your hook into a stitch, yarn over, and pull through both loops.
- Increase and Decrease: As you shape Little Jerry’s body, you’ll use increases and decreases. To increase, crochet two single crochets into the same stitch. To decrease, crochet two stitches together to reduce the size of the piece.
- Working in a Spiral: Most amigurumi is worked in continuous rounds, which means you do not join each round with a slip stitch. This creates a smooth spiral, but you should mark the beginning of each round with a stitch marker so you know where each new round starts.
- Joining Pieces: Once you’ve crocheted the various pieces (head, body, arms, etc.), you’ll use a yarn needle to sew them together securely. Make sure the pieces are aligned properly and tightly stitched.
With these techniques in mind, you’re ready to begin crocheting Little Jerry!
3. Step-by-Step Instructions
Now that you’ve gathered your materials and understand the basic techniques, let’s start crocheting Little Jerry! We’ll begin with the head and work our way down to the arms, legs, and other details.
Head:
- Start with a magic ring, and crochet 6 single crochets into the ring. (6)
- Increase in each stitch around, making 12 single crochets. (12)
- Work one single crochet in the next stitch, then increase in the next stitch. Repeat around. (18)
- Work one single crochet in the next two stitches, then increase in the next stitch. Repeat around. (24)
- Continue working evenly (no increases or decreases) for several rounds, until the head reaches the desired size.
- Stuff the head lightly with fiberfill.
- Begin decreasing by working one single crochet in the next two stitches, then crocheting two stitches together. Repeat around, until the hole is closed.
- Attach the safety eyes and embroider a small smile or mouth using black yarn.
Body:
- Start with a magic ring, and crochet 6 single crochets into the ring. (6)
- Increase in each stitch around to make 12 single crochets. (12)
- Increase every other stitch until the body reaches the desired width.
- Work evenly for several rounds to form the middle section of the body.
- Begin decreasing to shape the bottom of the body.
- Stuff the body lightly with fiberfill.
- Attach the head securely to the body.
Arms (Make 2):
- Start with a magic ring, and crochet 6 single crochets into the ring. (6)
- Work evenly for a few rounds to form a tube.
- Stuff the arms lightly with fiberfill.
- Attach the arms to the sides of Little Jerry’s body.
Legs (Make 2):
- Start with a magic ring, and crochet 6 single crochets into the ring. (6)
- Continue crocheting evenly for several rounds to form a tube.
- Stuff the legs lightly with fiberfill.
- Attach the legs to the bottom of the body.
Tail (Optional):
- Ch 6, then crochet 5 single crochets into the second chain from the hook.
- Work in a spiral to form the tail.
- Attach the tail to the back of Little Jerry’s body.
Ears (Optional):
- Start with a magic ring, and crochet 6 single crochets into the ring. (6)
- Increase in each stitch until the ears are the desired size.
- Attach the ears to the top of the head.
4. Customization Tips
Once your Crochet Little Jerry is complete, you may want to personalize it further. Here are some ideas for customization:
- Facial Features: You can create different expressions for Jerry’s face by experimenting with embroidery or felt. Add eyebrows, a different mouth shape, or even a small nose for added character.
- Clothing and Accessories: You could dress Little Jerry in a tiny sweater, pants, or even add a scarf for a little extra personality. Use fabric, felt, or yarn to make small clothing items that will fit your doll.
- Hair: For added fun, crochet a small tuft of hair or a specific hairstyle to personalize Little Jerry further.
- Vary the Size: If you want a larger or smaller version of Little Jerry, you can change the yarn weight or adjust the number of stitches to make the doll fit your desired size.
- Add Patches: You could add small patches or designs to Jerry’s clothing or body, like a heart, star, or even stripes to make the doll stand out more.
- Use Different Yarn: Play around with different yarn textures or colors. You could make a version of Little Jerry in pastels, or experiment with sparkly or variegated yarn to create an entirely unique look.
FAQ
1. Can I use different yarn for this pattern? Yes! You can use any yarn that fits your desired size for Little Jerry. Just make sure the yarn you choose is not too thick or too thin compared to the recommended yarn weight.
2. Can I make Little Jerry bigger or smaller? Absolutely! You can adjust the size of Little Jerry by changing the yarn thickness or adjusting the number of stitches and rows in the pattern.
3. How do I add the safety eyes? Insert the safety eyes into the head before you fully close it, and ensure they are placed symmetrically. Secure them by attaching the back fastener and pulling tightly.
4. How long does it take to make Little Jerry? It depends on your crochet speed, but making Little Jerry can take anywhere from 3 to 6 hours to complete.
5. How do I make Jerry’s tail? You can crochet a small, simple tail with a chain and single crochets, or you can skip the tail entirely for a more basic version.
PATTERN HERE
Conclusion
Congratulations! You’ve successfully learned how to crochet Little Jerry. By following this pattern and adding your own creativity, you can make an adorable amigurumi character to enjoy or give as a gift. Remember that amigurumi is all about having fun and personalizing the project to make it uniquely yours. We hope this guide has helped you bring your Little Jerry to life, and we’d love to hear how your project turned out! Don’t forget to share your tips and suggestions in the comments. Happy crocheting!


