
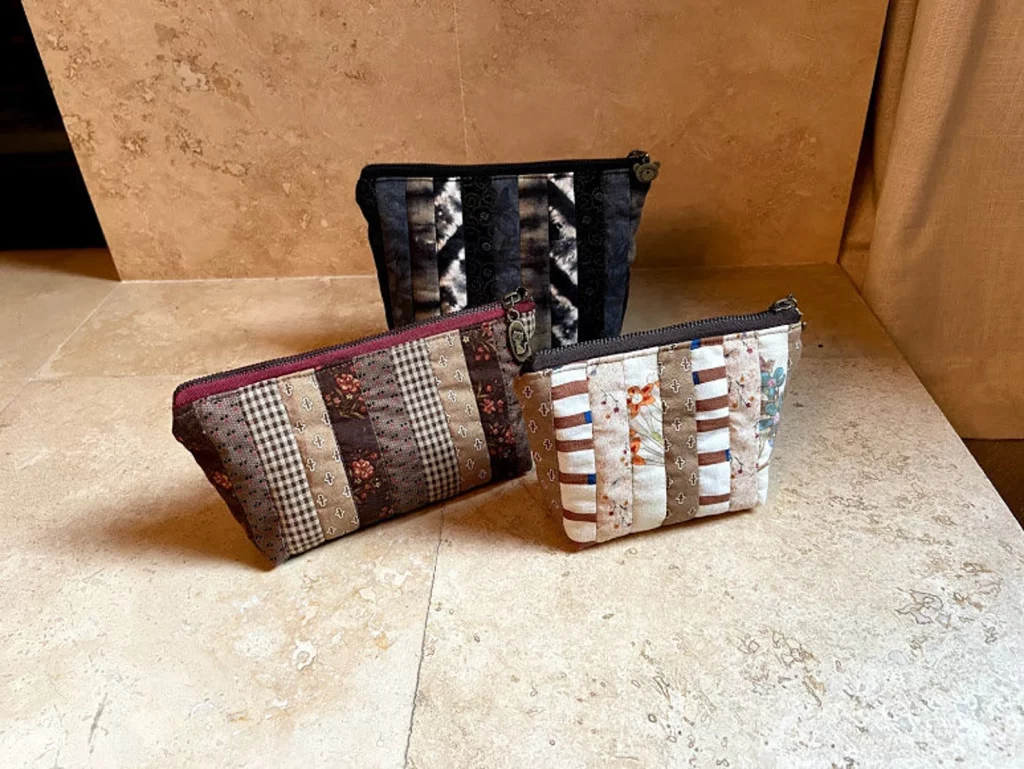
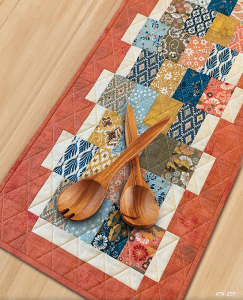
Horizontal Row Quilt - Pattern

The Patchwork bag – Pattern is a wonderful and creative way to blend functionality with the timeless charm of quilting. Whether you’re a beginner in sewing or a seasoned crafter, making a patchwork bag is not only satisfying but also a great opportunity to repurpose fabric scraps into something truly stylish and useful.
Patchwork bags come in all shapes and sizes—tote bags, pouches, crossbody bags, and even backpacks. With a little patience and a touch of creativity, you can design a completely unique accessory that reflects your personal style. The beauty of using the Patchwork bag – Pattern is that no two bags are ever the same.
In this guide, we’ll walk you through everything from materials and techniques to helpful tips and customization ideas. We’ll also cover how to structure your bag, how to quilt your patches, and how to finish it like a pro. So grab your fabric scraps, thread, and sewing machine—it’s time to dive into the beautiful world of patchwork!
Starting your Patchwork bag – Pattern project begins with selecting the right materials. One of the best things about patchwork is that it’s a fantastic way to use leftover fabrics, giving your bag a unique and eco-friendly appeal.
Choose a mix of cotton fabrics in different prints and colors. Cotton is durable, easy to sew, and ideal for both beginners and experienced quilters. Try to balance bold prints with solids or subtle patterns so your bag doesn’t become visually overwhelming.
You’ll also need batting or interfacing to give your bag structure and durability. Fusible fleece is a popular choice because it’s easy to apply with an iron and adds a soft, padded feel to the bag.
Other essential materials include lining fabric, thread, sewing pins or clips, a rotary cutter, cutting mat, quilting ruler, and of course, a reliable sewing machine. Optional but helpful tools are a walking foot for easier quilting and a zipper foot if you plan to add closures.
Don’t forget bag hardware such as zippers, magnetic snaps, or D-rings if you’re planning straps or closures. These small details will elevate your project and add function and style.
Lastly, be sure to have your Patchwork bag – Pattern printed or accessible digitally to guide you through cutting, piecing, and assembling the bag. A good pattern offers measurements, diagrams, and step-by-step instructions.
Now that your materials are ready, it’s time to begin the most creative step in the Patchwork bag – Pattern process: piecing together your fabric patches. This is where you can play with color, texture, and layout.
Start by cutting your fabric into equal-sized squares, rectangles, or triangles—depending on the pattern you’ve chosen. Most patchwork bags use simple square or strip layouts, which are easier for beginners and quicker to sew.
Lay out your fabric pieces on a flat surface before sewing to see how they look together. This allows you to adjust the arrangement to create balance and harmony in your color palette and design.
Sew the pieces together using a 1/4-inch seam allowance, pressing the seams flat as you go. This keeps your patchwork neat and prevents bulk. You can press the seams to one side or open, depending on your personal preference or the pattern’s recommendation.
Once your patchwork front is complete, you can add quilting if desired. Quilting lines can be straight, diagonal, or decorative, and they help to hold the fabric layers together while adding texture and strength.
Repeat this process for the back panel of your bag if you want both sides to be patchworked. Otherwise, you can use a solid fabric for contrast, which also speeds up the project if you’re short on time.
The next phase of the Patchwork bag – Pattern involves constructing the actual bag. This is where your project comes to life and starts looking like something you can proudly carry or gift.
Start by adding interfacing or batting to the wrong side of your patchwork panels. This will give your bag its body and help maintain shape. Follow your pattern’s instructions to trim the panels to their final size after quilting.
Cut and prepare your lining fabric. If your pattern includes interior pockets, now is the time to sew those into the lining. Pockets can be as simple as a patch-style or more complex with zippers or divisions for organization.
Next, sew the main patchwork panels together, right sides facing. Use clips or pins to keep everything aligned, especially at seams. Once the outer shell is formed, repeat the same steps with the lining but leave a small gap at the bottom to turn the bag later.
Attach the straps or handles as instructed in your pattern. These can be made from fabric, leather, or webbing, depending on the desired look. If you’re using hardware like rings or adjustable sliders, take care to reinforce the stitching.
Finally, place the lining inside the outer bag, right sides together, and sew around the top edge. Pull the entire bag through the gap left in the lining, then sew the gap closed. Push the lining inside, press the top edge, and optionally topstitch for a polished finish.
With the basic structure of your Patchwork bag – Pattern complete, it’s time for the fun part—personalizing your creation with thoughtful details that make it your own.
You can add embellishments like embroidery, buttons, lace, or appliqué to the front of your bag. Hand-stitching a name or phrase makes the bag a meaningful gift or personal keepsake.
Consider using contrasting thread for topstitching or quilting to add a pop of color. This small detail can make a big visual impact and tie your color scheme together beautifully.
You can line the interior with bright or novelty fabrics for a fun surprise when you open the bag. This is a great way to use up smaller pieces of cherished fabrics.
To make your bag extra functional, add key holders, pen loops, or interior zipped pockets. These elements turn a basic bag into something you’ll want to use every day.
Think about the seasons or occasions for your fabric choices. Floral prints for spring, dark plaids for fall, or even holiday-themed patchwork for gifting. The possibilities are endless.
Lastly, label your creation! A custom-made tag or signature adds a professional touch, and if you’re selling your bags or gifting them, it adds authenticity and love to your work.
Q1: Is the Patchwork bag – Pattern suitable for beginners?
Yes! Most patchwork bag patterns are beginner-friendly, especially those using simple square or strip layouts. They offer a great introduction to both quilting and bag construction.
Q2: Can I use fabric scraps for this project?
Absolutely. In fact, patchwork bags are ideal for using up leftover fabric. Mixing scraps adds charm and uniqueness to every bag.
Q3: Do I need to quilt the patchwork?
Quilting is optional but recommended. It helps reinforce the structure, adds durability, and gives the bag a professional finish.
Q4: How long does it take to make a patchwork bag?
The time varies depending on the complexity and size, but most basic bags can be completed in one to two afternoons.
Q5: What’s the best type of fabric to use?
Cotton is the most common and recommended fabric for patchwork due to its ease of use and durability.
Q6: Can I wash a patchwork bag?
Yes, if all your fabrics are prewashed and colorfast. Use a gentle cycle and cold water, then air dry to prevent shrinking or damage.
Creating a Patchwork bag – Pattern is a rewarding project that combines beauty, sustainability, and function. With just a few materials and a bit of creativity, you can make a stylish, personalized accessory that’s perfect for daily use or heartfelt gifting.
In this article, we explored everything from choosing materials to assembling the bag, quilting techniques, and adding finishing touches. Whether you’re sewing your first patchwork bag or your fiftieth, each one becomes a unique reflection of your craftsmanship and care.
Have you tried making a patchwork bag? Share your thoughts, ideas, or tips in the comments below. We’d love to hear your feedback and suggestions for future projects. Happy sewing!


