
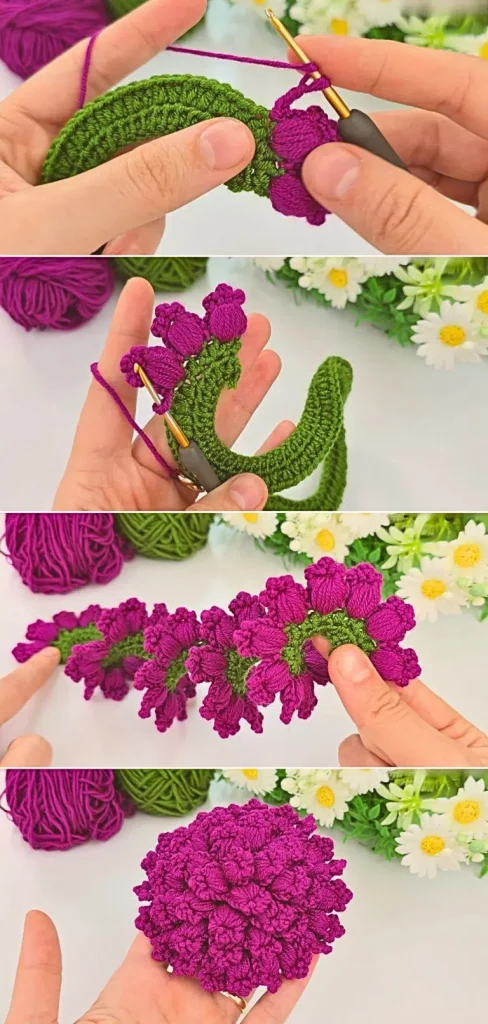
Lily in Crochet - Pattern

Mastering the 3D Crochet Bud Flower – Pattern is an exciting milestone for any fiber artist who wants to transition from flat designs to sculptural, lifelike creations that pop off the fabric. This specific design is a favorite among enthusiasts because it captures the delicate, tightly furled essence of a real flower about to bloom, offering a level of realism that standard 2D motifs simply cannot match. Whether you are looking to embellish a cozy winter hat, create a stunning floral bouquet for a wedding, or add a sophisticated touch to a baby blanket, this pattern provides the perfect blend of structural integrity and aesthetic charm.
When you begin working on a 3D Crochet Bud Flower – Pattern, you are engaging in a technique known as “layered crocheting,” where stitches are worked into different loops or levels to create volume and depth. Unlike traditional motifs that lie flat against a surface, these buds utilize specialized stitch placements to curve the petals inward, mimicking the natural tension found in organic plant life. By choosing the right vibrant yarn and a hook that complements your tension, you can transform simple loops into a miniature masterpiece that looks almost fresh-picked from a garden, making it a standout project for your handmade portfolio.
The beauty of the 3D Crochet Bud Flower – Pattern lies in its incredible versatility and the sheer joy of watching a three-dimensional shape take form under your fingers. For many, it serves as a meditative practice, as the repetitive nature of the petal construction allows for a flow state that is both relaxing and productive. In the following sections, we will explore everything from the essential materials needed to the complex finishing touches that will ensure your crochet flowers look professional, durable, and breathtakingly beautiful, providing you with all the tools necessary to master this botanical crochet art.
To achieve the best results with your 3D Crochet Bud Flower – Pattern, selecting the right fiber is the first and most critical step in the creative process. Most experts recommend using a mercerized cotton yarn in a sports weight or DK weight because cotton holds its shape much better than acrylic or wool blends. The mercerization process gives the yarn a subtle luster and a crispness that is essential for defining the edges of the bud, ensuring that the 3D effect doesn’t collapse under its own weight over time.
Your choice of crochet hook size will directly impact the “tightness” of the petals in your 3D Crochet Bud Flower – Pattern. If you want a firm, sturdy bud that maintains its structure as a brooch or a hair accessory, it is often wise to go down one hook size from what the yarn label recommends. A smaller hook creates denser stitches, which are necessary for the internal structural support of the flower, preventing the “gaps” that can sometimes occur in looser lace crochet designs.
Color selection is where your 3D Crochet Bud Flower – Pattern truly comes to life, and playing with gradients or “variegated” yarns can add an extra layer of realism. Nature rarely produces flowers in a single, solid flat tone, so using a yarn with subtle color transitions can mimic the way light hits a real bud. For a more traditional look, deep roses, sunny yellows, or soft lavenders are perennial favorites that highlight the intricate stitch work and the three-dimensional depth of the finished piece.
Before you make your first slip knot, ensure you have a few essential notions on hand, such as sharp embroidery scissors and a sturdy tapestry needle. In the 3D Crochet Bud Flower – Pattern, weaving in ends can be slightly more challenging due to the layers of the petals, so having a needle that can navigate tight spaces is a huge plus. You might also want to keep some stitch markers nearby to track the beginning of your rounds, especially since this pattern is typically worked in a continuous spiral.
Tension consistency is the secret ingredient to a professional-looking 3D Crochet Bud Flower – Pattern. If your tension varies significantly between petals, the bud may look lopsided or irregular, which can detract from the organic symmetry of the design. Practicing a few “test petals” before starting the final project can help you find a comfortable rhythm, ensuring that each layer of the crochet bud fits perfectly within the next, creating a harmonious and balanced floral structure.
Lastly, consider the “environment” where your flowers will live, as this might influence whether you use floral wire or stuffing. Some versions of the 3D Crochet Bud Flower – Pattern suggest using a small amount of polyester fiberfill in the center to maintain the plumpness of the bud. Alternatively, if you are making a bouquet, you will need to learn how to integrate a wire stem during the initial rounds, which allows the handmade flower to stand upright in a vase just like a real blossom.
The foundation of any successful 3D Crochet Bud Flower – Pattern is the mastery of “Back Loop Only” (BLO) and “Front Loop Only” (FLO) stitches. By working into only one half of the stitch from the previous row, you leave the other loop exposed, which acts as a “ledge” or anchor point for the next layer of petals. This “ribbing” technique is what allows the flower to grow outward and upward simultaneously, providing the vertical height that defines the 3D crochet style.
To create the characteristic “cup” shape of the 3D Crochet Bud Flower – Pattern, you will frequently use a series of increases followed by intentional decreases. This process, often involving half-double crochet (hdc) and double crochet (dc) stitches, forces the fabric to curl inward on itself. Understanding how these stitches interact with the tension of the yarn will help you manipulate the “curl” of the petal, allowing you to decide how “open” or “closed” your floral bud appears.
The Front Post Double Crochet (fpdc) is another advanced stitch often utilized in the 3D Crochet Bud Flower – Pattern to add texture to the outer sepals or leaves. By wrapping the yarn around the post of the stitch rather than the top loops, you create a raised ridge that mimics the veins of a real plant. This added texture provides a tactile quality to the crochet project, making it feel more realistic and giving it a high-end, artisanal finish that is sure to impress.
In many variations of the 3D Crochet Bud Flower – Pattern, the “Popcorn” or “Puff” stitch is used at the very center of the bud to create a dense, textured core. These stitches involve working multiple incomplete stitches into the same space and then joining them at the top to create a “bulge.” This creates a focal point for the flower, drawing the eye toward the center and emphasizing the contrast between the tight core and the flowing outer crochet petals.
Slip stitches play a vital role in the 3D Crochet Bud Flower – Pattern by acting as the “connective tissue” between different layers. They are used to travel invisibly from one petal to the next, ensuring that the transitions are smooth and that the overall shape remains circular. Learning to keep your slip stitches loose enough to work into later, but tight enough to remain hidden, is a nuanced skill that significantly improves the aesthetic quality of your floral crochet work.
Finally, the concept of “scalloping” is used to finish the edges of the petals in a 3D Crochet Bud Flower – Pattern. By working a sequence of stitches with varying heights—such as starting with a single crochet, moving to a double crochet, and back down to a single crochet—you create a rounded, organic edge. This mimics the soft, undulating curves of a natural flower, bringing a sense of movement and life to the yarn-based creation that flat stitches simply cannot achieve.
Once you have completed the crochet portion of the 3D Crochet Bud Flower – Pattern, the “shaping” phase begins, which is where the true artistry happens. Unlike flat projects, a 3D flower often requires a bit of manual manipulation to look its best. You will need to gently tug and smooth the petals, encouraging them to sit in their natural positions. This “blocking with fingers” is a crucial step in ensuring that the crochet bud looks symmetrical and professionally finished.
If your 3D Crochet Bud Flower – Pattern includes a stem, the attachment process must be handled with care to ensure the flower doesn’t droop. Using a small dab of hot glue or carefully wrapping the yarn around a floral wire can provide the necessary support. Many crafters like to crochet a “receptacle”—the green part at the base of the flower—which hides the wire attachment and adds a level of botanical accuracy to the 3D crochet design.
For those who want their 3D Crochet Bud Flower – Pattern to have a permanent, “frozen” shape, using a fabric stiffener or a mixture of water and craft glue can be very effective. By dipping the petals or lightly spraying them, you can ensure that they maintain their curve even if they are handled frequently. This is particularly useful for flowers used in wedding bouquets or home decor items that will be displayed in high-traffic areas where they might get bumped.
Adding “veining” with a needle and thread is an optional but highly recommended step for the 3D Crochet Bud Flower – Pattern. By using a slightly darker or lighter shade of embroidery floss, you can stitch fine lines onto the petals, adding another layer of visual complexity. This small detail can make a massive difference, transforming a simple yarn flower into a piece of fine art that captures the delicate nuances of nature’s own patterns.
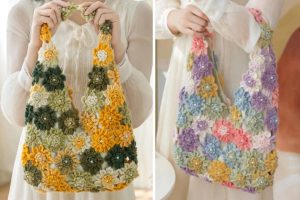
Layering multiple buds together can create a more dramatic effect than a single flower. When following the 3D Crochet Bud Flower – Pattern, consider making several buds in different stages of bloom—some tightly closed and others just starting to unfurl. Arranging these together on a single branch or as a cluster on a garment creates a “botanical story” that is much more engaging than a repetitive row of identical crochet motifs.
Finally, consider the center of your bud. While many 3D Crochet Bud Flower – Patterns use yarn for the center, you can also experiment with beads, pearls, or even dried flower stamens. Adding a small, shiny bead to the center can catch the light and add a touch of glamour to your work. This mix of media—combining yarn with other materials—is a growing trend in the modern crochet community, allowing for even more creative freedom.
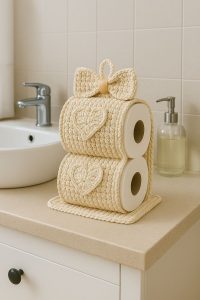
The beauty of the 3D Crochet Bud Flower – Pattern is that it can be used in almost any area of home decor or fashion. One popular use is “flower bombing” everyday items, such as turning a plain wicker basket into a floral masterpiece by sewing dozens of small buds around the rim. The 3D nature of these flowers adds a tactile, cozy feeling to any room, making the space feel more curated and personally handcrafted.
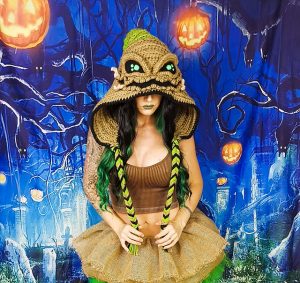
In the world of fashion, the 3D Crochet Bud Flower – Pattern makes for incredible statement jewelry. By attaching a small bud to a felt backing and adding a pin or a hair clip, you can create a one-of-a-kind accessory that complements a spring outfit. Because they are lightweight and soft, they are much more comfortable to wear than heavy metal jewelry, making them a popular choice for bohemian-style fashion enthusiasts and children alike.
For special occasions, a “forever bouquet” made using the 3D Crochet Bud Flower – Pattern is a thoughtful and sustainable gift. Unlike real flowers that wither in a week, these crochet buds will remain beautiful for years, serving as a lasting memento of a wedding, anniversary, or birthday. You can even scent the flowers with a drop of essential oil, adding a sensory layer to your crochet gift that makes it feel even more like the real thing.
Seasonal wreaths are another fantastic way to showcase your 3D Crochet Bud Flower – Pattern. By swapping out the colors—using pastels for spring, vibrant oranges for autumn, or whites and blues for winter—you can create a versatile decoration that changes with the months. The 3D volume of the buds ensures that the wreath looks lush and full, even if you only use a few flowers mixed with other greenery or crochet leaves.
If you are a fan of “scrap-busting,” the 3D Crochet Bud Flower – Pattern is your best friend. Because each bud is relatively small, you can use up those tiny leftover balls of yarn that aren’t enough for a full project. This allows you to create a “wildflower” collection with a wide variety of colors and textures, resulting in a vibrant, eclectic look that is both eco-friendly and visually stunning for your crochet collection.
Lastly, consider using these buds as decorative “toppers” for gifts. Instead of a plastic bow, tie a 3D crochet bud onto the ribbon of a wrapped present. This adds a “second gift” to the package that the recipient can keep and reuse, demonstrating a level of care and effort that is always appreciated. The 3D Crochet Bud Flower – Pattern is truly a gift that keeps on giving, offering endless possibilities for those who love to create and share beauty.
1. Is the 3D Crochet Bud Flower – Pattern suitable for total beginners?
While a total beginner might find the layering and post stitches a bit challenging, the pattern is excellent for those who have mastered basic stitches and are looking for a “step-up” project. Taking it slow and using stitch markers will help immensely.
2. Which yarn is best for a 3D effect?
Mercerized cotton is the gold standard. It has the stiffness required to hold the “3D” shape and the stitch definition needed to see the intricate details of the bud.
3. How do I stop my flowers from flattening over time?
Using a smaller hook to create tight stitches is the best prevention. For long-term display, a light misting of fabric stiffener or hairspray can help the petals keep their shape.
4. Can I wash my 3D crochet flowers?
Yes, but you must be gentle. Hand washing in cool water and reshaping the petals while they are damp is the best way to clean them without losing the 3D structure. Avoid the dryer at all costs!
5. How long does it take to make one bud?
Once you are familiar with the 3D Crochet Bud Flower – Pattern, a single bud can usually be completed in 30 to 60 minutes, making it a perfect “palette cleanser” project between larger works.
In this article, we have dived deep into the magical process of creating a 3D Crochet Bud Flower – Pattern, from the initial selection of mercerized cotton yarn to the technical mastery of BLO, FLO, and post stitches. We explored how to add realism through shaping, stiffening, and embellishing, and looked at the wide array of creative ways these buds can be used in your home and fashion. This project is a testament to the versatility of crochet, proving that with a hook and some string, you can truly recreate the beauty of the natural world.
We hope this guide has inspired you to start growing your own crochet garden! Whether you are making a single bud or a whole field of flowers, the process is sure to be rewarding.


