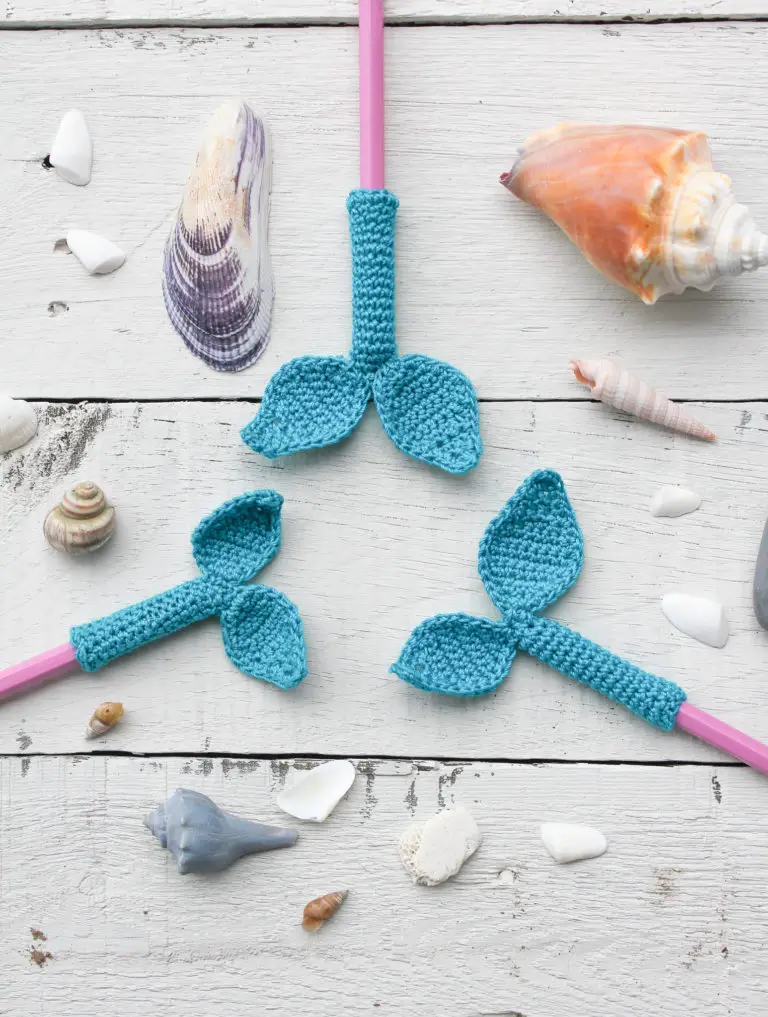
Mermaid Tail Pencil Topper Crochet - Pattern

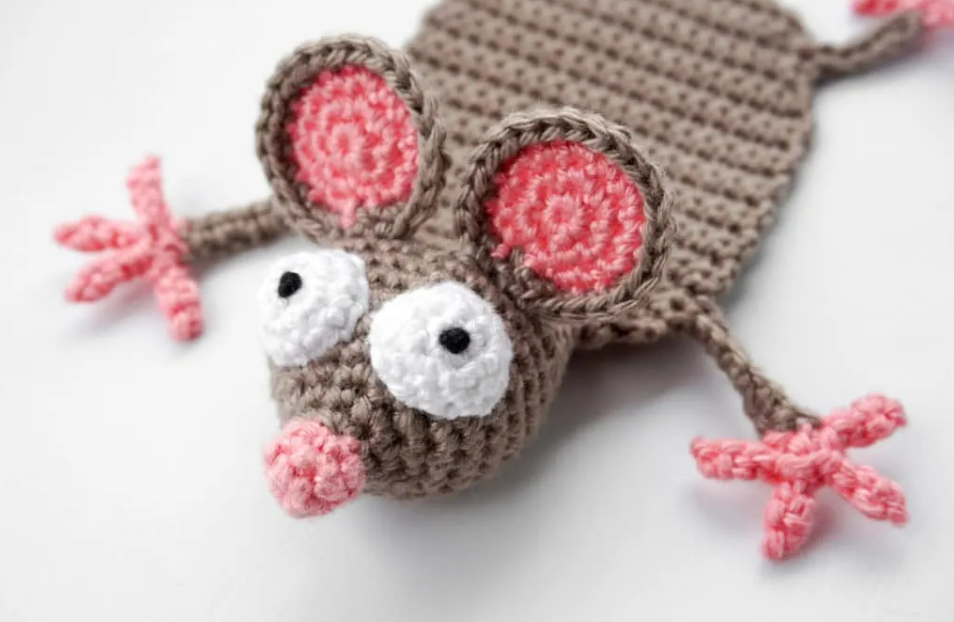
The Amigurumi Mouse Bookmark Crochet – Pattern is a delightful project that combines the charm of handmade toys with the practical utility of a reading accessory. For book lovers and craft enthusiasts alike, creating a crochet bookmark offers a unique way to personalize a reading experience while honing your crochet skills. This specific Amigurumi Mouse Bookmark Crochet – Pattern is designed to be both whimsical and functional, featuring a long, flat body that sits perfectly between the pages of your favorite novel, while a cute crochet mouse head and tiny paws peek out from the edges.
Starting an Amigurumi Mouse Bookmark Crochet – Pattern is an excellent entry point for beginners who want to explore the world of amigurumi without committing to a massive, time-consuming project. Because it requires only small amounts of cotton yarn, it is also a fantastic stash-buster project. Whether you are looking to make a thoughtful handmade gift for a librarian, a student, or a child, this mouse bookmark is guaranteed to bring a smile to anyone’s face every time they open their book.
In this comprehensive guide, we will delve deep into the Amigurumi Mouse Bookmark Crochet – Pattern, breaking down the essential steps to ensure your finished piece looks professional and holds up over years of use. We will explore the materials needed, the crochet stitches involved, and the specific assembly techniques that make amigurumi patterns so special. By following this detailed walkthrough, you will transform simple strands of thread into a durable and adorable reading accessory that bridges the gap between art and utility.
Selecting the right yarn is the first step in mastering the Amigurumi Mouse Bookmark Crochet – Pattern. For a bookmark, you want a material that is thin enough not to damage the book’s spine but sturdy enough to maintain its shape. A mercerized cotton yarn (weight 2 or 3) is usually the best choice because it offers great stitch definition and doesn’t pill easily.
The crochet hook size is equally important when working on your Amigurumi Mouse Bookmark Crochet – Pattern. Typically, a 2.0mm or 2.5mm hook is used to ensure the crochet stitches are tight. This tightness prevents the polyester fiberfill stuffing in the mouse’s head from leaking out, which is a common issue in lower-quality amigurumi projects.
You will also need a few basic notions to complete the mouse bookmark. A pair of safety eyes (6mm is a standard size) will give your mouse its personality, though you can also use embroidery thread to sew on eyes if the bookmark is intended for a very young child. Don’t forget a tapestry needle for weaving in ends and assembling the pieces.
Regarding the color palette, most crafters prefer classic shades like grey, white, or brown for the crochet mouse. However, the beauty of the Amigurumi Mouse Bookmark Crochet – Pattern is its versatility. Feel free to experiment with vibrant colors like mint green or soft pink to make your handmade bookmark stand out or to match the aesthetic of a specific book collection.
Stitch markers are your best friend when working in continuous rounds, which is the standard method for this pattern. Since the mouse head is small, it is very easy to lose track of your starting point. Using a simple plastic stitch marker or a scrap piece of contrasting yarn will save you time and prevent the frustration of having to frog your work.
Lastly, make sure you have a small amount of embroidery floss in pink or black. This is used to create the delicate nose and whiskers that give the Amigurumi Mouse Bookmark Crochet – Pattern its signature “cute factor.” These tiny details are what differentiate a generic crochet item from a high-quality, boutique-style amigurumi piece that people will cherish.
The foundation of the Amigurumi Mouse Bookmark Crochet – Pattern lies in the magic ring (or magic circle). This technique allows you to start crocheting in the round without leaving a hole in the center of the mouse’s head. Mastering the magic ring is essential for any amigurumi enthusiast, as it creates the polished, professional look required for high-end crochet toys.
Once the ring is established, the Amigurumi Mouse Bookmark Crochet – Pattern primarily uses the single crochet (sc) stitch. In the world of crochet patterns, the single crochet is the workhorse stitch because it creates a dense, opaque fabric. When working on the flat body of the bookmark, you will transition from working in rounds to working in rows to create the long, thin strip.
Increases and decreases are the tools you use to shape the mouse head. An invisible decrease (inv dec) is highly recommended for this Amigurumi Mouse Bookmark Crochet – Pattern. Unlike a standard decrease, the invisible version is nearly undetectable, ensuring that the curves of your mouse’s face are smooth and free of lumps or gaps that might show the stuffing inside.
The body of the Amigurumi Mouse Bookmark Crochet – Pattern is unique because it must be flat. To achieve this, you will often use a double crochet (dc) or half double crochet (hdc) for the length of the tail or the body strip. This ensures the bookmark isn’t too bulky, allowing the book to close properly while the amigurumi mouse sits playfully at the top.
Tension control is a subtle but vital skill when following this crochet pattern. If your tension is too loose, the bookmark will be floppy; if it is too tight, it may curl uncomfortably. Practice maintaining a consistent rhythm with your yarn hand to ensure that every single crochet is uniform, which is the hallmark of a skilled crochet artist.
Finally, learning how to change colors seamlessly is a great way to level up your Amigurumi Mouse Bookmark Crochet – Pattern. You might want to give your mouse a striped sweater or a different colored tail. The trick is to pull the new color through the last two loops of the previous stitch, creating a crisp transition that keeps the amigurumi’s design looking sharp and intentional.
Assembly is often the most challenging part of the Amigurumi Mouse Bookmark Crochet – Pattern, but it is also where the magic happens. You begin by stuffing the head firmly but carefully. You want the mouse head to be round and plush, but not so overstuffed that the crochet fabric stretches and reveals the white filling underneath.
Positioning the ears is the next crucial step in the Amigurumi Mouse Bookmark Crochet – Pattern. The ears define the character of the mouse. Placing them higher up creates a “surprised” look, while placing them wider apart makes the mouse look more relaxed. Use sewing pins to test different positions before you commit to sewing them down with your tapestry needle.
Attaching the head to the flat body requires a whip stitch or a ladder stitch. For the Amigurumi Mouse Bookmark Crochet – Pattern, you want the connection to be incredibly secure, as bookmarks are frequently pulled and tugged out of bags. Ensure you catch the inner loops of both pieces to create a sturdy bond that won’t wobble or detach over time.
The limbs and tail are usually the final pieces added to the Amigurumi Mouse Bookmark Crochet – Pattern. The tail is often a simple chain stitch or a thin i-cord. Attaching the tail to the very bottom of the bookmark strip allows it to hang out of the bottom of the book, acting as a secondary indicator of where the reader left off.
Don’t overlook the importance of weaving in your ends. In a project as small as the Amigurumi Mouse Bookmark Crochet – Pattern, loose threads can easily come undone. Use your needle to weave the yarn tails through the dense single crochet stitches in multiple directions. This “locking” technique ensures your handmade mouse remains intact through years of reading.
The final touch in the assembly process is the facial embroidery. Using a satin stitch for the nose and simple straight stitches for the whiskers brings the Amigurumi Mouse Bookmark Crochet – Pattern to life. This is the moment where your crochet project stops being a collection of yarn loops and starts being a charming character with a personality of its own.
Customization is what makes the Amigurumi Mouse Bookmark Crochet – Pattern so addictive. You can easily adjust the length of the body strip to accommodate different book sizes, from pocket-sized paperbacks to large coffee table books. Simply add more rows to the central strip of the crochet pattern until you reach your desired length.
Adding accessories to your mouse is another way to personalize the Amigurumi Mouse Bookmark Crochet – Pattern. You could crochet a tiny hat, a small bow, or even a miniature book for the mouse to “hold.” These small additions make your handmade gift feel even more special and show the recipient the extra effort you put into the crochet work.
If you are making the Amigurumi Mouse Bookmark Crochet – Pattern as a gift, consider the presentation. Sliding the bookmark into a brand-new book or wrapping it around a gift card to a local bookstore creates a cohesive and thoughtful package. The mouse bookmark becomes a keepsake that reminds the reader of your friendship every time they pick up a book.
For those interested in selling their work, the Amigurumi Mouse Bookmark Crochet – Pattern is a high-margin item. It uses very little material and can be completed in a few hours. When listing them on platforms like Etsy, use keywords like “crochet mouse,” “book lover gift,” and “unique bookmark” to attract the right audience to your amigurumi shop.
Think about the texture of the yarn as well. Using a fuzzy yarn for the head and a smooth cotton for the body can create an interesting tactile contrast. While fuzzy yarn is harder to see stitches in, the result is a “realistic” Amigurumi Mouse Bookmark Crochet – Pattern that feels incredibly soft to the touch, making it a favorite for children.
Lastly, always include “care instructions” when gifting or selling your Amigurumi Mouse Bookmark Crochet – Pattern. Since it is made of yarn, it can get dirty over time. Advise the owner to hand wash the bookmark in cold water and lay it flat to dry. This ensures that the crochet mouse stays in perfect condition for many stories to come.
What is the best yarn for an Amigurumi Mouse Bookmark Crochet – Pattern?
The best choice is 100% cotton yarn or a cotton blend. Cotton is less stretchy than acrylic, which helps the bookmark stay flat and prevents the mouse head from becoming distorted over time. It is also thin enough to fit between pages without damaging the book’s binding.
How long does it take to finish this crochet pattern?
For an intermediate crocheter, the Amigurumi Mouse Bookmark Crochet – Pattern usually takes between 2 to 4 hours. Beginners might take a bit longer as they navigate the shaping of the head and the assembly of the small parts.
Can I wash my crochet mouse bookmark?
Yes, but hand washing is highly recommended. Use a mild detergent and cool water. Gently squeeze out the excess water without wringing the piece, and reshape the mouse head while it is damp. Let it air dry completely before putting it back into a book.
Is this pattern suitable for complete beginners?
While it is helpful to know the basic stitches, the Amigurumi Mouse Bookmark Crochet – Pattern is a great “first amigurumi” project. The shapes are simple, and because the project is small, you can see your progress quickly, which is very encouraging for those new to crochet.
What size safety eyes should I use?
For most amigurumi bookmarks, 5mm or 6mm safety eyes are ideal. If you are making this for a baby or a pet, it is safer to embroider the eyes using black embroidery floss to avoid any choking hazards.
How do I prevent the bookmark from curling?
Curling often happens if your tension is too tight or if you are using a hook that is too small for the flat section. You can “block” your crochet bookmark by pinning it to a flat surface, spraying it with a little water, and letting it dry. This helps the stitches relax and lay flat.
In this article, we have explored the wonderful world of the Amigurumi Mouse Bookmark Crochet – Pattern, covering everything from the selection of cotton yarn to the intricate details of facial embroidery.
We learned that a successful crochet bookmark requires a balance of tight stitches for the amigurumi head and a flat, flexible tension for the body. By following the tips on assembly, materials, and customization, you now have the knowledge to create a charming, functional piece of art that any reader would treasure.


