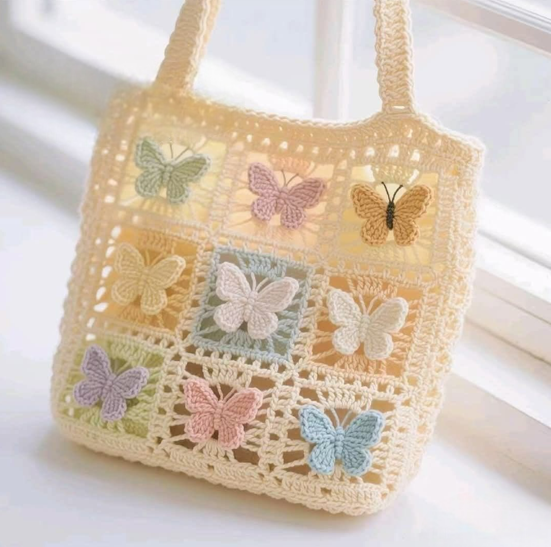
Crochet Butterfly Bag - Tutorial

Bag Crochet Granny Square – Pattern designs are taking the fashion world by storm, blending nostalgic aesthetics with modern functionality. Whether you are a seasoned crafter or a curious beginner, creating a handmade crochet bag using the classic granny square technique is a rewarding project that allows for endless personalization. This Bag Crochet Granny Square – Pattern guide is designed to help you navigate the process of turning simple yarn into a durable, stylish accessory that stands the test of time.
To start your journey with a Bag Crochet Granny Square – Pattern, it is essential to understand that the granny square is the building block of many iconic crochet patterns. These squares can be joined in various configurations to create everything from crochet tote bags and boho shoulder bags to compact market bags. By mastering the basic crochet stitches involved, you gain the creative freedom to experiment with vibrant color palettes and premium cotton yarn, ensuring your final piece is both sturdy and beautiful.
Choosing the right Bag Crochet Granny Square – Pattern is the first step toward achieving a professional-looking result. In the following sections, we will break down the essential components of the project, including yarn selection, crochet hook sizes, and the assembly process. Our goal is to provide a comprehensive resource that optimizes your workflow and ensures your crochet project is successful, functional, and visually stunning.
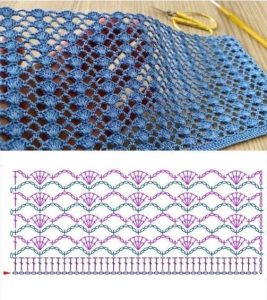
The Bag Crochet Granny Square – Pattern typically starts with a magic ring or a small chain loop, which serves as the foundation for the center of your square. This traditional crochet technique relies on clusters of double crochet stitches separated by chain spaces to create the iconic “window” effect. Mastering this rhythm is crucial because the consistency of your tension determines how well the squares will eventually fit together during the bag assembly.
When working on a Bag Crochet Granny Square – Pattern, you must pay close attention to the stitch count in each round. Each corner of the square requires an increase, usually consisting of two clusters of stitches with a chain-two space between them. This expansion ensures the square remains flat and symmetrical, which is vital for a structured crochet bag that doesn’t sag or warp when filled with your belongings.
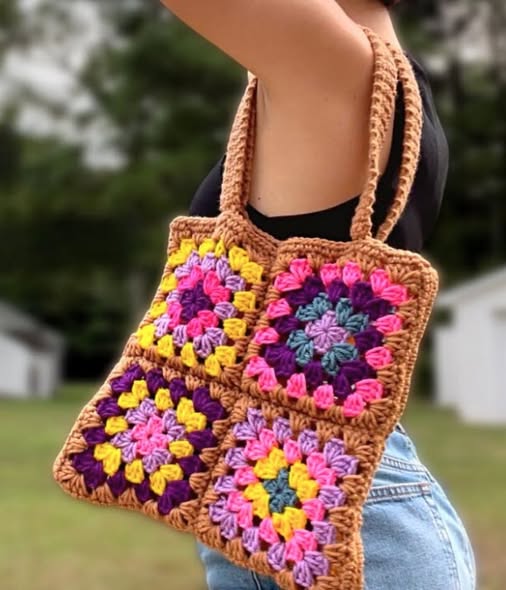
The beauty of the Bag Crochet Granny Square – Pattern lies in its versatility regarding color changes. You can choose to work the entire square in a solid color for a minimalist look or switch yarns at the end of every round to create a multicolored vintage aesthetic. If you are aiming for a modern crochet style, try using neutral tones like beige, cream, and charcoal to make a sophisticated accessory.
Another key element of the Bag Crochet Granny Square – Pattern is the choice of material. For a durable daily-use bag, we highly recommend using 100% cotton yarn or a mercerized cotton blend. These fibers have less stretch than acrylic or wool, meaning your crochet tote will maintain its shape even after carrying groceries, books, or electronics.
For those following a Bag Crochet Granny Square – Pattern for the first time, it is helpful to use stitch markers. Placing a marker in the corner spaces helps you identify where to place your increases without constantly counting every stitch. This simple SEO-friendly crochet tip can significantly speed up your production time and reduce errors in the pattern execution.
Lastly, understanding the gauge is important for this Bag Crochet Granny Square – Pattern. While a slight variation in size won’t ruin a blanket, a square that is too large or too small will change the overall dimensions of your crochet bag. Always work a test square first to ensure your crochet hook size matches the weight of the yarn you have selected for this project.
To successfully execute a Bag Crochet Granny Square – Pattern, you need more than just yarn; you need the right tools for a professional finish. A 5.0mm (H) crochet hook is the standard for medium-weight yarn, but always refer to your yarn label for specific recommendations. Using a hook that is too large can result in a “floppy” bag, while a hook that is too small might make the crochet fabric too stiff and difficult to work with.
Beyond the hook, your Bag Crochet Granny Square – Pattern kit should include a sharp pair of craft scissors and a tapestry needle. The needle is particularly important for weaving in ends, a task that can be tedious but is essential for the longevity of your handmade bag. Ensuring your ends are tucked securely prevents the granny squares from unraveling during use or washing.
The Bag Crochet Granny Square – Pattern often requires a lining material if you plan to carry smaller items like pens or coins. Choosing a cotton fabric lining that complements your yarn color adds a layer of professionalism and durability. You might also want to look into magnetic snaps or zippers to provide a secure closure for your finished crochet bag.
For handles, the Bag Crochet Granny Square – Pattern can be adapted in several ways. You can crochet sturdy straps using the thermal stitch for extra strength, or you can purchase leather handles or bamboo rings for a more “high-end” boutique look. The choice of handle can completely transform the crochet bag design from a casual beach bag to an elegant evening purse.
Don’t forget about blocking boards when working on your Bag Crochet Granny Square – Pattern. Blocking involves pinning your finished squares to a board and lightly steaming them to ensure they are all exactly the same size. This step is the “secret ingredient” that makes the joining process much easier and ensures the seams of the bag are perfectly straight.
Finally, consider the stitch definition of your yarn. A smooth-ply yarn will make the details of the Bag Crochet Granny Square – Pattern pop, while a “fuzzy” or “halo” yarn might hide the intricate stitch work. For beginners, a light-colored yarn is often easier to work with because it allows you to see the stitch anatomy clearly as you build each square.
Once you have completed the required number of squares for your Bag Crochet Granny Square – Pattern, it is time for the joining phase. There are several methods to join crochet squares, including the slip stitch join, the whip stitch, or the invisible mattress stitch. The method you choose will affect the texture of the bag’s surface, with some joins creating a decorative ridge and others lying completely flat.
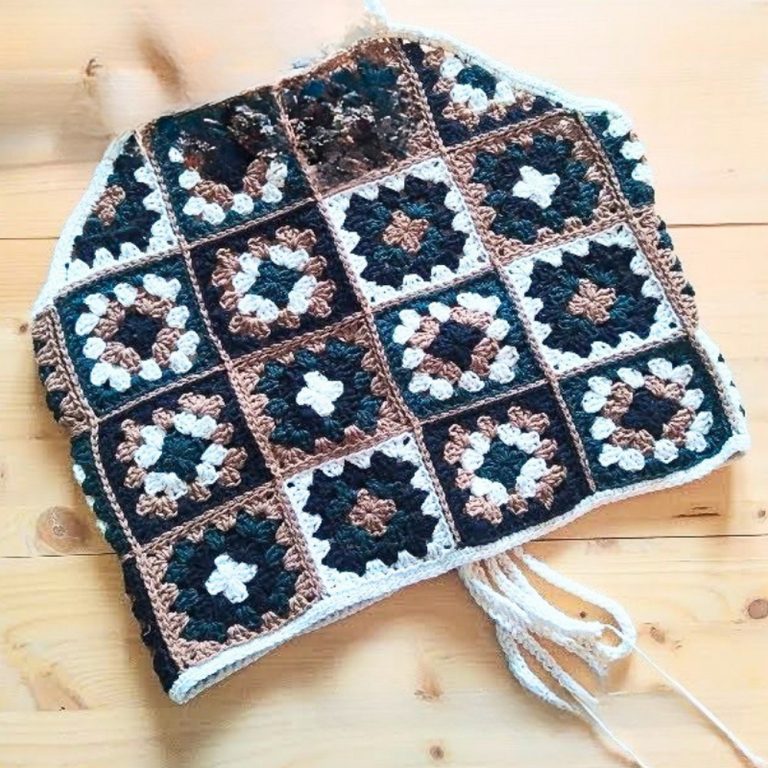
A popular layout for a Bag Crochet Granny Square – Pattern is the 13-square construction. This specific bag layout involves joining the squares in a way that creates the bottom, sides, and pointed tops for the handles. It is helpful to lay your squares out on a flat surface first to visualize the color arrangement and ensure the pattern flow is exactly how you want it before you start sewing.
As you join the pieces of your Bag Crochet Granny Square – Pattern, keep your tension consistent. If you pull your joining thread too tight, the crochet bag will pucker; if it is too loose, there will be visible gaps between the squares. Using the same yarn weight for joining as you did for the squares themselves creates a cohesive and professional finished product.
After the main body of the Bag Crochet Granny Square – Pattern is assembled, you will move on to the edging. Adding a few rounds of single crochet or crab stitch (reverse single crochet) around the opening of the bag provides structural integrity. This prevents the top of the crochet tote from stretching out of shape when it is being carried.
The handles are the final structural step in the Bag Crochet Granny Square – Pattern. If you are crocheting the straps, consider working them directly into the bag’s corners for a seamless look. For extra strength, you can “carry” a piece of nylon cord inside your crochet stitches, which ensures the straps will never stretch, no matter how much weight you put in your crochet bag.
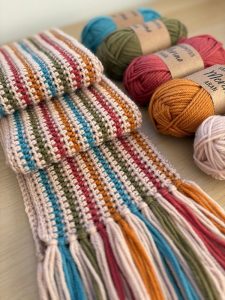
Finally, the finishing touches involve adding any hardware or embellishments mentioned in your Bag Crochet Granny Square – Pattern. This could include crochet tassels, wooden beads, or a custom garment tag. These small details are what elevate a simple DIY project into a unique, handcrafted fashion statement that you can be proud to wear or gift.
One of the best things about a Bag Crochet Granny Square – Pattern is how easily it can be adapted to your personal style. You can change the size of the bag simply by adding more rounds to each square or by using a bulkier yarn weight. A “mini” version of this pattern makes a perfect crochet pouch for earphones, while a larger version serves as an excellent crochet market bag.
Experimenting with different granny square designs within the same Bag Crochet Granny Square – Pattern is another way to add flair. You don’t have to stick to the traditional design; you can use sunflower granny squares, daisy patterns, or even geometric 3D squares. Mixing and matching these designs can create a bohemian patchwork bag that is truly one of a kind.
Texture plays a big role in a Bag Crochet Granny Square – Pattern. Try incorporating bobble stitches or front post double crochets to give your squares a tactile feel. This adds depth to the crochet fabric and makes the bag’s design look much more intricate and high-end, even if the construction remains simple and straightforward.
Color theory is your friend when following a Bag Crochet Granny Square – Pattern. Using complementary colors (like blue and orange) creates a high-energy, vibrant look, while analogous colors (like greens and blues) offer a more calming, harmonious feel. If you’re unsure, search for crochet color palettes online to find inspiration for your next handmade accessory.
For a more functional Bag Crochet Granny Square – Pattern, consider the “bottom” of the bag. You can crochet a solid rectangular base instead of using squares for the bottom to give the bag more “stand-up” ability. This is particularly useful for crochet handbags that you want to set down on tables without them collapsing or spilling their contents.
Lastly, remember that the Bag Crochet Granny Square – Pattern is just a template. Don’t be afraid to break the rules! Add a crochet fringe, incorporate some metallic thread for a bit of sparkle, or even change the shape of the bag by adding “half-squares” (triangles) to the design. The goal is to enjoy the creative process and end up with a crochet masterpiece that reflects your personality.
1. What is the best yarn for a Bag Crochet Granny Square – Pattern?
The best yarn is 100% cotton or a cotton/linen blend. These fibers are durable, have very little stretch, and offer great stitch definition, which is essential for maintaining the shape of a crochet bag.
2. How many squares do I need for a standard crochet bag?
It depends on the bag design, but the most popular Bag Crochet Granny Square – Pattern requires 13 squares. Some smaller designs use only 2 large squares, while complex totes can use 24 or more.
3. Do I need to line my crochet granny square bag?
While not strictly necessary, lining a crochet bag is highly recommended. It prevents the crochet fabric from stretching, hides the “wrong side” of your work, and keeps small items from falling through the chain spaces of the granny squares.
4. How do I wash my finished crochet bag?
If you used cotton yarn, you can usually hand wash the bag in cool water with a mild detergent. Lay it flat on a towel to dry (reshape it while wet) to ensure the Bag Crochet Granny Square – Pattern keeps its form.
5. Can a beginner complete this Bag Crochet Granny Square – Pattern?
Absolutely! The granny square is one of the first things many people learn in crochet. As long as you know how to do a double crochet and a chain stitch, you can successfully finish this project.
6. How do I stop my crochet bag straps from stretching?
You can prevent stretching by using a tighter stitch (like single crochet), lining the straps with fabric ribbon, or crocheting around a non-stretch cord. This ensures your crochet tote remains comfortable to carry over time.
Creating a Bag Crochet Granny Square – Pattern is a wonderful way to express your creativity while producing something practical and stylish. In this article, we have explored the foundational crochet stitches, the essential materials like cotton yarn, the assembly techniques for joining squares, and various ways to customize your handmade bag.
By following these steps and paying attention to details like blocking and lining, you can create a high-quality accessory that rivals any store-bought item.
.


