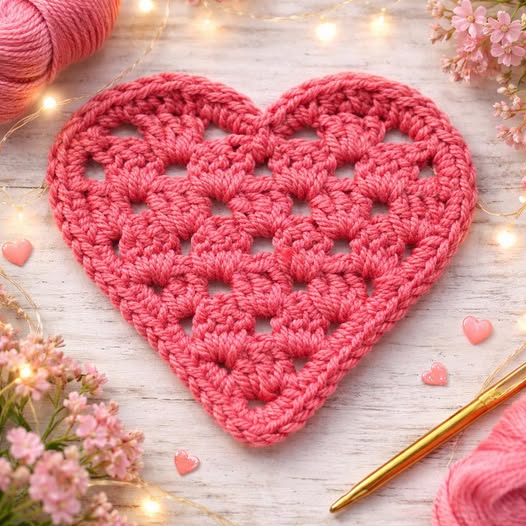
Heart-shaped coaster Crochet- Pattern

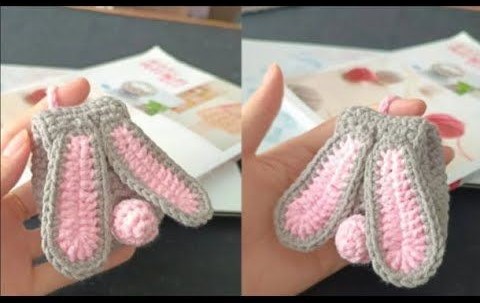
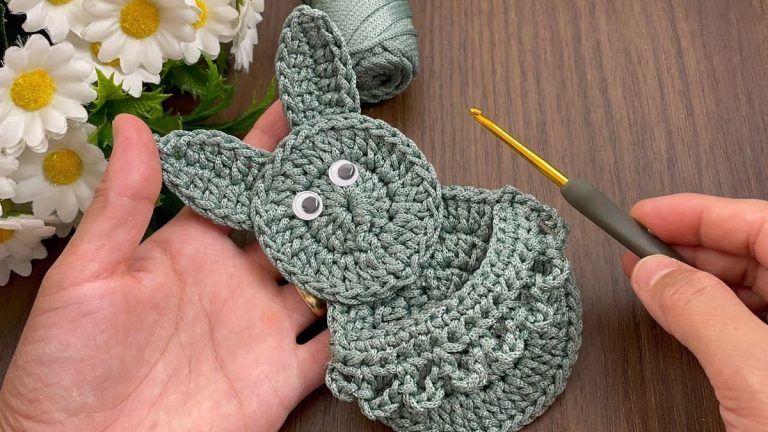
The Bunny Ears Mini Bag Crochet – Pattern is one of the most charming projects you can undertake if you are looking to combine utility with an irresistible touch of whimsy. This handmade accessory has taken the crafting world by storm because it appeals to both children who love animal-themed items and adults who appreciate the kawaii aesthetic in their wardrobe. Whether you are preparing a special gift for Easter or simply want a unique crochet pouch to hold your essentials, this guide will provide everything you need to succeed.
Creating a Bunny Ears Mini Bag Crochet – Pattern allows for immense creativity, especially when it comes to selecting textures and colors. Using soft cotton yarn or a plush velvet finish can completely change the look and feel of the final product, making it either a sturdy everyday bag or a decorative keepsake. Because the construction is relatively straightforward, it serves as an excellent way to practice shaping techniques and attaching secondary pieces, like the iconic long ears, to a main body.
By following this Bunny Ears Mini Bag Crochet – Pattern, you are engaging in a mindful activity that results in a high-quality, sustainable fashion piece. In an era of fast fashion, a custom crochet bag stands out as a statement of individuality and craftsmanship. Throughout this article, we will break down the essential components of the project, ensuring that your tension control and stitch definition are perfect, resulting in a professional-grade mini crochet purse that everyone will ask about.
The foundation of a successful Bunny Ears Mini Bag Crochet – Pattern begins with selecting the appropriate yarn weight. For a structured bag that holds its shape, a medium-weight cotton yarn (worsted) is highly recommended. Cotton is durable, has excellent stitch definition, and won’t stretch out as much as wool when you place items inside the bag.
Your choice of crochet hook size is equally vital to the integrity of the project. Typically, using a hook slightly smaller than what the yarn label suggests (such as a 3.5mm or 4.0mm hook) will create a denser fabric. This ensures that the crochet stitches are tight enough so that small items like coins or lip balm don’t slip through the gaps in your hand-stitched bag.
Don’t forget the aesthetic details that make the Bunny Ears Mini Bag Crochet – Pattern truly pop. You will need a small amount of pink yarn for the inner ear details and perhaps some safety eyes or embroidery thread for the face. Having a high-quality tapestry needle is essential for weaving in ends and securely attaching the ears so they stand upright or flop stylishly.
If you want a more luxurious feel, you might consider chenille yarn or velvet yarn. While these are slightly harder to work with because it is more difficult to see the stitch count, the result is an incredibly soft plush bunny bag. For beginners, however, sticking to a smooth mercerized cotton will make the learning process much smoother and more enjoyable.
Hardware is an optional but professional addition to your crochet project. Adding a magnetic snap closure or a zipper can turn a simple pouch into a functional secure mini bag. If you prefer a purely textile approach, a crochet drawstring made from a simple chain stitch or i-cord works perfectly to keep the bunny’s “head” closed and secure.
Finally, gather your basic crochet notions like a pair of sharp scissors and stitch markers. Using markers is particularly important when working in the continuous round, which is a common technique for this Bunny Ears Mini Bag Crochet – Pattern. Keeping track of the start of each row prevents the bag from looking lopsided and ensures the ears are perfectly centered.
To execute a flawless Bunny Ears Mini Bag Crochet – Pattern, you must be comfortable with the single crochet (sc) stitch. This stitch creates a firm, opaque fabric that provides the necessary support for the bag’s structure. Most amigurumi-style bags rely heavily on this stitch because it hides the stuffing (if used) and keeps the contents of the bag hidden and safe.
The magic ring (or magic circle) is the best way to start the base of your bag. This technique allows you to pull the center tight, leaving no hole at the bottom of your crochet accessory. Mastery of the magic ring ensures that your Bunny Ears Mini Bag Crochet – Pattern looks professional from the very first row, providing a clean and polished foundation.
Increasing and decreasing are the core techniques used for shaping crochet projects. To create the rounded bottom of the bag, you will use inc (increases), which involves placing two stitches into one. To taper the ears or the top of the bag, you will use inv dec (invisible decreases), a technique that reduces the stitch count without leaving visible bumps in your crochet fabric.
The “ears” in the Bunny Ears Mini Bag Crochet – Pattern often require working in the back loops only (BLO) or front loops only (FLO) to create specific textures or ridges. Learning to identify these loops will allow you to add depth to the ears, making them look more realistic. These small details are what elevate a simple DIY craft into a piece of crochet art.
Another important skill is the slip stitch (sl st), which is used to join rounds or move the yarn across the fabric without adding height. In this pattern, the slip stitch is often used to finish the edges of the bag or to attach the strap. A clean invisible join at the end of your work will make the seam of your mini bag virtually undetectable.
Lastly, understanding gauge is important if you want your bag to be a specific size. While a mini bag is forgiving, checking your crochet gauge ensures that the ears aren’t disproportionately large or small compared to the body. Taking the time to practice these fundamental crochet techniques will make the assembly of your Bunny Ears Mini Bag much faster and more satisfying.
The construction of the Bunny Ears Mini Bag Crochet – Pattern usually starts from the bottom up. You will begin by creating a flat circle, gradually increasing the number of stitches in each round until the base reaches your desired diameter. Maintaining an even tension during this stage is crucial to ensure the bag sits flat when placed on a surface.
Once the base is complete, you will transition to the sides of the bag by crocheting rounds without any further increases. This part of the crochet process is often the most relaxing, as you can see the walls of your Bunny Ears Mini Bag grow taller. It is during these rounds that you can introduce color changes if you want a striped or multi-colored animal bag.
The “bunny” elements are typically crocheted separately and then sewn onto the main body. For the ears, you will usually create two long, pointed shapes. To make them stand up, you can use a stiffer yarn or even insert a bit of plastic mesh inside. The Bunny Ears Mini Bag Crochet – Pattern relies on these ears for its identity, so taking your time with the sewing and assembly is vital.
Attaching the strap is the next phase. You can choose between a short handheld strap or a long crossbody strap. A popular method for straps in the Bunny Ears Mini Bag Crochet – Pattern is the Romanian Point Lace cord, which is incredibly sturdy and doesn’t stretch over time, making your handmade purse much more functional for long-term use.
Adding the facial features is where the personality of your Bunny Ears Mini Bag comes to life. Whether you choose a simple minimalist bunny face with just eyes or a full set of whiskers and a nose, ensure everything is symmetrical. Using embroidery on crochet is a delicate task, so use a sharp needle to pierce the yarn fibers for the most secure and clean look.
The final step in the Bunny Ears Mini Bag Crochet – Pattern is the lining, which is optional but highly recommended. Adding a fabric lining (like cotton or satin) protects the crochet work from being stretched by the weight of your items. It also adds a professional “boutique” feel to your crochet creation, making it a perfect handmade gift or a product to sell in an online shop.
One of the best things about the Bunny Ears Mini Bag Crochet – Pattern is how easy it is to customize. You can add crochet flowers, bows, or even a small pom-pom tail on the back to enhance the theme. Experimenting with variegated yarn can also create a beautiful “watercolor” effect on the bunny’s fur, making every mini bag you create a one-of-a-kind piece.
If you are making the Bunny Ears Mini Bag Crochet – Pattern for a child, safety should be your top priority. Instead of using plastic safety eyes, which can be a choking hazard for very young children, consider embroidering the eyes directly onto the fabric. Using organic cotton yarn is also a great choice for kids, as it is soft on the skin and free from harsh chemicals.
Size adjustments are also quite simple within this pattern. If you want a larger tote bag version of the bunny, simply use a chunkier yarn and a larger hook. The logic of the crochet increases remains the same, but the scale will increase significantly. This versatility makes the Bunny Ears Mini Bag Crochet – Pattern a staple for any crochet designer’s library.
Proper care will ensure your crochet bag lasts for years. Since most bags are made from cotton or acrylic, they are often machine washable on a delicate cycle. However, to maintain the shape of the ears and any delicate embroidery, hand washing in cold water with a mild detergent is always the safest bet. Lay the bag flat on a towel to air dry to prevent stretching.
Storing your Bunny Ears Mini Bag correctly is also important. Avoid hanging it by the strap for long periods when it is heavy, as this can cause the crochet stitches to elongate permanently. Instead, store it flat or stuffed with some tissue paper to maintain its rounded shape. This keeps your handmade accessory looking brand new and ready for use at any time.
Finally, don’t be afraid to share your progress! The crochet community is vast and supportive. Posting photos of your finished Bunny Ears Mini Bag Crochet – Pattern on social media or platforms like Ravelry can provide inspiration to others. Whether you are a hobbyist or a professional crochet seller, this pattern is a joyful project that brings a smile to anyone who sees it.
What is the best yarn for a Bunny Ears Mini Bag?
For a durable and well-defined Bunny Ears Mini Bag Crochet – Pattern, 100% cotton yarn is the gold standard. It provides the structure needed to keep the bag’s shape and is less likely to pill over time.
Can a beginner finish this Bunny Ears Mini Bag Crochet – Pattern?
Yes! As long as you know the basic crochet stitches like single crochet, increases, and decreases, you can complete this project. It is a great way to learn how to assemble different parts into a final product.
How long does it take to crochet the Bunny Ears Mini Bag?
Because it is a mini bag, it is a relatively quick project. An intermediate crocheter can usually finish the entire Bunny Ears Mini Bag Crochet – Pattern, including assembly, in about 3 to 5 hours.
Do I need to line the bag with fabric?
While not strictly necessary, lining your crochet bag prevents it from stretching and ensures small items don’t fall out. It adds a level of durability and professional finish to your handmade accessory.
How do I make the bunny ears stand up?
To make the ears stand up in the Bunny Ears Mini Bag Crochet – Pattern, use a smaller hook to create a tight fabric, or consider inserting a piece of stiff felt or wire inside the ear before sewing it to the bag.
Can I sell the bags I make from this pattern?
Most designers allow you to sell finished products made from their crochet patterns, but it is always best to check the specific terms of the Bunny Ears Mini Bag Crochet – Pattern you are following and give credit to the creator.
In this article, we explored the wonderful world of the Bunny Ears Mini Bag Crochet – Pattern, covering everything from the selection of the best cotton yarns to the technical mastery of single crochet stitches and assembly.
We discussed how to shape the bag using increases and decreases, the importance of adding professional touches like fabric linings, and how to customize your bunny with unique facial expressions or floral embellishments. This project is not just a craft; it is a way to create a functional piece of crochet fashion that carries a sense of joy and personality.
