Crochet Rose - Pattern

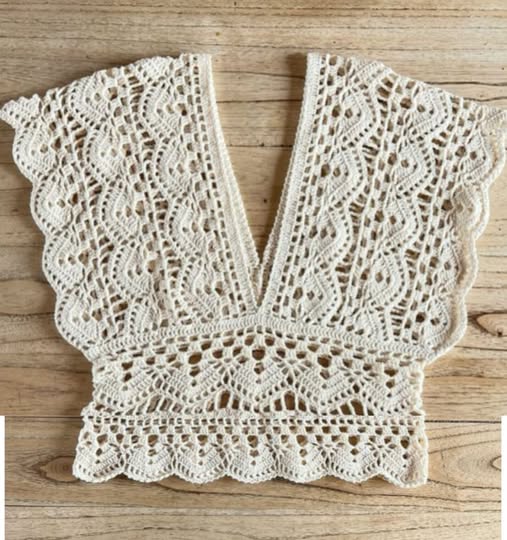
If you’re searching for a crochet blouse tutorial – pattern, you’re in the right place. Whether you’re a beginner or have some experience with crochet, this guide will walk you through everything you need to know to create a beautiful and wearable crochet blouse. From choosing the right materials to understanding the stitches and assembling the blouse, this tutorial offers everything in one place.
Creating your own crochet blouse is not only rewarding but also allows you to wear something unique and handmade. By following a clear crochet blouse tutorial – pattern, you’ll gain the skills to customize your project according to your style, body type, and preferences. Plus, crocheting can be a relaxing and therapeutic hobby that helps you unwind while crafting something beautiful.
This guide includes detailed steps, helpful tips, and important techniques that will guide you through every phase of the process. We’ll cover yarn selection, sizing, shaping, assembly, and finishing. Everything is structured into four main sections, so you can easily follow along and achieve great results—even if you’ve never crocheted a blouse before.
Before starting your crochet blouse tutorial – pattern, it’s essential to gather the right materials. This step will set the foundation for your project and ensure you’re comfortable during the process.
Start with choosing the right yarn. Cotton yarn is highly recommended for crochet blouses, especially for warm weather. It’s breathable, soft on the skin, and gives your blouse a nice drape. Look for yarn labeled as DK (double knit) or sport weight for the best results.
Pick a crochet hook that matches the yarn weight. Most yarn labels suggest a hook size. For DK cotton, a 3.5 mm to 4.5 mm hook usually works well. Using the right hook size ensures your stitches come out evenly and the blouse fits properly.
Have a pair of sharp scissors and a tapestry needle ready. The scissors will help with cutting yarn, while the tapestry needle will be used later to weave in ends and assemble the blouse.
Don’t forget measuring tools. A soft measuring tape is crucial for ensuring the blouse fits your body correctly. You’ll also need stitch markers if you’re working in the round or want to mark specific points on your pattern.
Optional but helpful: a notebook to track rows and stitch counts, especially for beginners. Taking notes helps you avoid mistakes and lets you pick up where you left off more easily.
Lastly, have your crochet blouse tutorial – pattern printed or on a tablet. Following a written pattern ensures consistency and helps you visualize the blouse before it’s complete.
Now that you have your materials, it’s time to dive into the actual crochet blouse tutorial – pattern. One of the most overlooked yet critical steps in crochet is checking your gauge. This ensures your blouse will fit as intended.
A gauge swatch is a small sample piece you crochet using the stitch pattern and yarn specified. It helps you measure how many stitches and rows fit into a specific area, usually 4×4 inches. If your gauge is off, the blouse might turn out too small or too large.
Follow the pattern’s instructions carefully. Start with the stitch indicated—this could be a simple double crochet or a more complex lace stitch. Count your stitches and rows per inch to check accuracy.
If your swatch doesn’t match the pattern’s gauge, adjust your hook size. A smaller hook tightens your stitches, while a larger hook loosens them. Re-test until your gauge matches the required count.
Once the gauge is set, follow the pattern instructions to begin the blouse. Most patterns are divided into sections such as front panel, back panel, and sleeves. Work on each section separately, keeping track of your rows.
Remember, reading a crochet pattern takes practice. Terms like “ch”, “dc”, “sc”, and “sl st” stand for chain, double crochet, single crochet, and slip stitch. Refer to a crochet abbreviation chart if needed.
Take your time with the first rows. Getting the base row correct makes the rest of the project smoother and ensures your blouse has a polished, professional finish.
Once you’ve finished the individual parts of the crochet blouse tutorial – pattern, it’s time to assemble everything into a wearable piece. This phase is all about shaping, aligning, and joining the sections.
Start by laying out the front and back panels flat. Use pins or stitch markers to align the edges where you’ll join them. Usually, you’ll join the shoulders first using a slip stitch or whip stitch technique.
After the shoulders are connected, fold the blouse to line up the side seams. Attach the sides from the bottom hem to the underarm, leaving space for the armholes as indicated in the pattern.
Next, attach the sleeves. If you crocheted the sleeves separately, position them to fit into the armhole and stitch them in. Alternatively, some patterns work sleeves directly into the armhole using a circular method.
Make sure your seams are even and neat. Uneven seams can cause the blouse to hang improperly or feel uncomfortable. Take your time and double-check as you go.
Once the major parts are joined, try on the blouse to ensure the fit is correct. This is a good moment to make minor adjustments before finishing the edges.
Finally, weave in all loose ends using the tapestry needle. This gives your blouse a clean look and prevents it from unraveling. At this point, your blouse is almost complete!
Now that your blouse is assembled, it’s time to add the final details that make your project stand out. This is where you can truly personalize your crochet blouse tutorial – pattern.
Start by adding borders or trims to the neckline, sleeves, and hem. A simple scalloped or picot edging adds elegance without being overly complicated. Choose a contrasting yarn color for extra flair.
Consider adding buttons, ribbons, or ties. These can be both decorative and functional, especially if your pattern includes an open-back design or a front closure.
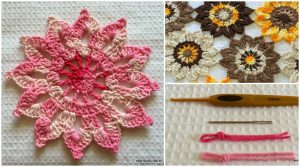
If the blouse feels too basic, you can incorporate crochet motifs like flowers or lace medallions. Attach them to the shoulder, pocket area, or sleeve ends to give your blouse character.
Block your blouse to enhance its shape. Blocking involves wetting or steaming the blouse and pinning it into shape as it dries. This step evens out stitches and improves the garment’s drape.
Want to make more versions? Use the same pattern with different yarn colors or fibers. This allows you to create both summer and winter versions by switching from cotton to acrylic or wool blends.
Lastly, take a photo and share your creation! Whether on social media or in a crafting group, your finished blouse can inspire others to try their own crochet blouse tutorial – pattern.
1. What yarn is best for a crochet blouse?
Cotton yarn is ideal due to its breathability and softness. Look for DK or sport weight yarns for better drape and comfort.
2. Can beginners follow a crochet blouse tutorial – pattern?
Yes! Many patterns are beginner-friendly. Choose a simple design with basic stitches like single crochet and double crochet to start.
3. How do I adjust the blouse size?
Use your body measurements and adjust the stitch count or number of rows. Many patterns provide size charts to help with customization.
4. What does “gauge” mean in crochet patterns?
Gauge refers to the number of stitches and rows per inch. It ensures your finished blouse matches the intended size. Always make a gauge swatch before starting.
5. Do I need to block my finished blouse?
Blocking is optional but highly recommended. It helps even out stitches and shapes the blouse for a professional look.
6. How long does it take to make a crochet blouse?
It depends on the complexity of the pattern and your crochet speed. On average, it can take 8–20 hours to complete a blouse.
Creating your own blouse following a crochet blouse tutorial – pattern is a fulfilling experience that combines creativity, craftsmanship, and style. In this article, you learned how to select the right materials, understand pattern instructions, assemble the blouse, and add finishing touches for a professional result.
Whether you’re just beginning or looking to expand your crochet wardrobe, this guide gives you a solid foundation to build beautiful, wearable pieces. Don’t forget to explore different yarns, patterns, and embellishments to make your blouse truly yours.
We’d love to hear from you! Leave a sincere opinion in the comments—was this tutorial helpful? Do you have suggestions or pattern ideas you’d like to see next? Your feedback helps us create better content for all crochet lovers out there.


