
Crochet Butterfly Bag - Pattern

The Crochet Butterfly Bag – Pattern is an enchanting project that combines the whimsical beauty of nature with the practical utility of a handmade accessory, making it a favorite for crafters of all skill levels. There is something truly magical about watching a simple skein of yarn transform into a delicate, winged creature that is sturdy enough to carry your daily essentials like a phone, wallet, and keys. Whether you are aiming for a bohemian festival look or a sweet, colorful gift for a child, mastering a Crochet Butterfly Bag – Pattern allows you to showcase your artistic flair through intricate wing textures and vibrant color transitions.
Working on a Crochet Butterfly Bag – Pattern offers a unique opportunity to experiment with symmetry and structural shaping that you won’t find in a standard rectangular tote. The bag usually consists of two large butterfly-shaped panels joined together, or a central pouch adorned with smaller winged appliques that create a 3D effect. In the world of modern fiber arts, this handmade bag stands out as a high-quality statement piece, proving that functional items can also be deeply imaginative and visually stunning when created with the right techniques.
In this comprehensive guide, we will explore every essential element needed to successfully complete your Crochet Butterfly Bag – Pattern, from selecting the most durable yarns to the technical stitches that define those iconic wing curves. We will focus on creating a professional-grade finish that ensures your bag is as strong as it is beautiful. By the end of this article, you will feel confident in your ability to follow this crochet pattern, troubleshoot any shaping issues, and add your own personalized touches to the final design. Let’s get our hooks ready and dive into the colorful world of butterfly-themed crochet.
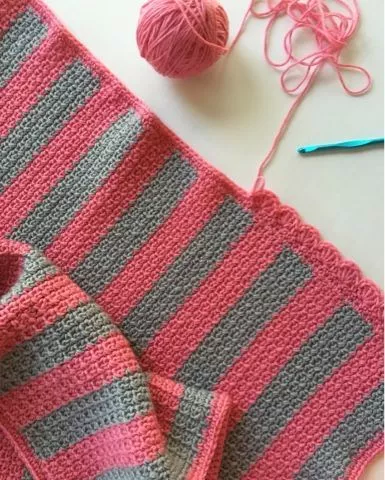
The success of your Crochet Butterfly Bag – Pattern begins with choosing a yarn that offers the right balance of flexibility and strength. 100% mercerized cotton yarn is highly recommended for this project because it has very little stretch, ensuring that your butterfly wings won’t sag or lose their shape when the bag is filled. Additionally, the slight sheen of mercerized cotton enhances the stitch definition, making the intricate patterns in the wings look crisp and professional.
When looking at a Crochet Butterfly Bag – Pattern, the yarn weight plays a significant role in the final size and “feel” of the accessory. A DK or worsted weight yarn is generally preferred for a standard-sized handbag, as it provides enough thickness to be durable without becoming overly heavy. If you are making a miniature butterfly pouch for a child, switching to a fingering weight yarn with a smaller hook will result in a more delicate and lightweight crochet butterfly design.
Choosing the correct crochet hook size is vital for maintaining the structural integrity of your Crochet Butterfly Bag – Pattern. It is often wise to use a hook that is half a size smaller than what the yarn label recommends to create a tighter gauge. This ensures that the fabric is dense enough to prevent small items from slipping through the stitches, which is a common concern when making any type of handmade crochet bag intended for daily use.
Color selection is where the Crochet Butterfly Bag – Pattern truly comes to life, allowing you to mimic real species or create a fantasy creature. Variegated yarn or “cake” yarns with long color changes can create a stunning ombre effect across the wings without the need for frequent yarn joins. If you prefer a more traditional look, choosing high-contrast solid colors for the “body” and the “wing borders” will make the butterfly silhouette pop against any outfit.
Don’t forget about the lining fabric. While not every Crochet Butterfly Bag – Pattern requires one, adding a cotton or satin lining can elevate your project to a boutique-quality accessory. A lining protects the interior stitches from snagging on keys and provides an extra layer of security. If your wing design features open lace-work, a contrasting lining color can peek through the stitches, adding another dimension of visual interest to your crochet project.
Lastly, consider the hardware and fasteners that will complete your Crochet Butterfly Bag – Pattern. Magnetic snaps, zippers, or even a simple wooden button can serve as a secure closure for the bag’s opening. For the straps, you might choose to crochet them directly onto the wings or use metal D-rings to attach a leather or chain strap for a more modern, fashionable finish. These details turn a simple craft into a functional handcrafted masterpiece.
The most critical part of a Crochet Butterfly Bag – Pattern is achieving perfect symmetry between the left and right wings. This is typically done by working in mirror image, where you reverse the order of increases and decreases on the second wing. Mastering the increase (inc) and decrease (dec) techniques is essential here, as they are the tools that allow you to sculpt the yarn into the graceful, rounded curves that define a butterfly’s flight.
A popular starting point for a Crochet Butterfly Bag – Pattern is the Magic Ring. This technique allows you to start the center of the wings or the body of the butterfly with a tight, seamless circle that won’t leave a hole. From this center point, you will radiate outward, using double crochet or treble crochet stitches to create the wider parts of the wings. The magic ring provides the strength needed for a high-tension start.
The Picot Stitch is frequently used in a Crochet Butterfly Bag – Pattern to create the decorative “points” or “bumps” along the outer edges of the wings. By chaining three and slip-stitching back into the first chain, you add a level of detail that makes the butterfly look more realistic. This small stitch adds a professional “lace” finish to the crochet design, making the wings look delicate while the base remains sturdy.
To create the “cells” or patterns within the wings, many Crochet Butterfly Bag – Patterns incorporate chain spaces (ch-sp) and skipped stitches. This creates a “mesh” effect that can be filled with a different color later or left open for a light, summery feel. Understanding how to count these spaces accurately is key to ensuring that both panels of your butterfly bag match perfectly when it comes time to join them together.
Working in the Back Loops Only (BLO) is a technique that can add 3D texture to your Crochet Butterfly Bag – Pattern. By only using the back loop, you leave a visible ridge on the front of the work, which can be used to simulate the “veins” found in real butterfly wings. This adds a level of sophisticated textile art to your bag, moving it beyond a simple flat motif and into a more sculptural realm of crochet.
Finally, let’s discuss the Slip Stitch (sl st) join. When you have completed the two main panels of your Crochet Butterfly Bag – Pattern, you will need to join them along the bottom and sides to create the bag’s cavity. Using a slip stitch join on the “wrong side” creates a hidden, strong seam, while doing it on the “right side” can create a decorative braided border that highlights the butterfly’s shape.
The “body” of the butterfly in your Crochet Butterfly Bag – Pattern often acts as the central spine that holds the weight of the bag. This section should be worked in single crochet to ensure a dense, non-stretch fabric. Because the straps are often attached to the top of this central unit, it needs to be reinforced with extra stitches to prevent the weight of your belongings from pulling the butterfly out of its natural shape.
For the straps of your Crochet Butterfly Bag – Pattern, the I-Cord technique is a fantastic choice. An I-cord is a round, knitted-look crochet tube that is incredibly strong and has very little “give.” Unlike a simple chain-and-row strap, an I-cord won’t dig into your shoulder or stretch out over time, making it the perfect functional choice for a handmade handbag that you plan to wear frequently.
If you prefer a wider strap for your Crochet Butterfly Bag – Pattern, consider the Foundation Single Crochet (fsc). This method creates the foundation chain and the first row of single crochet at the same time, resulting in a much more elastic and comfortable edge. A wider strap distributes weight more evenly, which is especially important if you are making a larger version of the butterfly tote for shopping or beach trips.
The term Blocking is a professional secret that is essential for a Crochet Butterfly Bag – Pattern. Once your wings are finished, they might look a bit curled or uneven. By pinning the wings to a foam mat in the correct shape and lightly steaming them, you “set” the stitches. Blocking ensures that the butterfly wings stay flat and symmetrical, giving your crochet craftsmanship a high-end, store-bought look.
Reinforcement at the stress points is another vital technical aspect. Where the straps meet the wings or the body of your Crochet Butterfly Bag – Pattern, you should use a Yarn Needle to sew extra “X” shapes with a matching thread. This prevents the yarn from weakening at the attachment points. Attention to these small details is what ensures your crochet accessory lasts for years rather than months.
Lastly, consider adding Antennae as a decorative but functional element. In some Crochet Butterfly Bag – Patterns, the antennae are actually part of the closure system, looping over a button to keep the bag shut. Using a stiffening agent or crocheting over a piece of floral wire can help the antennae hold their shape, adding a playful and literal finishing touch to your butterfly-themed project.
Once the structure of your Crochet Butterfly Bag – Pattern is complete, you can begin the “artistic” phase of the project. Surface Crochet is a wonderful way to add contrasting colors to the wings after they are already finished. By slip-stitching directly onto the surface of the wing panels, you can “draw” patterns, dots, or lines that mimic the intricate markings of a Monarch or Swallowtail butterfly.
Bead Integration can add a touch of sparkle to your Crochet Butterfly Bag – Pattern. By sliding small glass beads onto your yarn before you start, you can crochet them into the edges of the wings or the tips of the antennae. This makes the bag catch the light beautifully, making it an ideal choice for evening wear or as a special accessory for a wedding or garden party.
The term Applique refers to making smaller crochet items and sewing them onto the main bag. For a more 3D Crochet Butterfly Bag – Pattern, you might crochet tiny flowers or leaves and attach them around the butterfly, creating a “garden” scene. This technique allows you to add layers of color and texture without making the base bag too heavy or complex to construct.
Embroidery is often used to add the finest details to a Crochet Butterfly Bag – Pattern. Using a thin embroidery floss and a sharp needle, you can sew “French knots” to represent the spots on the wings. This adds a handcrafted, delicate feel to the crochet fabric, proving that you are a master of multiple fiber arts. It is these tiny details that make a handmade gift truly sentimental.
Consider the Tassel or Pom-Pom as a trendy addition to the zipper or the bottom of the wings. A long, flowing tassel made from the same yarn used in the Crochet Butterfly Bag – Pattern adds movement and a “boho” vibe. It is a quick and easy way to add a bit of flair to your finished project, making the bag feel more dynamic and playful as it swings by your side.
Finally, adding a Personalized Label is the ultimate way to finish your Crochet Butterfly Bag – Pattern. Whether it’s a small leather tag with your brand name or a woven “Handmade with Love” label, it marks the piece as a unique creation. For those who sell their work, this branding is essential, as it tells the story of the time and skill invested into every loop of the butterfly bag.
1. Is the Crochet Butterfly Bag – Pattern difficult for beginners?
It is generally considered an intermediate project. While the stitches themselves are basic, the shaping and the need for symmetry require a bit more attention to detail. However, a patient beginner who is comfortable with counting stitches and following a diagram can certainly succeed with this pattern.
2. What is the best yarn for a Crochet Butterfly Bag – Pattern?
Cotton yarn is the absolute best choice. It provides the stitch definition needed for the wings and the durability required for a bag. Avoid fuzzy yarns like mohair or very stretchy yarns like high-percentage acrylic, as they won’t hold the butterfly shape as well over time.
3. How do I make my crochet butterfly bag larger?
You can easily scale the Crochet Butterfly Bag – Pattern by using a thicker yarn (like bulky weight) and a larger hook. Alternatively, you can add extra “even rounds” to the outer edges of the wings to increase the wingspan and the overall capacity of the bag.
4. How do I stop the wings from curling?
Curling usually happens due to tight tension. If your wings are curling, try using a slightly larger hook or consciously loosening your grip. Blocking the finished pieces with steam is also an incredibly effective way to flatten out any natural curl in the crochet fabric.
5. Do I need to line the bag?
While not mandatory, lining is highly recommended if you plan to carry small items. Because the butterfly design often includes decorative “holes” or lace-work, a lining ensures that nothing falls out and that the bag doesn’t stretch out of shape when it’s heavy.
6. How long does it take to finish a Crochet Butterfly Bag – Pattern?
For an average crocheter, this project can take between 8 to 15 hours, depending on the complexity of the wing patterns and whether or not you choose to add a lining and embellishments. It’s a perfect “slow craft” project for a weekend.
In this article, we have journeyed through the intricate and rewarding process of completing a Crochet Butterfly Bag – Pattern. We’ve discussed the importance of choosing mercerized cotton for durability and the technical mastery required for symmetrical wings and shaping techniques.
From the foundation of the Magic Ring to the professional finish provided by blocking and lining, every step is designed to help you create a high-quality accessory. A butterfly bag is more than just a place to store your things; it is a wearable piece of art that celebrates the beauty of nature and the timeless skill of crochet.


