Crochet Rose - Pattern

Crochet is an incredibly versatile and relaxing craft that allows you to create a wide variety of beautiful items.
If you love flowers, Crochet Easy Rose – Pattern is a fantastic project to try. Roses are timeless, and crafting them with yarn brings an extra sense of satisfaction. Whether you’re a beginner or an experienced crocheter, this guide will help you create stunning crochet roses with ease.
In this article, we will take you through the process of crocheting roses, from choosing the right yarn to finishing off your project.
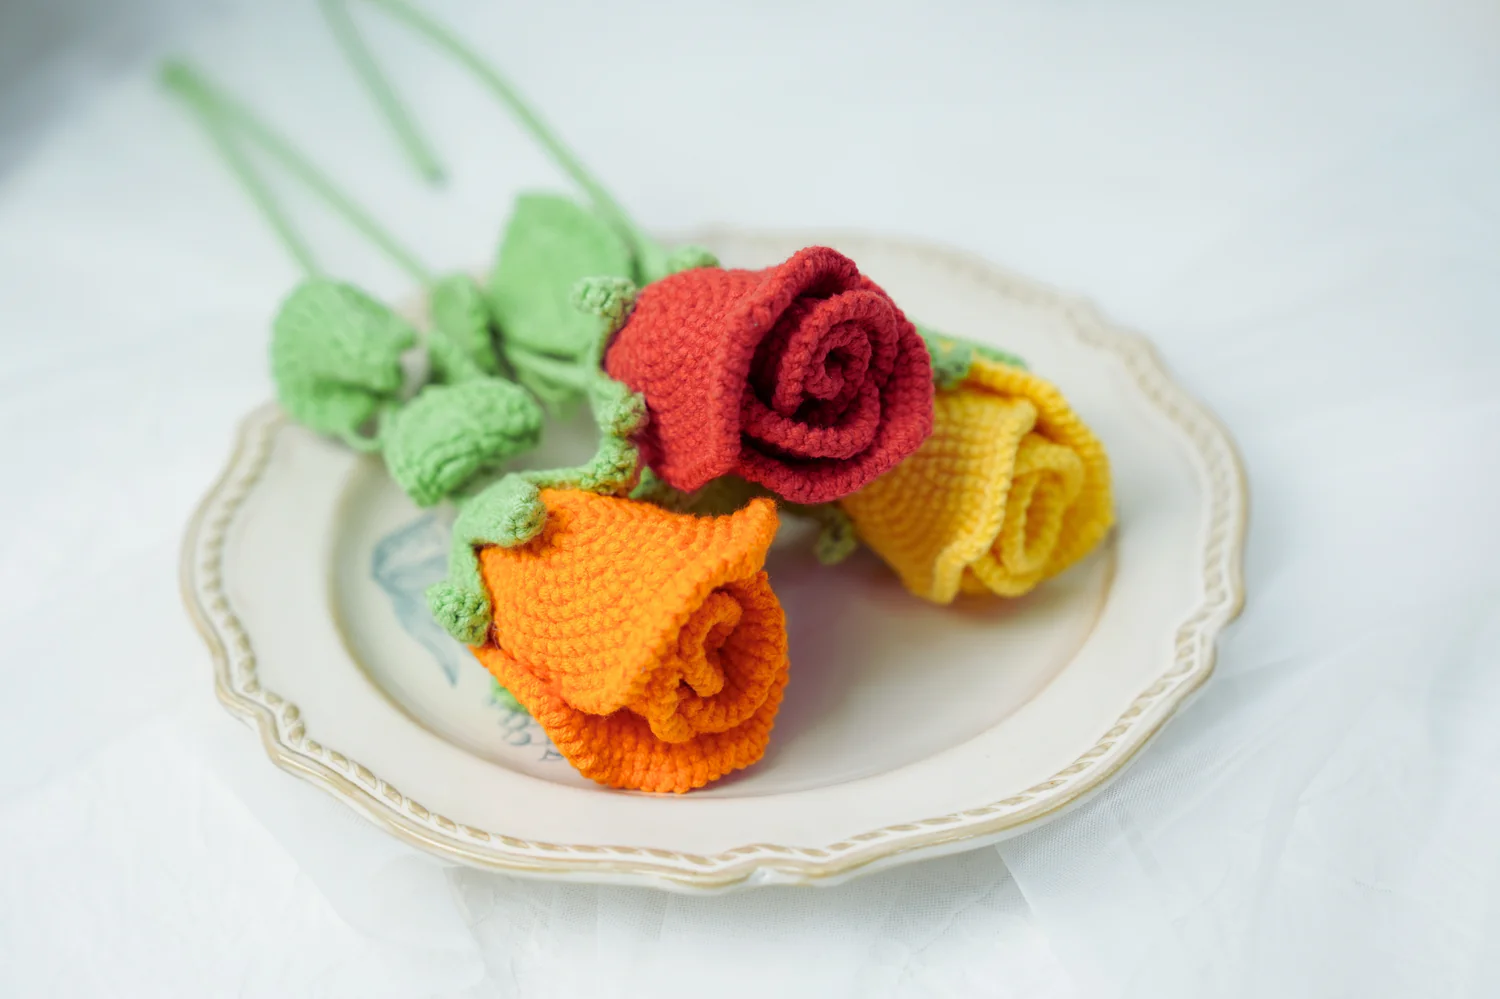
Image From Pinterest
When it comes to crocheting flowers, roses stand out for their elegance and versatility. You can use them in a variety of craft projects, including home décor, accessories, and even garments. The Crochet Easy Rose – Pattern is perfect for adding a touch of beauty to any piece. Not only will you learn how to crochet a rose, but you will also explore tips and tricks to make your roses stand out even more.
Crocheting roses might seem complicated at first, but with the right instructions and a bit of patience, you’ll be able to create these lovely flowers in no time. Throughout this guide, we’ll break down each step of the process, from the foundation chain to the final petal, so you can crochet your own beautiful roses. This pattern is designed to be easy enough for beginners, yet sophisticated enough for more advanced crocheters.
When it comes to crocheting roses, selecting the right yarn is crucial to achieving the desired look and feel of your Crochet Easy Rose – Pattern. The yarn you choose will impact the texture, size, and overall appearance of the rose. Generally, for crochet roses, it’s best to use a yarn that’s soft yet sturdy, as it will hold the shape of the petals without being too stiff or too flimsy.
One of the most popular yarns for roses is cotton yarn, which is ideal for creating a clean, crisp look. Cotton yarn tends to be slightly stiffer, which helps the petals of the rose keep their form. It also gives your rose a bit of structure, ensuring that the flower doesn’t lose its shape over time. Cotton yarn is also highly durable, making it perfect for items that will be handled or worn frequently.
Alternatively, you can choose acrylic yarn, which is soft and easy to work with, especially for beginners. Acrylic yarn is versatile and available in a wide range of colors, making it easy to customize your rose. For those who want a more delicate look, silk yarn can be an option. It’s more luxurious and gives the flower a smoother, softer finish. However, silk yarn can be more challenging to work with, so it’s better suited for intermediate crocheters.
The thickness of the yarn also plays an essential role in determining the size of the crochet rose. Light worsted yarn (category 3) is ideal for a medium-sized rose. If you want a smaller, more delicate rose, choose a finer yarn like sport-weight yarn (category 2). On the other hand, if you want a larger rose, you may want to use a heavier yarn like worsted-weight yarn (category 4). Experimenting with different yarn weights will help you find the perfect size for your crochet rose.
Once you’ve chosen the yarn, you’ll need to pick an appropriate hook size. Generally, for cotton or acrylic yarn, a 4.0mm to 5.0mm hook works well. However, you can adjust the hook size based on your tension and the yarn’s thickness.
Now that you’ve chosen the right yarn, it’s time to begin crocheting your Crochet Easy Rose – Pattern. The process starts with creating a foundation ring to form the center of the rose. A magic ring or adjustable ring is often used for flower patterns, as it allows you to pull the ring tight and close any gaps in the center. If you’re unfamiliar with this technique, don’t worry; it’s easy to learn and makes the flower look more polished.
Start by making a slip knot and placing it on your crochet hook. Then, form a ring by wrapping the yarn around your fingers and pulling the yarn through the ring to create a loop. Tighten the loop slightly, but not too much, as you will need to work into it. You can adjust the size of the magic ring by pulling on the tail of the yarn once your stitches are in place.
Next, crochet the required number of stitches into the magic ring. Most Crochet Easy Rose – Pattern variations use double crochet (dc) stitches for the petals. Work several double crochet stitches into the ring to form a base for the petals. As you crochet, make sure to count your stitches to ensure even petals. The first round typically consists of 6 to 8 double crochet stitches, depending on the desired size of your rose.
Once the first round is complete, you’ll move on to crocheting the petals. Each petal consists of a combination of chain stitches, slip stitches, and double crochet stitches. The number of stitches used will vary based on the pattern, but it’s important to ensure that each petal is evenly spaced around the center of the flower.
After establishing the base of your flower, it’s time to focus on creating the individual petals. For the Crochet Easy Rose – Pattern, the petals are typically created using a combination of double crochet stitches and chain spaces. This technique adds texture and dimension to the petals, making them appear more lifelike.
Start by working a series of double crochet stitches into the center of the flower, then create a chain space to form the base of each petal. Once you reach the desired height for the petal, work back along the stitches to form the top portion of the petal. This will give the rose its signature layered, ruffled appearance.
As you crochet the petals, you can experiment with the number of stitches in each one. For a larger, fuller rose, use more stitches per petal. For a more delicate, dainty rose, use fewer stitches and smaller chains. The beauty of the Crochet Easy Rose – Pattern is its flexibility – you can adjust the pattern to suit your preferences.
Don’t forget to maintain an even tension throughout your crocheting process. If your stitches are too tight, the petals may appear too stiff. If they’re too loose, the flower might lack structure and definition. A consistent tension will help you achieve a balanced and beautiful rose.
To finish off each petal, use slip stitches to join the edges, creating a seamless transition between the petals. Repeat the process for each petal until the flower reaches the desired size.
Once all the petals are complete, it’s time to assemble your Crochet Easy Rose – Pattern into a beautiful flower. Begin by joining the last petal to the first one, making sure the petals are evenly spaced around the center of the rose. You can secure the petals by weaving the yarn ends through the base of the flower using a yarn needle. This helps keep everything in place and ensures a neat finish.
At this stage, you can also add some embellishments to your rose. Consider adding beads or buttons to the center of the flower for extra flair. If you prefer a more natural look, you can use a darker shade of yarn to create the inner part of the rose, which mimics the center of a real flower.
To secure the yarn ends and prevent any unraveling, weave them back through the stitches of the petals, trimming off any excess yarn. Once all the ends are tucked away, give your rose a gentle steam with an iron (using a cloth between the iron and the yarn) to help shape the petals and give them a smooth finish.
Finally, your crochet rose is ready to be used! Whether you plan to use it for a brooch, hair accessory, or simply as a decorative piece, this simple but stunning flower will add a touch of elegance to any project. The Crochet Easy Rose – Pattern is incredibly versatile, and once you’ve mastered the basic technique, you can experiment with different color combinations and sizes to create a bouquet of roses.
1. How long does it take to crochet a rose?
The time it takes to crochet a rose depends on your skill level and the complexity of the pattern. A simple Crochet Easy Rose – Pattern can be completed in about 30 minutes to an hour. More intricate patterns with multiple layers may take longer.
2. Can I use any yarn for crochet roses?
While you can use any yarn, it’s best to choose a yarn that has a bit of stiffness to help the petals hold their shape. Cotton yarn or acrylic yarn is recommended for beginners, while silk or wool yarn may be better for more advanced crafters.
3. What is the best hook size for crocheting roses?
A hook size of 4.0mm to 5.0mm is typically used for most Crochet Easy Rose – Patterns when using medium-weight yarn. Adjust the hook size based on the yarn weight you are using.
4. Can I add beads or other decorations to my crochet rose?
Yes! You can add beads, buttons, or even small fabric leaves to your crochet rose for added decoration. Embellishments can enhance the beauty of the rose and make it unique.
5. Can I make a larger rose?
Absolutely! To make a larger rose, simply use thicker yarn or more stitches for the petals. You can also experiment with different crochet techniques to add layers and texture to the flower.
6. How can I use crochet roses in my projects?
Crochet roses are versatile and can be used in many projects, including headbands, scarves, pillow covers, brooches, and even wedding decorations. You can also attach them to bags, hats, or other accessories for a pop of color and elegance.
In this guide, we’ve walked through the process of creating a Crochet Easy Rose – Pattern, from selecting the yarn to assembling the final flower. Crocheting roses can be a fun and rewarding project, whether you’re a beginner or an experienced crocheter. With the right materials and techniques, you can create beautiful roses to use in a wide range of craft projects. We hope this guide has been helpful, and we encourage you to experiment with different yarns and patterns to make your crochet roses truly unique.
If you have any questions or suggestions, feel free to leave a comment below. We’d love to hear your thoughts on this tutorial!


