
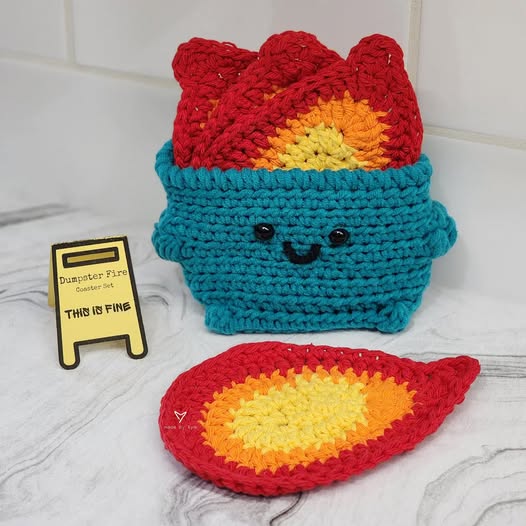
Heart-shaped coaster Crochet- Pattern

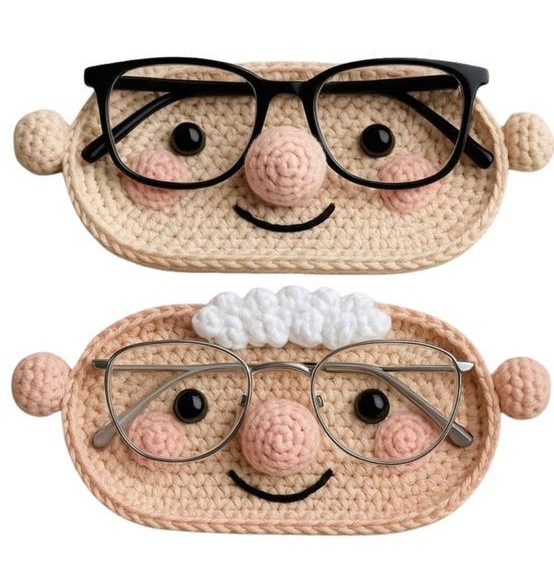
Creating a Crochet Eyeglass Tray – Pattern is one of the most rewarding small-scale projects you can undertake, combining practical utility with the timeless charm of handmade decor. Many of us struggle with the daily “where are my glasses?” hunt, often finding them scratched or buried under mail on the coffee table. This crochet eyeglass tray – pattern solves that problem by providing a soft, cushioned landing spot that protects delicate lenses while adding a touch of personalized style to your nightstand or desk.
When you decide to follow a crochet eyeglass tray – pattern, you are engaging in a mindful craft that yields a high-quality, durable accessory. These trays are not just for glasses; they serve as a versatile catch-all for jewelry, pens, or small gadgets. Because the yarn texture is naturally soft, it acts as a built-in cleaning cloth and protective barrier, ensuring your frames stay in pristine condition for years to come without the need for bulky plastic cases.
The beauty of this specific crochet eyeglass tray – pattern lies in its simplicity and the ability to customize it to fit any interior design aesthetic. Whether you prefer a minimalist modern crochet look using neutral cotton tones or a vibrant, eclectic vibe with variegated scraps, the foundation remains the same. In the following sections, we will break down the essential components, stitches, and finishing techniques required to master this project and create a professional-grade handmade tray.
To begin your crochet eyeglass tray – pattern, you must first understand the structural requirements of a functional tray. Unlike a flat coaster, a tray needs defined sidewalls to keep your glasses secure. This is typically achieved by working in the back loops only (BLO) for one round to create a sharp 90-degree turn from the base.
Selecting the right crochet hook size is crucial for this project. If your stitches are too loose, the tray will be floppy and fail to hold its shape. Most designers recommend using a hook slightly smaller than what the yarn label suggests to create a dense, stiff fabric. This ensures the structural integrity of your finished piece.
The primary stitches used in a standard crochet eyeglass tray – pattern are often simple, such as the single crochet (sc) or the half double crochet (hdc). These stitches provide a tight weave that prevents small items from slipping through gaps. Using a stitch marker is highly encouraged to keep track of your rounds, especially when working in a continuous spiral.
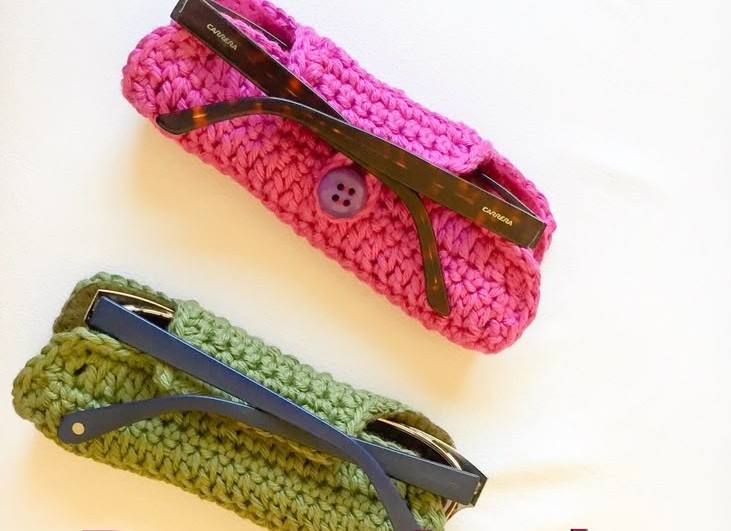
Material choice is the next pillar of a successful crochet eyeglass tray – pattern. Cotton yarn is widely considered the best option because it is sturdy, less prone to stretching over time, and can be easily washed. Mercerized cotton adds a lovely sheen and even more durability to your functional crochet project.
Before starting the first row, you should measure your eyeglasses. While our crochet eyeglass tray – pattern provides standard dimensions, you might need to adjust the starting chain length to accommodate oversized sunglasses or specific designer frames. A standard base is usually about 7 inches long and 3 inches wide.
Finally, consider the tension of your work. Consistent tension is the secret to a professional-looking crochet eyeglass tray – pattern. If you find your base curling prematurely, you may need to increase your increase stitches at the corners to ensure the tray lays perfectly flat on your surface.
Every crochet eyeglass tray – pattern starts with a foundation chain. For a standard size, you will typically chain 21, which allows for a comfortable length. You will then work around both sides of the chain to create an oval base, which is more ergonomic for glasses than a sharp rectangle.
In the second round of your crochet eyeglass tray – pattern, you will focus on increasing at the ends. By placing three stitches into the same stitch at each curve, you expand the surface area while maintaining a flat profile. This oval crochet technique is a fundamental skill that applies to many other projects like bag bottoms or soles for booties.
Once the base reaches your desired width (usually after 3 or 4 rounds), the crochet eyeglass tray – pattern shifts focus to the height. By working one round of single crochet into the back loops only, you create a “ridge” that signals the start of the walls. This is the moment your 2D project becomes a 3D object.
The walls of the crochet eyeglass tray – pattern generally consist of 3 to 5 rounds of standard stitches. You don’t need to increase anymore; simply work one stitch into every stitch from the previous round. This creates the vertical height necessary to cradle your glasses and protect them from sliding out.
For an added touch of elegance, many people like to finish their crochet eyeglass tray – pattern with a crab stitch (reverse single crochet) or a simple slip stitch border. This creates a finished, “rolled” edge that looks much more polished than a standard raw edge. It also adds extra rigidity to the top of the tray.
Don’t forget the weaving in ends phase. Because this tray will be handled daily, you want to ensure your yarn tails are securely hidden and knotted. Using a tapestry needle, weave the ends through the densest part of the stitches to make the crochet eyeglass tray – pattern as durable and seamless as possible.
One way to elevate your crochet eyeglass tray – pattern is through colorwork. You can use tapestry crochet techniques to add geometric patterns or even a monogram to the center of the tray. This makes the item a perfect personalized gift for friends or family members who wear readers or blue-light glasses.
Adding a fabric liner is another popular customization. If you are worried about the yarn catching on the nose pads of your glasses, you can cut a small piece of felt or velvet and glue or sew it into the bottom of the tray. This adds a layer of luxury and extra lens protection to your work.
Texture plays a huge role in the final look of your crochet eyeglass tray – pattern. Instead of plain single crochet, you could try the waistcoat stitch (which looks like knit) or the star stitch for a more decorative finish. These variations change the visual weight of the tray without compromising its utility.
If you find that your yarn is too soft to stand up on its own, you can “stiffen” your crochet eyeglass tray – pattern using a mixture of water and white glue or a commercial fabric stiffener. This is particularly useful if you used acrylic yarn, which tends to be softer and less structural than cotton.
You can also experiment with yarn weights. While worsted weight is standard for a crochet eyeglass tray – pattern, using two strands of fingering weight yarn held together can create a beautiful “marled” effect. Alternatively, using t-shirt yarn will result in a chunky, modern tray that works up incredibly fast.
Think about functionality beyond the nightstand. You can modify the crochet eyeglass tray – pattern to include a small loop so it can be hung on a wall hook near the front door. This versatile design ensures that your glasses are always right where you need them when you’re heading out.
Because your crochet eyeglass tray – pattern will likely sit on a nightstand or desk, it will eventually collect dust or coffee rings. If you used 100% cotton, care is simple. You can hand wash the tray in warm soapy water, reshape it while damp, and let it air dry to maintain its original form.
Avoid using a dryer for your crochet eyeglass tray – pattern creation, as the high heat can cause cotton to shrink or lose its shape. Reshaping it by hand while it is wet is the best way to ensure the sidewalls remain crisp and the base remains flat. This blocking process is essential for all crochet home decor.
If you added a felt liner to your tray, you should avoid submerging the whole piece in water. Instead, spot clean the yarn sections with a damp cloth and a mild detergent. Keeping the crochet eyeglass tray – pattern clean will prevent any oils from the yarn from transferring to your glasses’ lenses.
Over time, you might notice “pilling” on your tray if you used a wool or acrylic blend. A simple fabric shaver can remove these fuzzy bits and keep your crochet eyeglass tray – pattern looking brand new. Cotton rarely pills, which is another reason why it is the top recommendation for this project.
If the walls of your tray start to sag after months of use, you can simply “re-block” it. Dampen the tray slightly, fit it over a rectangular box of a similar size, and let it dry. This acts as a structural reset for your crochet eyeglass tray – pattern, bringing back that crisp, store-bought look.
Finally, remember that the crochet eyeglass tray – pattern is a sustainable alternative to plastic organizers. By choosing high-quality, natural fibers, you are creating an eco-friendly product that is both beautiful and functional. It is a testament to the power of slow fashion and intentional crafting in our everyday lives.
What is the best yarn for a Crochet Eyeglass Tray – Pattern? The best yarn is definitely 100% cotton or a cotton-linen blend. These fibers are breathable, sturdy, and hold their shape much better than acrylic or wool, which is vital for a tray with standing walls.
How long does it take to complete this pattern? Most crocheters can finish a crochet eyeglass tray – pattern in about 1 to 2 hours. It is an excellent “one-sitting” project that provides instant gratification and a useful end product.
Can I make this tray bigger for multiple glasses? Yes! To make the tray wider, simply add more rounds to the base before starting the sidewalls. To make it longer, increase the number of your starting foundation chains.
Do I need to be an expert to try this crochet eyeglass tray – pattern? Not at all. This is a beginner-friendly project. If you know how to chain, single crochet, and work in the back loops, you have all the skills necessary to succeed.
Will the yarn scratch my lenses? No, especially if you use a soft cotton. However, for extra peace of mind, you can use a velvety yarn or add a fabric liner to ensure a 100% scratch-free surface for your eyewear storage.
In this article, we explored the wonderful world of the Crochet Eyeglass Tray – Pattern, covering everything from the essential stitch techniques to customization and long-term care.
We learned that using cotton yarn and a tight tension are the keys to a functional, sturdy tray that protects your glasses in style. Whether you are making this for yourself or as a thoughtful handmade gift, this project is a perfect example of how simple crochet can solve everyday problems.

