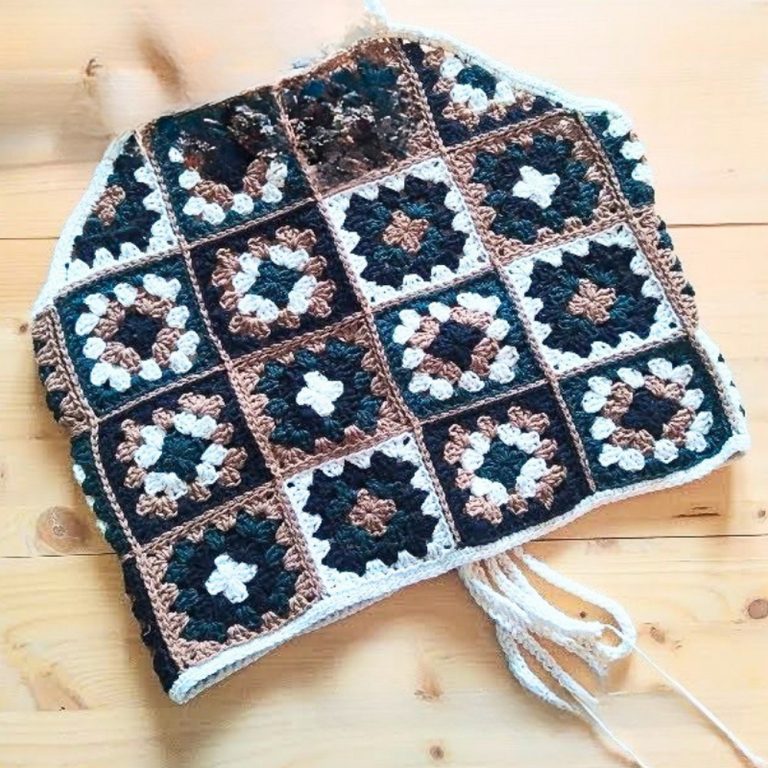
Crochet Granny Square Top - Tutorial

Looking for a timeless Crochet Hat – Pattern is more than just searching for a DIY project; it is about discovering a way to express your personal style through the art of yarn. Whether you are a seasoned crafter or a complete beginner, finding a reliable Crochet Hat – Pattern allows you to create cozy, fashionable accessories that serve as perfect gifts or essential winter wardrobe staples. The beauty of a Crochet Hat – Pattern lies in its versatility, as you can easily adjust the size, color, and texture to suit anyone from a newborn to an adult.
The process of working with a Crochet Hat – Pattern involves understanding the harmony between hook sizes, yarn weights, and stitch types. When you follow a well-designed Crochet Hat – Pattern, you aren’t just making a garment; you are building a skill set that includes increasing, decreasing, and working in the round. Modern enthusiasts love the Crochet Hat – Pattern because it offers a meditative experience, allowing you to disconnect from the digital world and create something tangible and warm with your own two hands.
In this comprehensive guide, we will dive deep into everything you need to know about the Crochet Hat – Pattern. We will explore the essential materials, the most popular stitch techniques, and how to troubleshoot common issues like sizing or tension. By the end of this article, you will feel confident in your ability to select and execute any Crochet Hat – Pattern you encounter, ensuring that your finished products look professional, feel comfortable, and last for many seasons to come.
When you first glance at a Crochet Hat – Pattern, the terminology can feel like a secret language. These documents are essentially blueprints that guide your hook through every loop and turn. A standard Crochet Hat – Pattern will list the required materials, gauge measurements, and specific abbreviations for stitches like the single crochet (sc) or double crochet (dc).
The core of any Crochet Hat – Pattern is the “gauge,” which measures how many stitches and rows fit into a specific square area. If your gauge doesn’t match the Crochet Hat – Pattern instructions, your hat might turn out far too big or way too small. Always take the time to create a small sample swatch before starting your main project to ensure your tension is correct.
Choosing the right yarn is the next vital step in mastering your Crochet Hat – Pattern. Most beginner-friendly patterns suggest a medium-weight (worsted) yarn because it is easy to handle and shows stitch definition clearly. As you become more comfortable with a Crochet Hat – Pattern, you can experiment with bulky yarns for a chunky look or delicate wool for a sophisticated finish.
The hook size is another critical component mentioned in every Crochet Hat – Pattern. Hooks are usually made of aluminum, plastic, or ergonomic wood, and their size (measured in millimeters) must correspond to the yarn weight. If the Crochet Hat – Pattern calls for a 5.0mm hook, using a smaller one will result in a stiff, tight fabric, while a larger one will make it loose and floppy.
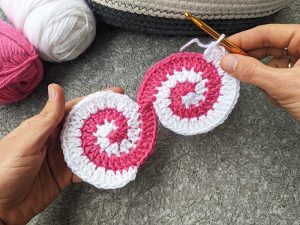
Most hats in a Crochet Hat – Pattern are worked in the round, meaning you create a continuous circle rather than flat rows. You can either join each round with a slip stitch or work in a spiral, which is a technique often used in a Crochet Hat – Pattern for beanies. Using a stitch marker is highly recommended so you never lose track of where your new round begins.
Lastly, a good Crochet Hat – Pattern will provide a size chart. Since heads come in all shapes, a professional Crochet Hat – Pattern includes instructions for adjusting the diameter and the length. This flexibility is what makes the Crochet Hat – Pattern such a popular choice for handmade charity donations and personalized family gifts during the holiday season.
To successfully complete a Crochet Hat – Pattern, you must master the “Magic Ring” or “Magic Circle” technique. This allows you to start your hat at the crown without leaving a hole in the center. While some Crochet Hat – Pattern options suggest chaining four and joining, the magic ring provides a much cleaner, professional finish that is highly sought after.
Increasing is the primary method used in the early stages of a Crochet Hat – Pattern. By placing two stitches into a single stitch from the previous row, you gradually expand the circle until it matches the circumference of the wearer’s head. A well-written Crochet Hat – Pattern will provide a specific mathematical formula for these increases to keep the top of the hat flat.
Once the “crown” or the flat top part is finished, the Crochet Hat – Pattern will transition into “even rounds.” This is the easiest part of the project where you simply place one stitch in each stitch from the row below. This part of the Crochet Hat – Pattern builds the height of the hat, moving from the top of the head down toward the ears.
Texture is often added to a Crochet Hat – Pattern through the use of “Post Stitches.” By working around the stem of a stitch rather than the top loops, you create a ribbed effect. This is a common feature in a Crochet Hat – Pattern for the brim, as it provides extra stretch and mimics the look of a knitted garment while maintaining the thickness of crochet.
Changing colors is a fantastic way to customize a basic Crochet Hat – Pattern. You can create stripes, ombre effects, or “color-blocking” by introducing a new yarn at the end of a round. Many advanced Crochet Hat – Pattern designs incorporate “Fair Isle” or “Tapestry” techniques, allowing you to “paint” pictures or geometric shapes directly into the fabric.
Finishing your Crochet Hat – Pattern requires a technique called “fastening off” and weaving in the ends. A common mistake is cutting the yarn too short, which can lead to the hat unraveling later. Use a yarn needle to hide the tail securely within the stitches of your Crochet Hat – Pattern creation, ensuring the finished piece is both durable and aesthetically pleasing.
One of the most frequent frustrations when following a Crochet Hat – Pattern is ending up with a hat that doesn’t fit. This usually happens because of “tension,” which is how tightly or loosely you hold the yarn. If you are a “tight crocheter,” your Crochet Hat – Pattern might result in a child-sized hat even if you followed adult instructions.
To fix sizing issues in a Crochet Hat – Pattern, you must learn how to measure the “flat circle.” For a standard beanie, you multiply the desired head circumference by $3.14$ (Pi) to find the diameter. If your Crochet Hat – Pattern tells you to stop increasing at 6 inches, but your measurement is only 5 inches, your hat will be too small.
The choice of fiber also impacts the fit of a Crochet Hat – Pattern. Cotton yarn has very little “give” or stretch, meaning your measurements must be exact. On the other hand, wool or acrylic yarns used in a Crochet Hat – Pattern offer more elasticity, making the fit more forgiving if your stitch count is slightly off.
If your hat is turning out like a “bowl” too quickly, you may have missed an increase row in the Crochet Hat – Pattern. Conversely, if the edges are wavy (the “ruffle” effect), you have added too many increases. A reliable Crochet Hat – Pattern will have a clear stitch count at the end of every row to help you avoid these common pitfalls.
Length is just as important as width in a Crochet Hat – Pattern. Some people prefer a “slouchy” fit, which requires adding several extra even rounds at the end. Others prefer a “cloche” or “fitted” look, where the Crochet Hat – Pattern ends right at the earlobe. Always try the hat on as you go if you are making it for yourself!
If you find that your Crochet Hat – Pattern is consistently too small, try switching to a hook that is 0.5mm larger than recommended. This small adjustment can compensate for natural tension and make the Crochet Hat – Pattern much more enjoyable to work with. Remember, the goal is a comfortable, wearable piece of art that you can be proud of.
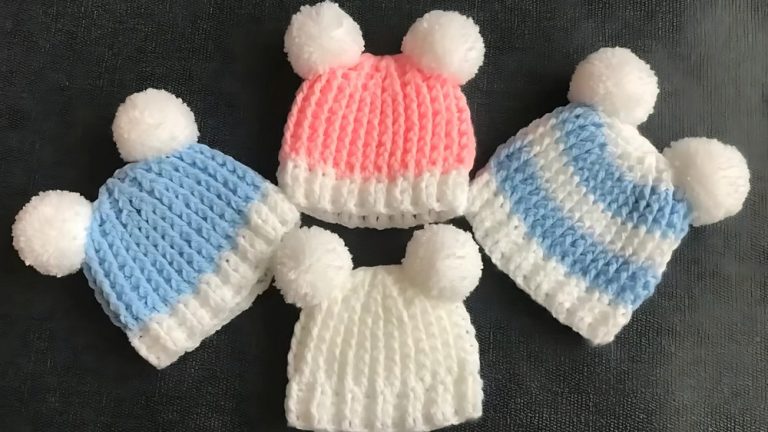
Once you have mastered the basic Crochet Hat – Pattern, the world of customization opens up. You can add “Pom-Poms” to the top of any hat to give it a playful, modern look. Whether you make the pom-pom out of the same yarn or use a faux-fur version, it adds a professional finishing touch to your Crochet Hat – Pattern project.
Earflaps are another popular addition to a standard Crochet Hat – Pattern, especially for children’s winter gear. By reattaching yarn to the bottom edge of the finished hat, you can crochet small triangles that keep the ears warm. Adding braided ties to these flaps makes the Crochet Hat – Pattern even more functional and adorable.
Brim styles can completely change the silhouette of a Crochet Hat – Pattern. You can create a “folded brim” by crocheting the hat extra long and turning up the bottom edge. Alternatively, a “bill” or “visor” can be added to a Crochet Hat – Pattern to create a newsboy-style cap, which provides shade for the eyes while keeping the head warm.
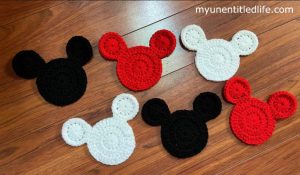
Appliqués are a fun way to breathe life into a simple Crochet Hat – Pattern. You can crochet small flowers, stars, or even animal ears and sew them onto the finished hat. This is a great way to use up “scrap yarn” left over from your main Crochet Hat – Pattern project, ensuring nothing goes to waste while adding a personal flair.
Stitch variations like the “Star Stitch,” “Waffle Stitch,” or “Basketweave” can be substituted into a basic Crochet Hat – Pattern structure. While these stitches use more yarn, they provide incredible depth and warmth. Just be sure to adjust your stitch count, as these complex textures can sometimes “pull in” the width of your Crochet Hat – Pattern.
Finally, consider the “lining” of your Crochet Hat – Pattern. For extremely cold climates, sewing a fleece lining inside your crochet hat makes it windproof and extra cozy. This elevates your Crochet Hat – Pattern from a simple hobby project to a high-performance piece of winter apparel that rivals any store-bought alternative.
How long does it take to complete a Crochet Hat – Pattern?
For a beginner, a basic beanie might take 3 to 5 hours. Experienced crocheters can often finish a simple Crochet Hat – Pattern in under 2 hours, depending on the complexity of the stitches and the weight of the yarn used.
What is the best yarn for a Crochet Hat – Pattern?
Acrylic is the most popular choice for a Crochet Hat – Pattern because it is affordable, washable, and comes in every color. However, for maximum warmth and breathability, a wool blend is often preferred by those following a premium Crochet Hat – Pattern.
Can I make a Crochet Hat – Pattern if I only know the single crochet stitch?
Absolutely! There are many beautiful Crochet Hat – Pattern designs that use only the single crochet stitch. These hats are usually very dense and warm, making them perfect for harsh winter weather.
How do I wash a hat made from a Crochet Hat – Pattern?
Most items made from a Crochet Hat – Pattern should be hand-washed in cool water with a mild detergent and laid flat to dry. This prevents the hat from stretching out of shape or “pilling” in the washing machine.
Why is my Crochet Hat – Pattern turning out pointy at the top?
This usually happens if you stop increasing too abruptly or if your tension at the start of the Crochet Hat – Pattern was too tight. Following a pattern that uses a gradual increase method will result in a more rounded, natural shape.
Is it possible to convert a knitting pattern into a Crochet Hat – Pattern?
While the two crafts are different, you can “mimic” the look. You cannot directly follow knitting instructions for crochet, but you can find a Crochet Hat – Pattern that uses the “Waistcoat Stitch” to create a look that is nearly identical to knitting.
In conclusion, embarking on a journey with a Crochet Hat – Pattern is an incredibly rewarding endeavor that combines creativity with practicality. We have covered the essentials of reading a Crochet Hat – Pattern, the vital techniques like the magic ring and ribbing, and how to ensure your sizing is perfect every time.
By understanding the relationship between gauge, hook size, and yarn choice, you can transform any Crochet Hat – Pattern into a masterpiece. From basic beanies to advanced textured caps with earflaps and pom-poms, the possibilities are truly endless.


