
Lily in Crochet - Pattern

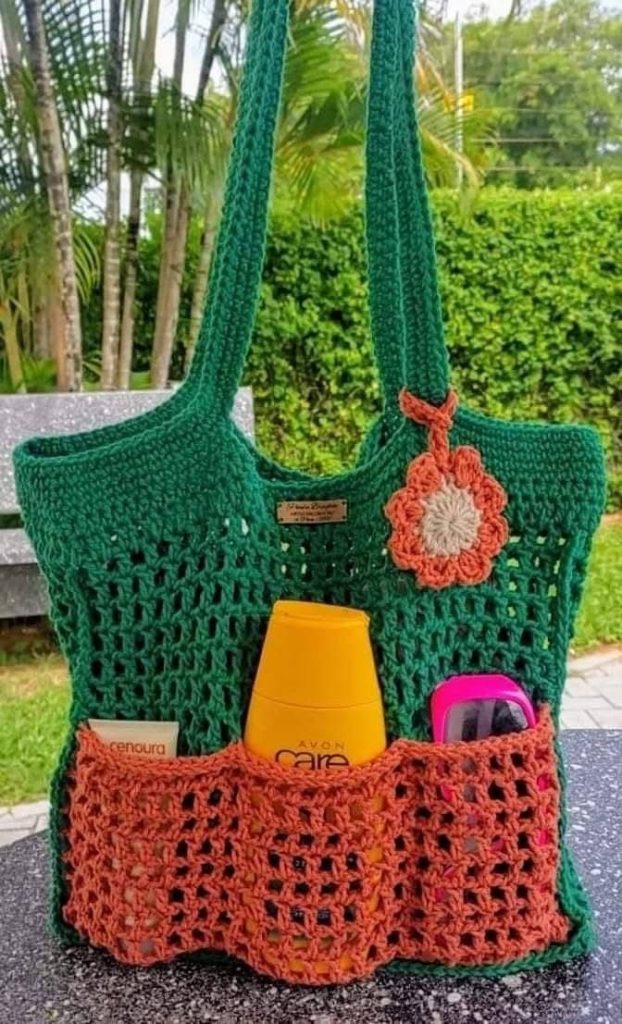
The Crocheted beach bag – Pattern is the ultimate summer accessory for anyone who loves combining functionality with a personal, handmade touch. When we talk about a Crocheted beach bag – Pattern, we are referring to a comprehensive set of instructions that guides a crafter through the selection of materials, the execution of specific stitches, and the final assembly of a durable tote designed for coastal environments. Whether you are a seasoned artisan or a curious beginner, following a well-structured Crocheted beach bag – Pattern ensures that your final product is not only aesthetically pleasing but also strong enough to carry heavy towels, sunscreen bottles, and all your seaside essentials.
The term Crocheted beach bag – Pattern essentially acts as a blueprint for textile art. It breaks down complex shapes into manageable steps, usually starting with a foundation chain or a magic ring and expanding into the body of the bag using various techniques like the double crochet stitch or the v-stitch. By following a Crocheted beach bag – Pattern, you eliminate the guesswork involved in sizing and tension, allowing you to focus on the meditative rhythm of the hook and yarn.
Choosing to work with a Crocheted beach bag – Pattern also offers an incredible opportunity for customization that store-bought items simply cannot match. You have the freedom to select organic cotton yarns, vibrant color palettes that match your swimwear, and even adjust the strap length for maximum comfort. In the following sections, we will delve into the technicalities of the Crocheted beach bag – Pattern, explaining how to choose the right materials, master the essential stitches, and add those professional finishing touches that make your handmade bag stand out on the sand. This guide is designed to be your definitive companion in mastering the art of the summer crochet tote.
The success of your Crocheted beach bag – Pattern starts long before you make your first slip knot; it begins with the selection of the right yarn fiber. For a beach environment, 100% cotton yarn or raffia are the top choices because they are breathable, inelastic, and can withstand the weight of wet items without sagging excessively. Unlike wool, which would be too hot and prone to felting, cotton ensures that your Crocheted beach bag – Pattern remains crisp and maintains its structural integrity even after multiple trips to the salty shore.
In addition to fiber type, the weight of the yarn—often referred to as the yarn ply—is a critical factor in the Crocheted beach bag – Pattern. Most designers recommend a worsted weight (Category 4) or a bulky weight (Category 5) yarn to ensure the bag is sturdy enough for utility. Using a yarn that is too thin might result in a delicate look, but it won’t be practical for carrying a heavy beach haul. Therefore, your Crocheted beach bag – Pattern should clearly specify the recommended weight to help you achieve the correct gauge and size.
The crochet hook size is the next essential tool you must consider when starting your Crocheted beach bag – Pattern. Generally, a 5.0mm (H) or 6.0mm (J) hook is used with cotton yarn to create a fabric that is tight enough to hold small items but flexible enough to have a nice drape. If your stitches are too loose, the bag will stretch out of shape; if they are too tight, the fabric might become overly stiff. Always refer to the Crocheted beach bag – Pattern instructions for the “gauge swatch” to ensure your tension matches the designer’s intent.
Don’t overlook the importance of stitch markers and a tapestry needle when preparing for your Crocheted beach bag – Pattern. Since many beach bags are worked in a continuous spiral or involve complex increases to create a circular base, markers are vital for keeping track of the beginning of each round. The tapestry needle is used at the very end to weave in your yarn tails securely, ensuring that your Crocheted beach bag – Pattern doesn’t unravel when it’s full of sand and gear.
Color selection is where your Crocheted beach bag – Pattern truly comes to life. While neutral “sand” tones are timeless and hide salt stains well, many crafters use the Crocheted beach bag – Pattern to experiment with ombré effects or bright, neon stripes that are easy to spot on a crowded beach. When choosing colors, consider the “colorfastness” of the yarn, as prolonged exposure to direct sunlight and salt water can cause some dyes to fade over time.
Lastly, consider any additional hardware your Crocheted beach bag – Pattern might call for, such as leather handles, metal grommets, or a magnetic snap closure. While a fully crocheted strap is common, adding non-textile elements can elevate the look of your Crocheted beach bag – Pattern and provide extra durability at the points of highest tension. Having all these materials ready before you begin will make the process of following your Crocheted beach bag – Pattern much smoother and more enjoyable.
Most versions of a Crocheted beach bag – Pattern rely on a few fundamental stitches that every crocheter should know. The single crochet (sc) is often used for the base of the bag because it creates a dense, strong fabric that prevents small items like keys or coins from falling through. When you look at the bottom of a Crocheted beach bag – Pattern, you will likely see rows of tight, sturdy single crochets that provide the “floor” for your tote, ensuring it can sit upright on the sand.
To create the “mesh” look that is so popular in a Crocheted beach bag – Pattern, designers often incorporate the chain stitch (ch) and the double crochet (dc). This combination creates intentional holes in the fabric, which are perfect for a beach setting because they allow sand to fall out of the bag instead of collecting at the bottom. This “breathable” design is a hallmark of a high-quality Crocheted beach bag – Pattern, making it as practical as it is stylish for coastal excursions.
The magic ring (or magic circle) is a common technique used to start a Crocheted beach bag – Pattern that has a circular or oval base. This method allows you to pull the center of your starting round tight, leaving no hole at the bottom of your bag. Mastering the magic ring is a game-changer for anyone following a Crocheted beach bag – Pattern, as it provides a professional, seamless finish that is much cleaner than the traditional “chain and join” method.
Increases and decreases are the “sculpting” tools of any Crocheted beach bag – Pattern. To make the bag wider as you move up from the base, the pattern will instruct you to place two stitches in one stitch from the previous row—this is an increase. Conversely, if the Crocheted beach bag – Pattern features a “bucket” shape that tapers at the top, you will use decreases (sc2tog or dc2tog) to bring the edges inward. These geometric adjustments are what give the crocheted tote its specific silhouette.
Another popular element in a modern Crocheted beach bag – Pattern is the slip stitch (sl st), which is primarily used for joining rounds and finishing the top edge. A row of slip stitches around the rim of your bag can prevent the top from stretching out over time, acting as a “stabilizer” for the opening. Even if the Crocheted beach bag – Pattern doesn’t explicitly require it, adding a final round of slip stitches is a pro-tip for increasing the longevity of your handmade summer bag.
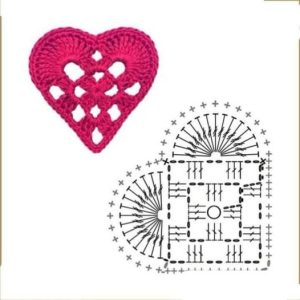
Finally, the Crocheted beach bag – Pattern may introduce “textured” stitches like the puff stitch or the bobble stitch to add visual interest or a boho-chic vibe. These stitches use more yarn but create a 3D effect that looks stunning in the sunlight. While they might seem intimidating, most Crocheted beach bag – Pattern guides provide step-by-step instructions or diagrams to help you master these decorative flourishes, ensuring your bag is a true work of art.
The construction phase of a Crocheted beach bag – Pattern usually follows one of two paths: working in the round or sewing flat panels together. Working in the round is generally preferred for a beach tote because it results in a seamless bag that is structurally stronger. In a seamless Crocheted beach bag – Pattern, you work your way up from the bottom to the top in one continuous piece, which minimizes the amount of “finishing” work and reduces the risk of seams popping under the weight of your belongings.
If your Crocheted beach bag – Pattern involves flat panels, you will likely create a front, a back, and a long rectangular strip for the sides and bottom. These pieces are then joined using a slip stitch seam or a whip stitch with a tapestry needle. While this method takes a bit more assembly time, it allows you to create more complex geometric patterns or color-blocked sections that are harder to achieve when working in a circle. Each Crocheted beach bag – Pattern has its own logic, and both methods can yield beautiful results.
The handles are arguably the most important structural component of your Crocheted beach bag – Pattern. You can crochet them directly onto the bag by skipping stitches and creating long chains, or you can make them separately and sew them on later. To prevent the handles of your Crocheted beach bag – Pattern from stretching too much, many experts suggest crocheting over a piece of nylon cord or cotton rope. This “corded” handle technique ensures that your bag stays at a comfortable carrying height, no matter how much you pack inside.
For those who want a truly “sand-proof” interior, adding a fabric lining is a brilliant addition to any Crocheted beach bag – Pattern. While crochet is beautiful, the holes can sometimes be a disadvantage for small items like jewelry or lip balm. By sewing a simple cotton liner and attaching it to the inside of your crocheted bag, you combine the artisanal look of crochet with the security of a solid bag. Some Crocheted beach bag – Pattern guides even include a template for a matching liner.
Reinforcing the bottom of your Crocheted beach bag – Pattern is another trick to improve its functionality. Some crafters insert a piece of plastic canvas or a leather base between the crochet and the lining. This keeps the bottom of the bag flat and prevents it from “sagging” into a teardrop shape when you put heavy items inside. If your Crocheted beach bag – Pattern is intended for heavy-duty use, these small reinforcements make a world of difference in the bag’s performance.
Blocking your finished project is the final step in the construction of your Crocheted beach bag – Pattern. Blocking involves wetting the bag slightly and pinning it into the desired shape while it dries. This process “sets” the stitches, evens out any irregularities in your tension, and gives the Crocheted beach bag – Pattern a polished, professional look. It is the secret step that separates a “homemade” looking bag from a “handmade” masterpiece that looks like it came from a high-end beach boutique.
Once you have completed your Crocheted beach bag – Pattern, knowing how to care for it will ensure it lasts for many summers to come. Since beach bags are exposed to salt, sand, and sweat, they inevitably need cleaning. If you used cotton yarn for your Crocheted beach bag – Pattern, you can usually hand wash it in cool water with a gentle detergent. Avoid using a washing machine unless the yarn label specifically says it’s safe, as the agitation can cause the bag to lose its shape or pill.
Sand management is another aspect of caring for your Crocheted beach bag – Pattern. After a day at the beach, give your bag a vigorous shake while it’s upside down to remove any trapped grains. If your Crocheted beach bag – Pattern features a mesh design, this is much easier, as the sand will naturally fall through. For solid-stitch bags, you may need to use a vacuum attachment or a lint roller on the interior lining to get every last bit of grit out.
Storing your Crocheted beach bag – Pattern during the off-season is crucial for preventing mold and stretching. Never store a crocheted bag while it is damp; ensure it is completely dry before placing it in a closet. To help it keep its shape, you can “stuff” the bag with clean tissue paper or bubble wrap. Avoid hanging your Crocheted beach bag – Pattern by the straps for long periods of time when not in use, as gravity will eventually cause the fibers to elongate, permanently changing the bag’s proportions.
If your Crocheted beach bag – Pattern uses raffia or other natural plant fibers, it requires slightly more delicate care than cotton. Raffia can become brittle if it gets too wet, so it’s best to spot-clean these bags with a damp cloth rather than submerging them. If you notice any “fuzziness” appearing on the surface of your Crocheted beach bag – Pattern, you can carefully trim the stray fibers with a pair of sharp embroidery scissors to keep it looking fresh and new.
Sun exposure is a natural part of a beach bag’s life, but it can eventually weaken the fibers of your Crocheted beach bag – Pattern. While you don’t need to keep it in the shade all day, try not to leave it in the back window of a hot car for weeks at a time. The heat and UV rays can break down the molecular structure of the yarn, making your handmade bag more prone to tearing. A little bit of mindful handling goes a long way in preserving the work you put into your Crocheted beach bag – Pattern.
Finally, don’t be afraid to perform “minor surgery” on your Crocheted beach bag – Pattern if a stitch snags or a handle begins to loosen. One of the best things about crochet is that it is relatively easy to repair. Keep a small amount of the original yarn so you can reinforce high-wear areas or fix small holes. This ability to maintain and repair your own gear is part of the sustainable philosophy that makes the Crocheted beach bag – Pattern such a valuable and enduring project for any eco-conscious crafter.
1. How long does it take to finish a Crocheted beach bag – Pattern?
The time required depends on the complexity of the design and your skill level. A simple mesh beach bag can often be completed in a weekend (about 8–12 hours), while a large, solid-stitch tote with intricate textures might take 20 hours or more. Beginners should allow extra time to practice new stitches.
2. Can I use acrylic yarn for my Crocheted beach bag – Pattern?
While you can use it, it is not recommended. Acrylic yarn is essentially plastic, which means it doesn’t “breathe” well and can become very sweaty in the heat. Furthermore, acrylic tends to stretch significantly more than cotton, which could cause your Crocheted beach bag – Pattern to become uncomfortably long once it’s loaded with beach gear.
3. What is the best stitch for a beginner following a Crocheted beach bag – Pattern?
The mesh stitch (alternating double crochets and chain spaces) is the best for beginners. it grows quickly, uses less yarn than solid stitches, and is very forgiving of minor tension inconsistencies. It also gives the classic “market bag” look that is synonymous with summer fashion.
4. How do I make the straps of my bag stronger?
The best way to strengthen straps in a Crocheted beach bag – Pattern is to use the thermal stitch or to crochet around a core of cotton clothesline rope. Another option is to use “non-stretch” materials like jute twine for the handles while using soft cotton for the body of the bag.
5. How much yarn do I need for a standard Crocheted beach bag – Pattern?
For a medium-sized bag, you will typically need between 400 and 600 yards of worsted-weight cotton yarn. This usually translates to 3 or 4 standard skeins. Always buy an extra skein from the same dye lot to ensure your colors match perfectly if you run out toward the end.
Creating your own Crocheted beach bag – Pattern is a deeply rewarding project that blends the art of traditional craft with modern summer utility. In this article, we’ve covered everything from the technical definition of a Crocheted beach bag – Pattern to the specific choices of cotton and raffia that ensure durability. We’ve explored the essential stitches like the magic ring and the mesh stitch, and discussed the construction secrets—like lining and blocking—that give your work a professional finish. Most importantly, we’ve seen how a handmade bag can be a sustainable, stylish, and long-lasting alternative to mass-produced accessories.
We hope this guide has given you the confidence and the inspiration to start your own Crocheted beach bag – Pattern today! There is nothing quite like the feeling of walking onto the sand with a bag you made with your own two hands. We would love to hear from you—did you find these tips helpful? What colors are you planning to use for your next project? Please leave your sincere opinion and suggestions in the comments below, as we are always looking to improve our guides for the crafting community. Happy crocheting!


