
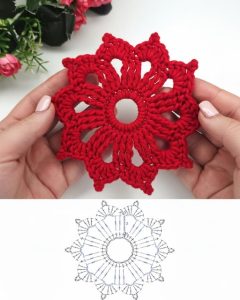
Lily in Crochet - Pattern

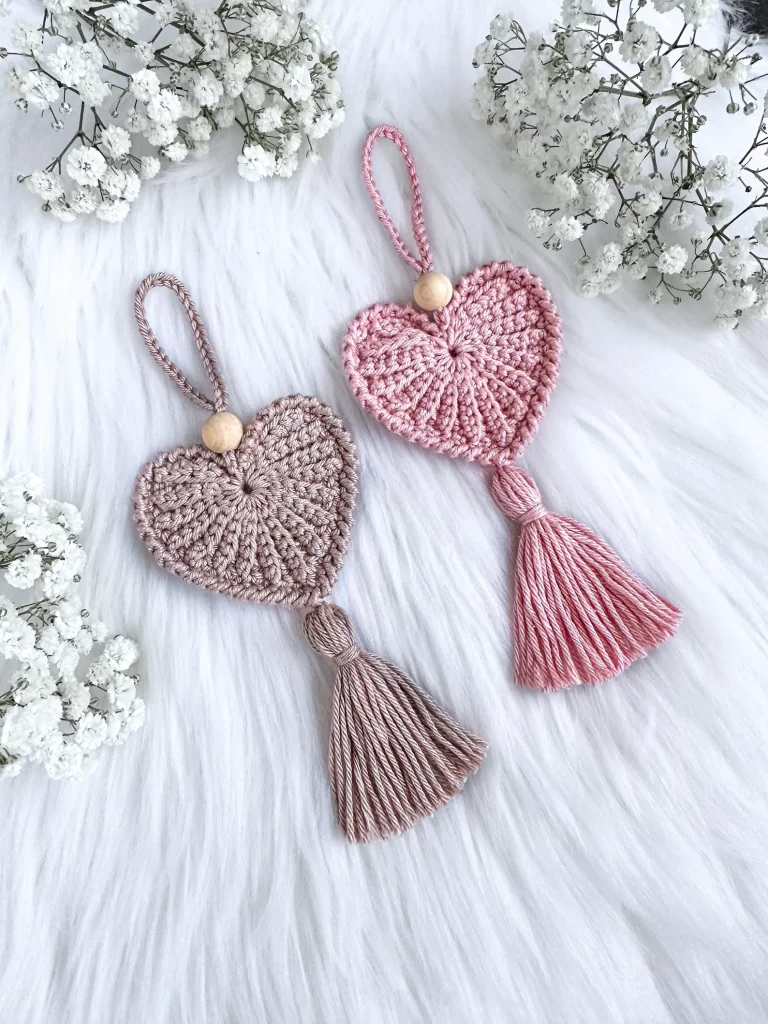
Making a Crochet Heart Keychain – Pattern is one of the most rewarding quick projects you can undertake, whether you are a seasoned crafter or a complete beginner picking up a hook for the first time. These tiny, stuffed tokens of affection are perfect for using up scrap yarn and make incredible gifts for Valentine’s Day, Mother’s Day, or just as a “thinking of you” gesture. In this comprehensive guide, we will explore everything you need to know about creating a professional-looking heart that stays plush and durable over time.
When you start working on a Crochet Heart Keychain – Pattern, you are engaging in a form of “amigurumi,” the Japanese art of knitting or crocheting small, stuffed yarn creatures. Because keychains undergo a lot of wear and tear—being tossed into bags or pulled out of pockets—choosing the right materials and stitches is crucial. This article focuses on creating a seamless look that highlights the classic heart shape while ensuring the attachment for the metal ring is secure and long-lasting.
The beauty of the Crochet Heart Keychain – Pattern lies in its versatility; you can adjust the size by simply changing your hook or yarn weight. From delicate lace hearts to chunky, velvet-textured ones, the possibilities are endless. Beyond being a simple accessory, these hearts can also serve as bag charms, zipper pulls, or even essential oil diffusers if you use natural wool fibers. Let’s dive into the technical aspects and the step-by-step process of mastering this adorable handmade accessory.
The foundation of any successful Crochet Heart Keychain – Pattern begins with understanding the magic ring (or magic circle). This technique allows you to start crocheting in the round without leaving a hole in the center of your work. For a heart, the magic ring is usually where you will cluster your initial stitches to create the bottom point or the start of the two rounded lobes, depending on the specific construction method you choose.
Another vital component of the Crochet Heart Keychain – Pattern is the use of single crochet increases and invisible decreases. To get that smooth, rounded shape at the top of the heart, you need to add stitches accurately. Conversely, when tapering down to the point, the invisible decrease is your best friend because it prevents the gaps that often occur with standard decreases, ensuring your polyester fiberfill stuffing doesn’t peek through.
Choosing the right yarn weight is the next step in perfecting your Crochet Heart Keychain – Pattern. Most designers recommend a DK (Double Knitting) or Worsted weight cotton yarn. Cotton is preferred over acrylic for keychains because it is less likely to pill and holds its shape much better under the constant friction of daily use. It also provides excellent stitch definition, making your hard work clearly visible to everyone.
Your crochet hook size plays a massive role in the final outcome of the Crochet Heart Keychain – Pattern. For amigurumi-style projects, it is standard practice to use a hook that is one or two sizes smaller than what the yarn label suggests. For example, if your yarn recommends a 4.0mm hook, try using a 3.0mm or 3.25mm hook. This creates a tight, dense fabric that is firm enough to stand on its own once stuffed.
A stitch marker is a non-negotiable tool when working on a Crochet Heart Keychain – Pattern. Since you will likely be working in continuous spirals rather than joined rounds, it is very easy to lose track of where your row begins. Placing a marker in the first stitch of each round ensures that your heart remains symmetrical. Symmetry is the difference between a heart that looks professional and one that looks slightly lopsided.
Lastly, the assembly and stuffing phase brings your Crochet Heart Keychain – Pattern to life. You want to stuff the heart firmly but not so much that the stitches stretch apart. Use a tapestry needle to weave in your ends securely. To attach the metal keychain ring, you can either crochet a small loop of chain stitches directly onto the top or use a jump ring for a more “store-bought” jewelry finish.
Before you sit down to start your Crocheted Heart Keychain – Pattern, gather all your supplies to ensure a smooth crafting experience. You will need mercerized cotton yarn, which has a beautiful sheen and high durability. Vibrant reds, soft pinks, or even unconventional colors like teal or mustard yellow can make your handmade keychain stand out. About 20 to 30 yards of yarn is usually more than enough for one heart.
The crochet hook you select should be ergonomic if you plan on making a large batch of these. Since you will be working with a tight tension to keep the Crochet Heart Keychain – Pattern looking neat, an ergonomic handle prevents hand fatigue. Steel or aluminum hooks work best for gliding through cotton fibers without snagging, which is essential when working in small, tight rounds.
For the interior, high-quality polyester fiberfill is the standard stuffing material. It is washable and resilient, meaning the heart will bounce back even after being squished in a pocket. When stuffing your Crochet Heart Keychain – Pattern, use small tufts at a time rather than one large clump. This technique prevents lumps and ensures the heart has a smooth, even surface all the way around.
You cannot complete a Crocheted Heart Keychain – Pattern without the hardware. You will need split key rings or lobster clasps. Some crafters prefer a swivel clasp because it allows the heart to spin freely without tangling the keys. Having a pair of small pliers on hand is also helpful for opening and closing jump rings securely so that your heart doesn’t fall off the metal attachment.
To finish the project, a sharp pair of embroidery scissors and a yarn needle are essential. The needle is used for “closing the gap” at the end of the Crochet Heart Keychain – Pattern. There is a specific technique called the ultimate finish where you thread the yarn through the front loops of the last remaining stitches to create a point that is virtually invisible, giving your heart a high-end look.
Optional but recommended are embellishments. You can personalize your Crocheted Heart Keychain – Pattern by adding small safety eyes to make a “kawaii” face, or you can embroider initials using embroidery floss. Some people even add a small bell inside or a drop of lavender essential oil to the stuffing. These small touches turn a simple crochet project into a cherished, personalized keepsake.
To begin the Crochet Heart Keychain – Pattern, you usually start by making two separate “cups” which will eventually become the rounded tops of the heart. You will crochet a few rounds for the first cup, fasten off, and then crochet the second cup. Instead of fastening off the second one, you will join it to the first cup with a slip stitch or by simply crocheting into the next stitch of the first piece.
Once joined, the Crochet Heart Keychain – Pattern moves into the body phase. You will work in rounds around the outside of both cups. This is the widest part of the heart. For the next few rounds, you will maintain the same number of stitches to build height. This is where the heart starts to look less like two circles and more like a 3D object. Always keep your stitch marker at the join point.
The shaping of the Crochet Heart Keychain – Pattern happens during the decrease rounds. In each subsequent round, you will typically decrease by four stitches, evenly spaced around the diameter. This gradual reduction creates the sloping sides of the heart. It is important to perform these decreases consistently; if they are too close together, the heart will look pinched rather than elegantly tapered.
When you are about two-thirds of the way through the Crochet Heart Keychain – Pattern, it is time to start stuffing. If you wait until the very end, the opening will be too small to get your fingers or a stuffing tool inside. Fill the two top lobes first, ensuring they are firm and identical in shape. Continue adding small amounts of stuffing as you finish the final decrease rounds toward the bottom point.
The final rounds of your Crochet Heart Keychain – Pattern will bring the stitch count down to just six or eight stitches. After the last round, cut the yarn, leaving a long tail. Use your yarn needle to weave the tail through the remaining stitches and pull tight. This creates the bottom tip of the heart. Secure the yarn with a hidden knot inside the body and pull the tail through to the other side before trimming.
The last step in the Crochet Heart Keychain – Pattern is attaching the hardware. Locate the center point between the two lobes at the top. This is the strongest area to attach your yarn loop or jump ring. If you are crocheting a loop, attach the yarn with a slip stitch, chain about 10 to 15 stitches (depending on the desired length), and slip stitch back into the same spot. Slide your key ring onto this loop, and you are finished!
Once you have mastered the basic Crochet Heart Keychain – Pattern, you can start experimenting with different yarn textures. Using velvet yarn or chenille yarn creates a “squishy” heart that is incredibly popular on platforms like Etsy and TikTok. Keep in mind that fuzzy yarns make it harder to see your stitches, so this is best attempted once you are comfortable with the pattern’s rhythm and feel.
Colorwork is another way to elevate the Crochet Heart Keychain – Pattern. You can try variegated yarn for a rainbow effect or use striping techniques to create a nautical or candy-cane look. For those who enjoy a challenge, “tapestry crochet” allows you to incorporate small patterns, like a tiny star or a contrasting color border, directly into the surface of the heart while you work.
If you are making the Crochet Heart Keychain – Pattern for sale, consistency is key. Ensure every heart you produce is the same size and firmness. Creating a “brand” around your hearts—perhaps by using a specific signature color or adding a small wooden “handmade” tag—can help you charge a premium price. Packaging them in small organza bags or on branded cardstock makes them look professional and gift-ready.
Pricing your Crochet Heart Keychain – Pattern creations requires balancing your time and material costs. While these are quick to make, your skill and the “handmade” factor have value. Many crafters find success selling these as impulse buys at craft fairs or as part of “gift bundles” (e.g., a heart keychain paired with a handmade candle). They are low-cost to produce but have a high perceived emotional value.
For those interested in the digital side, you can even sell your own modified version of a Crocheted Heart Keychain – Pattern as a PDF download. To do this, you must ensure your instructions are clear, include high-quality photos of the process, and offer tips for common mistakes. Digital patterns are a great source of passive income for crochet artists once the initial work of writing and testing is done.
Finally, remember that the Crochet Heart Keychain – Pattern is a gateway to larger projects. The skills you learn here—working in the round, joining pieces, and shaping—are the same skills needed for complex amigurumi dolls and home decor. Use these small hearts as a “practice ground” to perfect your tension and finishing techniques. The more you practice, the more flawless your handmade accessories will become.
1. What is the best yarn for a Crochet Heart Keychain – Pattern?
The best yarn is generally a 100% mercerized cotton in DK or Worsted weight. Cotton provides the durability needed for an item that will be handled daily and ensures the heart keeps its shape without stretching or pilling.
2. How long does it take to make one heart?
For an intermediate crocheter, a single heart from the Crochet Heart Keychain – Pattern usually takes between 20 to 45 minutes. It is an ideal project for “binge-making” while watching a movie or traveling.
3. Can a beginner try this Crochet Heart Keychain – Pattern?
Yes! As long as you know the basic stitches (single crochet, increase, and decrease), you can complete this project. The most “difficult” part is joining the two lobes, but there are many visual tutorials available to help with that specific step.
4. How do I make the heart bigger or smaller?
To change the size of your Crocheted Heart Keychain – Pattern, simply change your yarn and hook size. Use embroidery thread and a 1.0mm hook for a tiny charm, or use super bulky blanket yarn and a 6.0mm hook for a large plushie heart.
5. How do I clean my crocheted keychain?
If you used cotton yarn and polyester stuffing, you can spot clean the heart with a damp cloth and mild soap. If it gets very dirty, place it in a mesh laundry bag and wash it on a delicate cycle, then air dry completely.
6. Why is my heart showing the stuffing?
This usually happens because your tension is too loose or your hook is too large for the yarn. To fix this in your next Crochet Heart Keychain – Pattern, try dropping down half a millimeter in hook size and pulling your stitches a bit tighter.
In this article, we have explored the wonderful world of the Crochet Heart Keychain – Pattern, covering everything from the essential tools and materials to the step-by-step construction and professional finishing tips.
We learned that using cotton yarn and a smaller hook creates the best result, and that mastering the invisible decrease is the secret to a professional look. Whether you are making these for yourself, as gifts, or to stock your small business, the heart keychain remains a timeless and beloved project in the crochet community.


