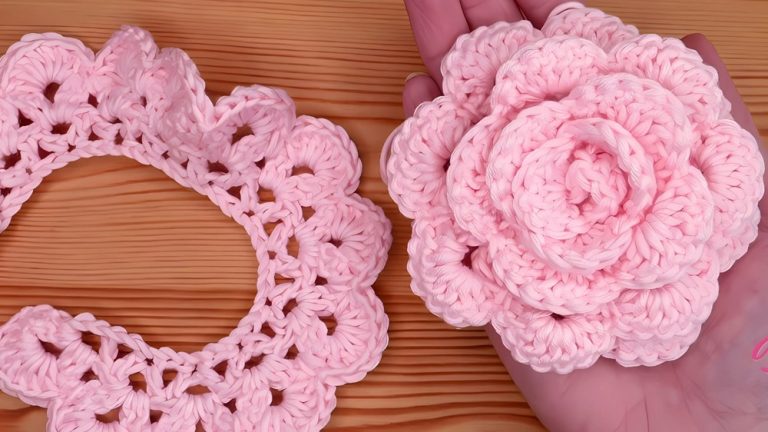
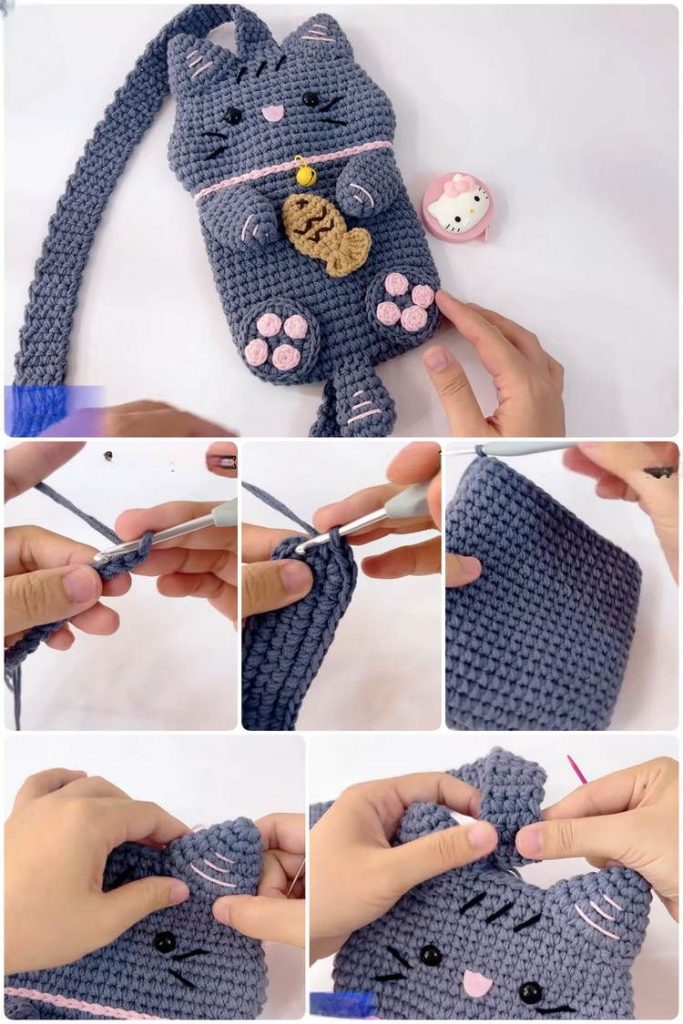
Pink Rose Crochet - Pattern

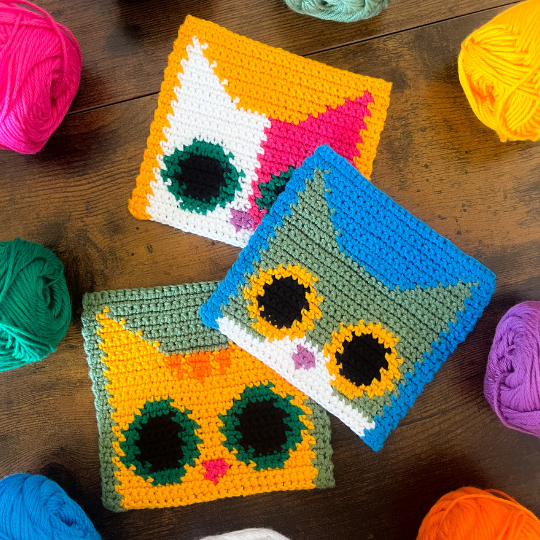
The Happy Cat Coasters Crochet- Pattern is a delightful project that combines functionality with an undeniable sense of feline charm, making it a must-have for any home decorator or cat lover. If you have been searching for a quick, rewarding project that allows you to practice your stitches while creating something genuinely useful, this specific pattern is the perfect answer. Crochet coasters are fantastic for protecting your wooden surfaces from condensation, and when they are shaped like cheerful cats, they become instant conversation starters for any guest who sits down for a cup of coffee.
Working on a Happy Cat Coasters Crochet- Pattern is also an excellent way for beginners to dive into the world of working in the round. Unlike large blankets that can take months to complete, these coasters offer almost immediate gratification, often taking less than thirty minutes from the first magic ring to the final whisker. This speed makes them ideal for last-minute gifts, craft fair stock, or simply a fun afternoon activity to de-stress after a long day. The versatility of the design means you can customize your “happy cat” to match your own pet’s markings or go wild with neon colors for a more modern, artistic look.
In this comprehensive guide, we are going to explore every facet of the Happy Cat Coasters Crochet- Pattern. We will discuss the best types of yarn to ensure your coasters are absorbent and durable, the essential tools you will need to get started, and the specific techniques required to achieve those adorable pointy ears and curved tails. By focusing on the structural integrity of the crochet stitches, you will be able to create a set of coasters that are not only cute but also lay perfectly flat—a crucial requirement for any stable drink holder. Let’s grab our hooks and dive into the whimsical world of cat-themed crochet.
The success of your Happy Cat Coasters Crochet- Pattern begins with the type of yarn you choose to use. While acrylic yarn is popular for many projects, most experts recommend using 100% cotton yarn for coasters. Cotton is highly absorbent, meaning it will soak up the moisture from a cold glass rather than letting it pool on top of the coaster. Additionally, cotton is heat-resistant, so it won’t melt if you place a steaming hot mug of tea on your finished crochet cat.
When it comes to the weight of the yarn, a worsted weight (Level 4) is typically the standard for the Happy Cat Coasters Crochet- Pattern. This thickness provides enough “heft” to protect your table while keeping the stitches defined enough to see the cat’s facial features. Using a slightly smaller hook than recommended on the yarn label—such as a 3.5mm or 4.0mm hook—will create a tighter, denser fabric. A dense fabric ensures that no liquid seeps through the holes of the crochet stitches and reaches your furniture.
Color choices for your Happy Cat Coasters Crochet- Pattern can be as varied as the feline world itself. You can choose classic tabby shades like greys and browns, or create a sleek tuxedo cat using black and white yarn. If you want to make your coasters extra “happy,” consider using bright variegated yarns that change color as you go, giving each cat a unique, marbled coat. Just remember to keep some solid black or pink yarn on hand for embroidering the nose, eyes, and whiskers at the very end.
In addition to your primary yarn and hook, you will need a few specialized tools for this crochet project. A sharp pair of scissors and a tapestry needle are essential for weaving in the ends and adding the embroidered details. Since these coasters are small, those tiny ends need to be tucked away securely so they don’t pop out after the coaster has been washed a few times. Having a few stitch markers on hand is also helpful to keep track of your rounds, especially when you are transitioning from the circular body to the ears.
Texture is another element to consider when following a Happy Cat Coasters Crochet- Pattern. Some makers prefer a completely flat look, while others like to add a bit of “fluff” by using a cotton-linen blend. However, be cautious with very “hairy” or fuzzy yarns. While they might make the cat look more realistic, they can also make the coaster unstable for a glass to sit on. The goal is to find a balance between the aesthetic appeal of the cat and the practical utility of a flat coaster surface.
Lastly, think about the finish of the yarn. A “mercerized” cotton yarn has a slight sheen and is very strong, which can make your Happy Cat Coasters Crochet- Pattern look more professional and polished. Non-mercerized cotton is softer and more matte, which might give the cats a more “rustic” or “cozy” feel. Whichever you choose, make sure the yarn is machine washable, as coasters are prone to spills and will inevitably need a good cleaning from time to time to keep them looking fresh.
The foundation of nearly every Happy Cat Coasters Crochet- Pattern is a perfectly flat circle. If your circle begins to “ruffle” or “wave,” it means you have too many stitches; if it starts to “bowl” or “cup,” you have too few. Mastering the formula for circle increases is the secret to a professional coaster. Usually, this involves starting with 6 or 12 stitches in a magic ring and increasing by the same number in each subsequent round to maintain a flat, even surface for your crochet piece.
Once the body of the cat is the desired size—usually about 3.5 to 4 inches in diameter—the Happy Cat Coasters Crochet- Pattern moves on to the shaping of the ears. This is typically done using a combination of different stitch heights in a single space. For example, you might work a single crochet, a half-double crochet, a double crochet, and a treble crochet all in a sequence to create the triangular point of a cat’s ear. This gradient of stitch height is what gives the cat its characteristic alert expression.
The tail is another defining feature of the Happy Cat Coasters Crochet- Pattern. Some designs include a tail that is crocheted as a long chain that curls around the body, while others might have a short, stubby tail worked into the final round. If you want a tail that stays in place, you can “surface crochet” it onto the body or simply sew a separate cord onto the edge. A curled tail adds a sense of movement and personality to the coaster, making the cat look as though it’s purring on your table.
One challenge many face with the Happy Cat Coasters Crochet- Pattern is the “seam” that appears when joining rounds. To avoid a visible line running through your cat’s face, you can work in continuous spirals instead of joined rounds. If you choose this method, using a stitch marker is vital because you won’t have a slip stitch to tell you where one round ends and the next begins. This results in a much smoother, more seamless look that enhances the visual quality of the cat’s face.
Adding the face is where the Happy Cat Coasters Crochet- Pattern truly comes to life. Using a simple “V” shape for the nose and two small “X” stitches for the eyes can create a minimalist, modern cat. For a more “happy” look, you can embroider a wide, curved mouth and long, sweeping whiskers. The key is to keep the embroidery relatively flat; if the eyes are too bulky, your coffee mug might tilt when placed on top of the coaster, defeating its functional purpose.
If you find that your coaster isn’t perfectly round or the ears are a bit floppy, don’t worry—this is where blocking comes in. By pinning your finished Happy Cat Coasters Crochet- Pattern to a foam board and lightly steaming it with an iron, you can train the fibers to stay in the exact shape you want. Blocking is the “magic touch” in crochet that turns a slightly wonky handmade item into a crisp, store-quality product that you will be proud to display or give as a handmade gift.
The beauty of the Happy Cat Coasters Crochet- Pattern is that it serves as a base for endless creativity. You don’t have to stop at just one type of cat. You can create a “Calico Set” by using the tapestry crochet technique to switch colors mid-round, creating patches of orange, black, and white. This color-work technique adds a bit more complexity to the pattern but results in a stunning, realistic look that cat owners will absolutely adore and cherish.
For those who enjoy a bit of holiday spirit, you can easily adapt the Happy Cat Coasters Crochet- Pattern for different seasons. Imagine a “Spooky Black Cat” set for Halloween with bright green eyes, or a “Festive Cat” set for Christmas wearing tiny red and green scarves. By simply changing the yarn color and adding a small accessory, the crochet design becomes a seasonal decoration that keeps your coffee table looking festive all year round.
If you are looking to sell your work, packaging a set of four Happy Cat Coasters Crochet- Pattern items with a ribbon can be a great seller. Many crafters find success on platforms like Etsy by offering “Custom Pet Portraits,” where they crochet a set of coasters that look exactly like the buyer’s actual cats. This personalized touch turns a simple household item into a sentimental keepsake, allowing you to charge a premium for your time and artistic skill.
You can also experiment with different sizes within the Happy Cat Coasters Crochet- Pattern. By using a much thicker yarn and a larger hook, you can turn the coaster pattern into a “Cat Trivet” for hot pots and pans. Conversely, using thin embroidery thread and a tiny hook can result in “Cat Earrings” or “Cat Wine Charms.” The mathematical proportions of the cat face remain the same, regardless of the scale you choose to work with.
Another fun variation is the “Grumpy Cat” versus the “Happy Cat.” By simply changing the angle of the embroidered mouth and the position of the ears, you can create a range of feline emotions. A set that includes one happy, one grumpy, one sleepy, and one curious cat is a humorous gift that adds personality to a living room set. It shows that the Happy Cat Coasters Crochet- Pattern is just the starting point for your own artistic expression.
Finally, consider the backing of your coasters. While a single layer of crochet is usually enough, some people like to glue a thin piece of cork or felt to the bottom of their Happy Cat Coasters Crochet- Pattern. This adds an extra layer of protection for delicate surfaces and gives the coaster a more substantial, weighted feel. It also hides the back of your embroidery, ensuring that the “messy” side of the stitches is completely invisible to the user.
One of the most common issues when following a Happy Cat Coasters Crochet- Pattern is the coaster “flipping up” at the edges. This is usually caused by tension that is too tight in the final round. If your hands tend to be tight, try using a hook that is half a millimeter larger for the very last round of the body. This gives the stitches more “breathing room” to lie flat against the table, ensuring your crochet coaster stays functional.
Another hurdle is the ears looking more like rabbit ears or mouse ears. To keep them looking like a cat, make sure the “points” are sharp. You can achieve this by adding a “picot stitch” (a small chain-3 loop) at the very tip of the ear. In the Happy Cat Coasters Crochet- Pattern, these small details are what define the silhouette and make the feline shape instantly recognizable even from a distance.
If you are having trouble with the color changes in your Happy Cat Coasters Crochet- Pattern, remember the “last pull-through” rule. Always change to your new color on the final loop of the stitch before the change is supposed to happen. This creates a clean vertical line between colors rather than a jagged, stepped look. This technique is essential for making those beautiful calico and tabby patterns look intentional and high-end.
For those whose coasters look a bit “gappy,” where you can see the table through the stitches, you may need to adjust your crochet hook size. If you can see daylight through your double crochets, your hook is too large for the yarn you are using. A “solid” look is much more desirable for a Happy Cat Coasters Crochet- Pattern because it increases the absorbency and prevents condensation from reaching the wood beneath.
Yarn pilling is another factor to watch out for. After some use, some cotton yarns can develop “fuzz balls.” To prevent this, look for “combed cotton” or yarns that have a tight twist. When you finish your Happy Cat Coasters Crochet- Pattern, you can also lightly spray it with a fabric protector to help repel stains and keep the fibers tight. This is a pro-tip for items that will see a lot of daily use in a busy household.
Lastly, if your coasters aren’t identical in size, it’s likely a tension issue caused by fatigue. Try to crochet the entire set of four in one sitting or at least during the same time of day. Our crochet tension changes based on how tired or stressed we are! By making the whole set of Happy Cat Coasters Crochet- Pattern at once, you ensure that they are uniform in size and will look perfect when stacked together on your coaster holder.
1. How long does it take to make one coaster?
For most intermediate crocheters, a single Happy Cat Coasters Crochet- Pattern takes about 20 to 30 minutes. Beginners might take up to an hour for the first one as they figure out the ear placement and embroidery.
2. Can I use acrylic yarn instead of cotton?
You can, but it is not recommended. Acrylic doesn’t absorb water; it just lets it run off. For a Happy Cat Coasters Crochet- Pattern to be effective, cotton is the superior choice for protecting your furniture from liquid.
3. How do I clean my crochet coasters?
If you used 100% cotton, you can usually machine wash them on a gentle cycle in a mesh laundry bag. Lay them flat to dry and give them a quick press with an iron to restore their cat-like shape.
4. What is the best way to embroider the face?
Use a split-stitch or backstitch for the whiskers and a satin stitch for the nose. Keep your stitches relatively tight so they don’t snag on cups. It’s best to do the embroidery after the coaster is finished but before any backing is added.
5. How many coasters come in a standard set?
Typically, a set consists of 4 or 6 coasters. If you are following the Happy Cat Coasters Crochet- Pattern for a gift, 4 is usually the “magic number” that looks great tied together with a bow.
6. Do I need to be an expert to try this pattern?
Not at all! As long as you know how to do a magic ring, single crochet, and double crochet, you can successfully complete a Happy Cat Coasters Crochet- Pattern. It’s a great “level-up” project for new crocheters.
The Happy Cat Coasters Crochet- Pattern is more than just a simple craft project; it is a way to bring a bit of joy and personality into your daily routine. Throughout this article, we have covered the importance of using absorbent cotton yarn, the techniques for achieving a perfectly flat circle, and the creative ways you can customize your cats to make them unique. By paying attention to small details like stitch tension and embroidery, you can create a professional set of coasters that are as durable as they are adorable.
Crocheting these little cats is a rewarding experience that allows you to sharpen your skills while producing something that protects your home and makes people smile. We hope this guide has given you the confidence to start your own set and perhaps even experiment with your own feline-inspired variations of the Happy Cat Coasters Crochet- Pattern.