A Checkerboard Quilt and Strip Piecing - Pattern

A Checkerboard Quilt and Strip Piecing – Pattern is one of the most timeless and rewarding projects a quilter can undertake, offering a perfect blend of classic aesthetics and efficient modern construction. Whether you are a beginner looking for your first major project or an experienced sewist wanting a relaxing yet visually striking design, the checkerboard layout never goes out of style. By utilizing the specific techniques involved in A Checkerboard Quilt and Strip Piecing – Pattern, you can transform simple fabric selections into a high-contrast masterpiece that looks far more complex than it actually is to assemble.
The true beauty of A Checkerboard Quilt and Strip Piecing – Pattern lies in its mechanical efficiency, which drastically reduces the time spent at the sewing machine. Instead of cutting out hundreds of individual small squares—a process that is both tedious and prone to inaccuracy—this method allows you to work with long lengths of fabric. By mastering this specific quilting technique, you ensure that your seams align perfectly every time, resulting in those crisp, sharp corners that define a professional-quality quilt. It is a fantastic way to use up your fabric stash or to showcase a coordinated bundle of new prints.
In this detailed guide, we will explore every nuance of A Checkerboard Quilt and Strip Piecing – Pattern, from the initial selection of high-quality cotton fabrics to the final finishing touches. We will delve into the logic of “strip sets,” the importance of pressing for success, and how to troubleshoot common alignment issues. This pattern is not just about making a blanket; it is about learning a fundamental skill that will improve your speed and accuracy on every future quilting project. Let’s dive into the world of geometric precision and textile art.
To start your journey with A Checkerboard Quilt and Strip Piecing – Pattern, you must first understand the concept of the “strip set.” Instead of sewing square to square, you sew long strips of fabric together side-by-side. For a classic checkerboard, you typically sew two contrasting colors together, creating a long “band” of fabric that will eventually be cross-cut into smaller units. This is the core efficiency of the strip piecing method, as it eliminates the need to handle tiny individual pieces until the very last moment.
Selecting the right fabric is the next crucial step in A Checkerboard Quilt and Strip Piecing – Pattern. You need two fabrics with high contrast—traditionally black and white, but any combination of “dark” and “light” will work. Using 100% quilting cotton is highly recommended because it has a stable weave that doesn’t slip while you are sewing long seams. This stability is vital when you are aiming for the mathematical precision required for a perfect checkerboard layout.
Precision cutting is the third pillar of a successful A Checkerboard Quilt and Strip Piecing – Pattern. You will need a rotary cutter, a self-healing mat, and a long acrylic ruler. When you cut your initial strips, they must be exactly the same width from top to bottom. If your strips are even an eighth of an inch off, that error will multiply across the entire quilt top, leading to a finished product that won’t lay flat or align correctly at the borders.
The “seam allowance” is the secret hero of A Checkerboard Quilt and Strip Piecing – Pattern. In quilting, a standard $1/4$ inch seam is the universal rule. However, many pros suggest using a “scant” $1/4$ inch seam to account for the space the fabric takes when it is folded over at the seam line. Using a specialized quilting foot on your sewing machine can help you maintain this consistency throughout the dozens of long seams you will be stitching.
Pressing is often confused with ironing, but in A Checkerboard Quilt and Strip Piecing – Pattern, it is a distinct action. You should lift and press the iron down rather than sliding it across the fabric. Sliding can stretch the long fabric strips, causing them to bow or curve. Always press your seams toward the darker fabric to ensure the seam allowance doesn’t show through the lighter squares, a technique known as nesting seams that makes the final assembly much easier.
Finally, the cross-cutting phase of A Checkerboard Quilt and Strip Piecing – Pattern is where the magic happens. Once your strips are sewn and pressed, you turn them horizontally on your mat and cut them into segments that are the same width as your original strips. These segments now look like two-square units. When you flip every other segment and sew them back together, the checkerboard pattern instantly appears, saving you hours of labor compared to traditional piecing.
Achieving “perfect points” is the goal of any A Checkerboard Quilt and Strip Piecing – Pattern. When you join your cross-cut segments, you want the corners of the squares to meet exactly. To do this, you use the “nesting” technique mentioned earlier. By pressing one segment’s seams to the left and the other’s to the right, the seams “lock” together when placed face-to-face. This physical lock ensures that the fabric cannot shift during the sewing process, resulting in flawless quilt intersections.
Starch is a secret weapon often used when executing A Checkerboard Quilt and Strip Piecing – Pattern. Applying a light mist of fabric starch to your strips before you cut them adds a bit of stiffness to the cotton. This prevents the edges from fraying and keeps the fabric from stretching as it moves under the sewing machine’s presser foot. A starched fabric strip is much easier to guide, leading to straighter lines and a more professional-looking finished quilt top.
If you find that your long strips are bowing or looking like a “banana” after sewing, you might be sewing all your seams in the same direction. In A Checkerboard Quilt and Strip Piecing – Pattern, it is best to alternate the direction of your sewing for each strip. Sew the first two strips from top to bottom, then add the third strip sewing from bottom to top. This directional sewing technique counteracts the natural pull of the machine’s feed dogs and keeps your strip sets perfectly rectangular.
Managing “seam bulk” is another advanced consideration for A Checkerboard Quilt and Strip Piecing – Pattern. At the points where four squares meet, there can be a lot of fabric layers. Some quilters prefer to “spin” their seams at the intersection to flatten the area. This involves opening a few stitches in the seam allowance at the very center so the fabric can be pressed in a circular fashion. This makes the quilting and batting process much smoother later on.
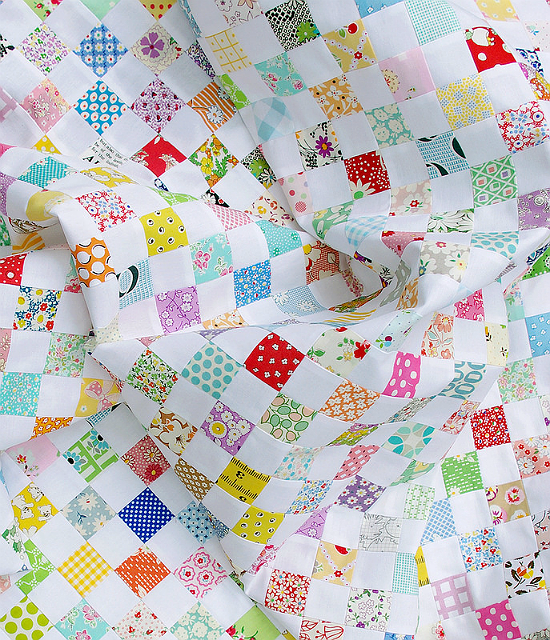
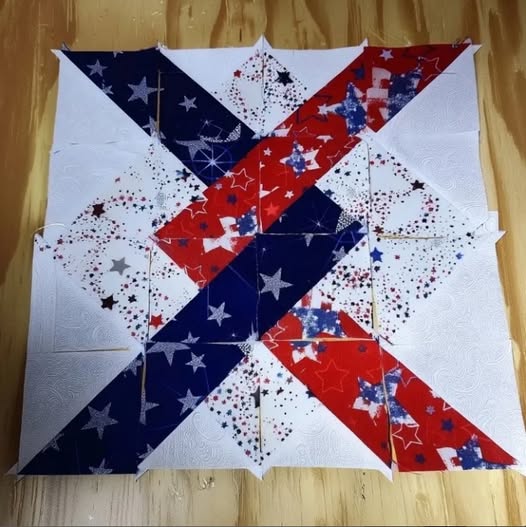
The size of your squares determines the overall “vibe” of your A Checkerboard Quilt and Strip Piecing – Pattern. Small 1-inch squares create a detailed, mosaic look that is very traditional. Larger 5-inch squares create a bold, modern graphic statement and are much faster to complete. When deciding on a size, consider the scale of any prints you are using; a large floral print might be lost in tiny squares, whereas solid-color fabrics thrive in almost any size.
Always check your “math” before you start cutting the bulk of your fabric for A Checkerboard Quilt and Strip Piecing – Pattern. Cut a small test strip set and verify that the finished segments are the exact size they should be. It is much easier to adjust your seam allowance by a hair after a test run than it is to unpick an entire quilt top. This quality control step is the difference between a frustrating experience and a successful, relaxing hobby.
While the traditional A Checkerboard Quilt and Strip Piecing – Pattern uses two colors, you can create a “scrappy” version by using many different fabrics. In this variation, you create several different strip sets using various light and dark fabrics. When you cross-cut and mix them, you get a vibrant, eclectic look that still maintains the organized structure of the checkerboard. This is a favorite technique for scrap quilting enthusiasts who want to clear out their fabric bins.
Another exciting variation is the “disappearing” checkerboard. You start by following the standard A Checkerboard Quilt and Strip Piecing – Pattern, but then you cut the finished blocks into quarters and rotate them. This creates a complex, kaleidoscope-like effect that hides the simple strip-pieced origins of the work. It’s an easy way to achieve a “designer” look without needing advanced geometric piecing skills.
You can also experiment with “gradient” or “ombre” fabrics in your A Checkerboard Quilt and Strip Piecing – Pattern. By using strips that fade from one color to another, your checkerboard can look like it is glowing or receding in space. This adds a level of artistic depth to the quilt. Using ombre fabric strips allows the color to shift gradually across the quilt top, creating a visual flow that is very popular in modern art quilts.
The “Irish Chain” quilt is actually a direct relative of A Checkerboard Quilt and Strip Piecing – Pattern. By alternating checkerboard blocks with solid fabric blocks, you create a delicate, interconnected chain design. This variation is a staple in traditional American quilting and is surprisingly easy to execute once you have mastered the basic strip piecing technique. It gives the eye a place to rest while highlighting the intricate work of the squares.
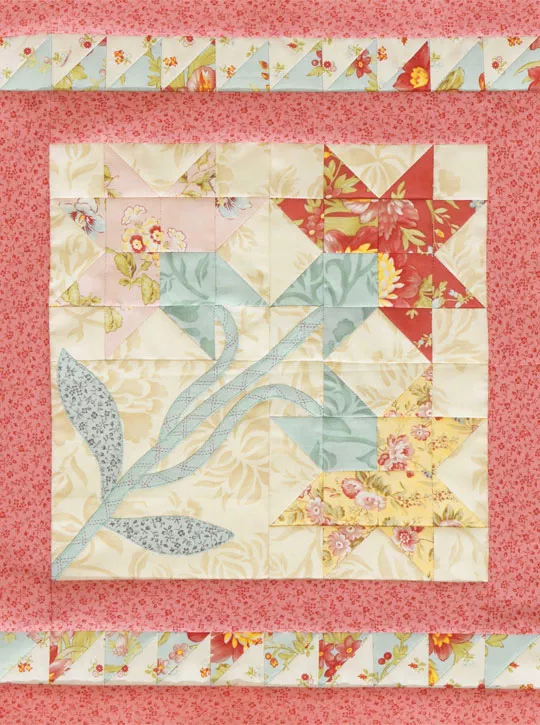
Adding borders can completely change the impact of your A Checkerboard Quilt and Strip Piecing – Pattern. A thick, solid-color border acts like a frame for the busy checkerboard center, while a “pieced border” made of leftover segments can extend the design all the way to the edges. Planning your quilt borders early in the process ensures you have enough fabric and helps you visualize the final proportions of the piece.
Don’t forget that A Checkerboard Quilt and Strip Piecing – Pattern can be used for more than just bed quilts. This technique is perfect for making table runners, placemats, or even decorative pillow covers. Because the construction is so fast, these smaller items make wonderful handmade gifts for friends and family. A checkerboard table runner in seasonal colors is a quick weekend project that adds a cozy, handmade touch to any dining room.
Once all your segments are sewn together into a completed A Checkerboard Quilt and Strip Piecing – Pattern top, it’s time for the “quilt sandwich.” This involves layering your finished top, a layer of batting (the fluffy middle), and your backing fabric. For a checkerboard design, a simple straight-line quilting pattern often looks best. You can “stitch in the ditch”—sewing directly into the seams—to make the quilting invisible while still securing the layers.
Choosing the right batting for your A Checkerboard Quilt and Strip Piecing – Pattern is a matter of personal preference. Cotton batting provides a flat, antique look that gets softer with every wash. Polyester or wool batting offers more “loft” or puffiness, which can make the checkerboard design pop. Consider the climate where the quilt will be used; natural fiber batting is usually more breathable, while synthetics provide more intense warmth.
The “binding” is the final edge of your A Checkerboard Quilt and Strip Piecing – Pattern. This is the fabric strip that wraps around the raw edges of the quilt sandwich. Many quilters choose a fabric that matches the “dark” square of the checkerboard to create a clean, finished boundary. Learning to sew mitered corners on your binding will give your quilt that professional, high-end look that is expected at quilt shows.
Before you call it finished, inspect your A Checkerboard Quilt and Strip Piecing – Pattern for any loose threads or “shadowing.” Shadowing happens when a dark seam allowance is visible through a light-colored fabric. If you find a dark thread trapped under a white square, you can often use a small crochet hook or a needle to gently pull it to the back. This attention to detail ensures your quilt looks beautiful from both far away and up close.
Labeling your quilt is an essential final step that many people overlook. Every A Checkerboard Quilt and Strip Piecing – Pattern represents hours of your life and a piece of your creativity. Use a permanent fabric marker or embroidery to record your name, the date, and the occasion. A quilt label turns a household item into a family heirloom that can be passed down through generations, telling the story of the maker.
Finally, give your completed A Checkerboard Quilt and Strip Piecing – Pattern a final press and a wash if you used starch. Washing the quilt creates that lovely “crinkle” effect that is characteristic of traditional cotton quilts. It also removes any markings you might have made during the process. There is no feeling quite like snuggling under a freshly laundered handmade quilt that you built from scratch using your own two hands.
The main advantage is speed and accuracy. In A Checkerboard Quilt and Strip Piecing – Pattern, sewing long strips and then cutting them ensures that your squares are perfectly uniform. It minimizes the handling of small fabric pieces, which often lead to frayed edges and distorted shapes.
Yes! “Jelly Rolls” are pre-cut 2.5-inch strips of fabric. They are perfect for A Checkerboard Quilt and Strip Piecing – Pattern because the most tedious part—the cutting—is already done for you. You just need to ensure your seam allowance is very consistent to maintain the 2-inch finished square size.
This usually happens due to inconsistent seam allowances or “bowing” of the strips. Ensure you are using a $1/4$ inch foot and that you are not pulling the fabric as it goes through the machine. Also, make sure you are nesting your seams so the fabric layers lock together before you sew.
No, any standard sewing machine that can sew a straight stitch will work for A Checkerboard Quilt and Strip Piecing – Pattern. However, having a machine with a “needle down” function and a $1/4$ inch presser foot will make the process much smoother and more enjoyable.
For a standard lap quilt (approx. 50″ x 60″), you will generally need about 2 to 3 yards of each contrasting fabric. This allows for the strip piecing method, borders, and binding. Always buy a little extra to account for potential cutting errors or fabric shrinkage during pre-washing.
This is a debated topic, but for A Checkerboard Quilt and Strip Piecing – Pattern, it is often safer to pre-wash. Since you are using high-contrast colors (like red and white), pre-washing helps prevent the dark dyes from bleeding into the light squares during the first wash of the finished quilt.
In this article, we have journeyed through the elegant and efficient world of A Checkerboard Quilt and Strip Piecing – Pattern. We’ve covered everything from the initial material selection and the “magic” of cross-cutting strips to advanced tips for perfect alignment and creative variations like the Irish Chain.
We also discussed the essential finishing steps that turn a collection of fabric into a durable heirloom. The checkerboard is a testament to the fact that simple shapes, when executed with precision and care, can create stunningly complex and beautiful results.


