
Horizontal Row Quilt - Pattern

The Arrowhead Quilt Block is a beautiful and striking design often used in various quilt projects.
With its geometric shape and modern appeal, it’s a perfect choice for quilters looking to add a touch of style and complexity to their creations.
Whether you’re making a wall hanging, bedspread, or throw, the Arrowhead Quilt Block provides a versatile and visually appealing option that can be adapted to suit a wide range of color schemes and themes.
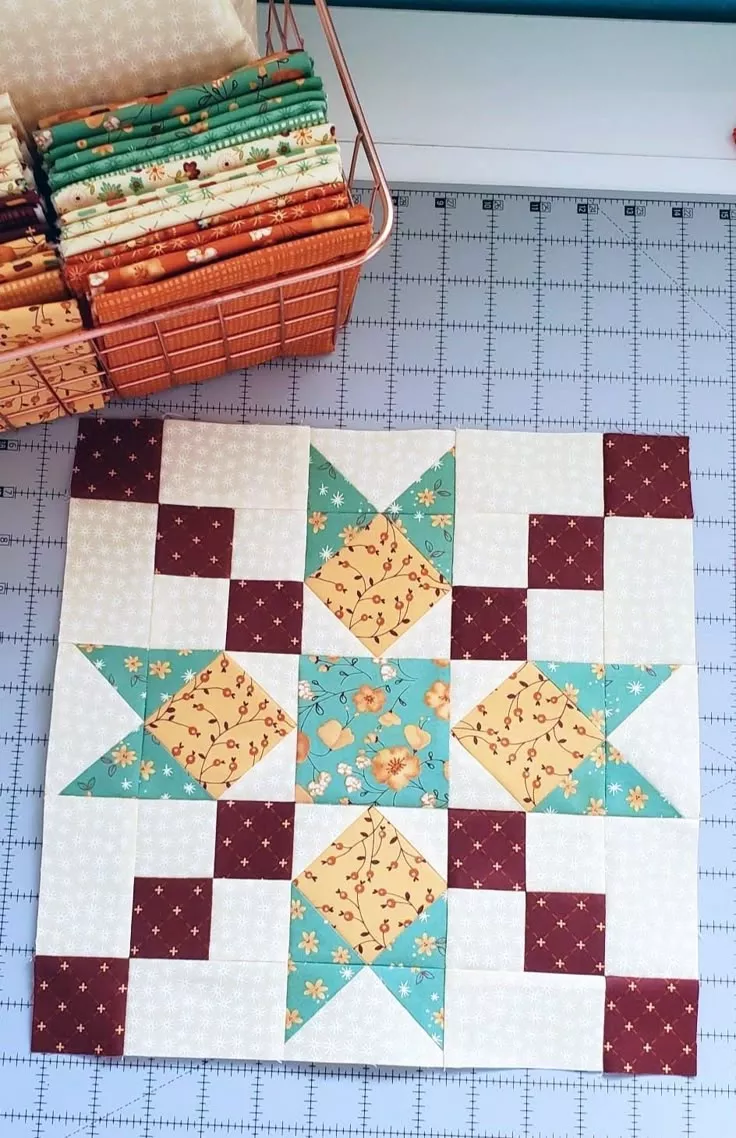
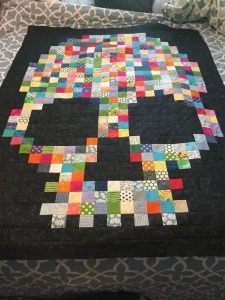
Image From Pinterest
This pattern’s charm lies in its simplicity combined with its bold, angular design. The arrowhead shape adds a sense of movement and energy to any quilt, making it an ideal choice for quilters who want to create something eye-catching yet relatively easy to construct. If you’re new to quilting, the Arrowhead Quilt Block – PATTERN is also a great starting point, offering a perfect balance between intricate design and straightforward techniques.
In this article, we’ll dive deep into the process of creating the Arrowhead Quilt Block – PATTERN, offering a detailed, step-by-step guide. Whether you’re looking for tips on fabric choices, how to piece together the blocks, or suggestions for assembling them into a larger quilt, this guide has you covered.
The Arrowhead Quilt Block – PATTERN is a square block with an arrowhead shape in the center. The design is made up of triangles that form the distinctive arrowhead shape, surrounded by other pieces of fabric that create a strong contrast. The key to mastering this block is understanding how to cut and piece the fabric accurately to create a clean and sharp design.
Typically, this quilt block is made from triangles of contrasting colors, often paired with a background fabric to create the arrowhead’s visual pop. The Arrowhead Quilt Block – PATTERN can be used in numerous quilt layouts, from repeating patterns to random arrangements, depending on the desired look of the finished quilt.
The layout of the Arrowhead Quilt Block – PATTERN often uses the technique of half-square triangles, a common quilting method that results in a clean, precise triangle shape. By combining half-square triangles in various ways, you can create the arrowhead shape and experiment with the arrangement of the pieces to form different patterns.
The beauty of this quilt block lies in its versatility. While it’s a relatively simple design in theory, you can achieve various effects by adjusting the colors, fabrics, and placement of the pieces. The Arrowhead Quilt Block – PATTERN can also be combined with other quilt block patterns for a more complex and intricate design.
Before starting any quilting project, it’s essential to gather the right materials. Here’s a list of the materials you’ll need to make the Arrowhead Quilt Block – PATTERN:
Choosing the right fabric is crucial to achieving the perfect Arrowhead Quilt Block – PATTERN. You’ll need a few different fabric types for this pattern. The main fabrics you will need are:
A rotary cutter is a handy tool for cutting fabric accurately. It allows for precise, straight cuts, ensuring that your triangles and other pieces fit together perfectly when pieced.
A quilting ruler and cutting mat are essential for measuring and cutting fabric. The ruler ensures straight lines while the mat protects your work surface and helps you make clean cuts.
A sewing machine with a standard quarter-inch foot is the best option for piecing together the Arrowhead Quilt Block – PATTERN. It allows you to sew with precision, which is crucial for achieving clean seams.
Choose thread that matches the fabric colors. You can use cotton or polyester thread, depending on your preference. Make sure to use a strong thread for durability.
Pressing your fabric pieces after each step is essential for achieving a crisp and neat finished quilt block. An iron and ironing board will help you maintain sharp creases and seams.
Now that you’ve gathered all the necessary materials, let’s walk through the process of making the Arrowhead Quilt Block – PATTERN. Follow these simple steps to create your own block:
To start, cut your fabric into squares and triangles. The exact measurements will depend on the size of the quilt block you want to make. Typically, the center arrowhead is formed by four half-square triangles, while the other pieces fill in the surrounding areas. Be sure to use a quilting ruler to ensure accurate cuts.
To form the half-square triangles, take two squares of fabric (one for the background and one for the arrowhead) and place them right sides together. Draw a diagonal line from one corner to the other, and sew a quarter-inch seam on either side of the line. Once sewn, cut along the line to create two triangle pieces. Press the seams open to create a sharp edge.
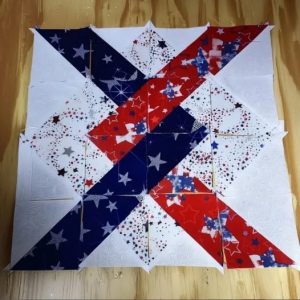
Next, assemble the half-square triangles to create the arrowhead shape. Arrange them with the arrowhead fabric pointing inward to form the shape of an arrow. Sew the triangles together to form the central part of the quilt block.
After the arrowhead shape is complete, add the background fabric to the edges of the block. This will help frame the arrowhead and make it stand out. Be sure to trim the edges of your fabric to ensure everything aligns properly.
Once the arrowhead and background pieces are sewn together, join them to complete the block. Press the seams to ensure everything lies flat and neat.
Finally, trim any excess fabric around the edges to ensure the quilt block is the correct size. You can then add any borders or sashing around the block before joining it with other blocks in your quilt design.
While the Arrowhead Quilt Block – PATTERN is relatively straightforward, there are a few tips to keep in mind that can make the process smoother:
Accuracy is key when piecing together quilt blocks. Always measure your fabric pieces and double-check your seam allowances to ensure everything fits together perfectly.
Pressing your fabric after each step helps keep the quilt block neat and prevents fabric from shifting. It also helps to ensure that your seams are crisp and even.
The Arrowhead Quilt Block – PATTERN can be made using a wide variety of color combinations. Don’t be afraid to experiment with different shades, fabrics, and prints to create a unique quilt design.
Chain piecing can save time and make your quilting process more efficient. This technique involves sewing multiple pieces together without cutting the thread in between, which can speed up the assembly process.
Trimming excess fabric during the quilting process ensures that your blocks are even and the edges are straight. It’s a small step that can make a big difference in the final result.
Quilting is a process that requires patience and attention to detail. Don’t rush—take your time to ensure each piece is sewn properly, and you’ll end up with a beautiful finished quilt.
An Arrowhead Quilt Block – PATTERN is a traditional quilt block design that features an arrowhead shape in the center, created using half-square triangles. It’s a popular choice for quilters looking to add a bold, geometric element to their projects.
Yes! You can adjust the measurements of the fabric pieces to create an Arrowhead Quilt Block in various sizes. Simply scale the pattern up or down to fit your project needs.
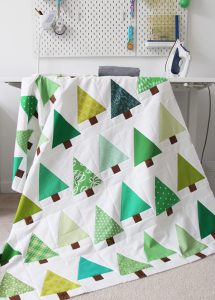
Arrowhead Quilt Blocks can be used for a variety of projects, including quilts, wall hangings, table runners, and even pillow covers. Their geometric design makes them versatile for many different types of decor.
To join multiple blocks together, you can use a technique called sashing, where fabric strips are sewn between the blocks. Alternatively, you can sew the blocks together directly, depending on your design preferences.
While the Arrowhead Quilt Block involves some basic techniques, such as creating half-square triangles, it is suitable for beginner quilters who are looking to try a geometric design.
To make your Arrowhead Quilt Block stand out, experiment with contrasting fabrics and bold colors. You can also try adding borders or sashing around the blocks to give them a framed appearance.
In conclusion, the Arrowhead Quilt Block – PATTERN is an exciting and versatile quilting design that can be adapted to fit a wide range of projects. From fabric selection to step-by-step assembly, we’ve covered everything you need to know to create beautiful arrowhead quilt blocks. By following these guidelines and experimenting with colors and fabrics, you’ll be able to create a quilt that’s uniquely yours. We’d love to hear your thoughts on this pattern! Feel free to leave a comment with your suggestions and any experiences you’ve had making the Arrowhead Quilt Block – PATTERN.


