
Horizontal Row Quilt - Pattern

The Box Quilt Block – Pattern is one of the most beloved and versatile designs in the quilting world.
Known for its simple, yet stunning look, this pattern creates a beautifully geometric design that can be used in a wide variety of quilting projects.
Whether you are creating a throw quilt, a bedspread, or a wall hanging, the Box Quilt Block – Pattern can easily adapt to any size or color scheme.
This article will explore the basics of the Box quilt block pattern, the materials you need, the steps to create the blocks, and some helpful tips to make your quilt-making process easier and more enjoyable.
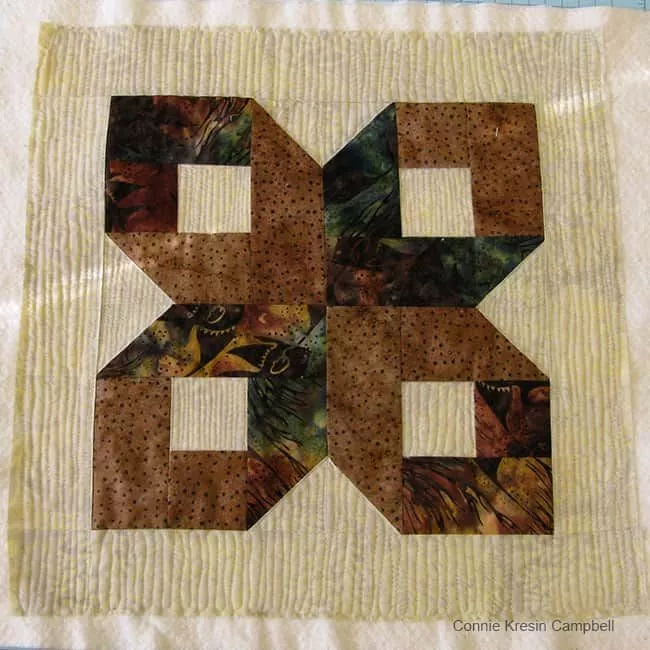
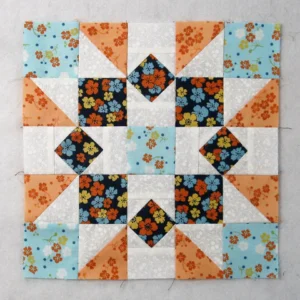
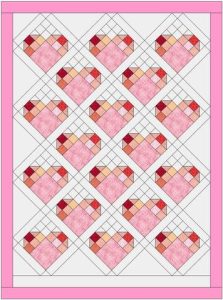
Image From Pinterest
The Box Quilt Block – Pattern gets its name from the distinct box-like shapes it forms when the individual blocks are pieced together. This pattern is characterized by clean lines and symmetrical shapes that create a visually pleasing, modern, and organized design. What makes it especially appealing is its simplicity, which allows quilters of all skill levels to create a quilt that looks complex but is relatively easy to construct.
Not only does the Box Quilt Block – Pattern offer aesthetic value, but it also allows for creativity. You can experiment with various color combinations, fabrics, and even the layout of the blocks to make a quilt that’s uniquely yours. The versatility of the pattern makes it a favorite among beginners and experienced quilters alike.
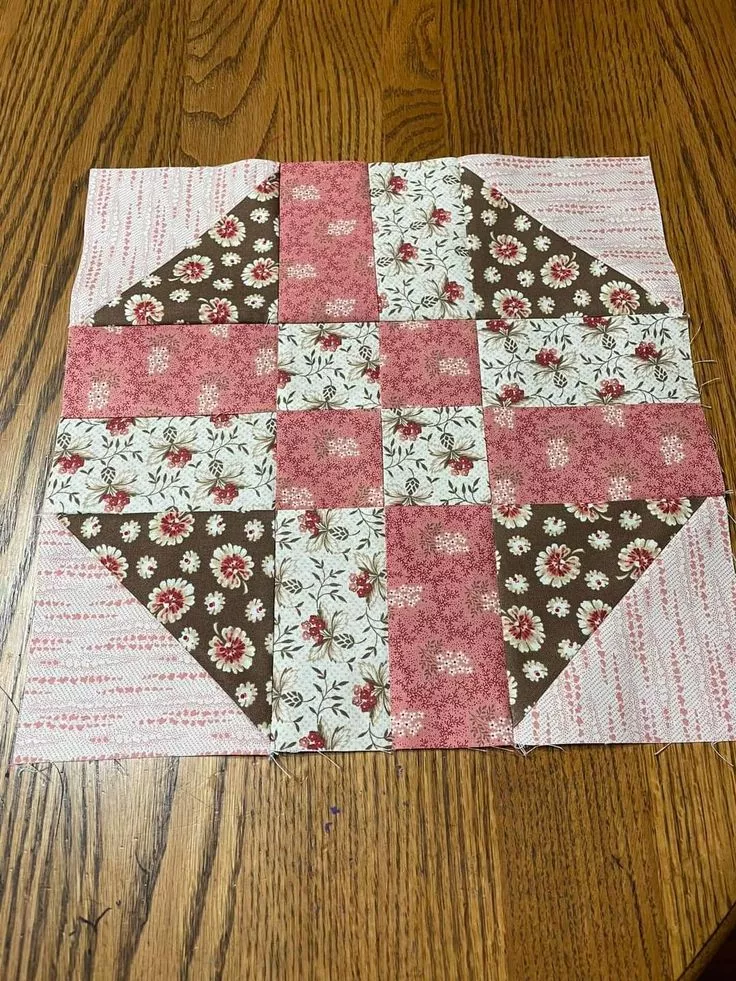
Before diving into creating a Box Quilt Block, it’s important to understand what makes up the pattern and how it comes together. The pattern relies on a series of squares, strips, and half-square triangles that fit together in a grid-like formation to create the box effect.
At the heart of the Box Quilt Block – Pattern are its geometric shapes. The blocks are typically made up of several squares of fabric that form the “boxes.” These squares are then arranged in a pattern to create a larger design. The most common sizes for a single Box block are 6-inch or 12-inch squares, but you can adjust this depending on the size of the quilt you are making.
The blocks are arranged in a grid, with the “boxes” positioned side by side. The layout can vary depending on your preferences – you can have rows of blocks that run horizontally, vertically, or even on a diagonal. The design options are nearly endless, giving you a lot of creative freedom when it comes to how you want your finished quilt to look.
To enhance the appearance of the Box Quilt Block – Pattern, you can add sashing or borders between the blocks. Sashing is a strip of fabric that separates the individual blocks, helping to create a more structured look. Borders can be added to frame the quilt, adding an extra layer of color and definition to your project.
A key feature of the Box Quilt Block is how color placement can dramatically change the overall look of the quilt. By alternating light and dark fabrics or experimenting with contrasting patterns, you can create a quilt that has depth and dimension. This is one of the most enjoyable parts of working with the Box Quilt pattern, as it allows for endless color combinations.
For the Box Quilt Block – Pattern, a variety of fabric types can be used, such as cotton, flannel, and even batik fabrics. A popular choice is to use coordinating fabric bundles to maintain a cohesive look throughout the quilt. Alternatively, you can use scraps for a scrappy quilt, which gives the quilt a fun, eclectic appearance.
One of the most important aspects of making a Box Quilt is ensuring that all of your fabric pieces are cut to the correct size. It’s a good idea to pre-cut your fabric before you start sewing to ensure consistency and accuracy in your blocks.
Creating the Box Quilt Block – Pattern requires just a few essential materials to get started. Having the right tools and supplies will make the process much easier and help ensure that your quilt turns out beautifully.
You’ll need fabric in a variety of colors to create the blocks. Choose fabrics that contrast well with each other to make the boxes stand out. You can either use a single color scheme or opt for a more vibrant, multicolored look.
A rotary cutter and cutting mat are essential for cutting your fabric into precise shapes. The rotary cutter ensures clean edges, while the cutting mat protects your work surface and allows for accurate measurements.
A quilting ruler will help you measure and cut straight lines, ensuring that each block is the correct size. It’s especially helpful for cutting half-square triangles, which are often used in the Box Quilt design.
A sewing machine is essential for quickly and accurately piecing together your quilt blocks. It allows you to join the fabric pieces and finish your quilt faster, with cleaner seams.
Use high-quality cotton thread to match or complement the fabric. The right thread will ensure that your quilt holds together well and lasts through years of use.
After you sew each block, you’ll need an iron and pressing mat to press the seams. Pressing helps to flatten the seams and give your quilt blocks a neat, polished look.
Now that you have your materials ready, it’s time to start creating the Box Quilt Block – Pattern. Follow these simple steps to make your own blocks and assemble them into a stunning quilt.
Start by cutting your fabric into the appropriate sizes. You will need squares for the boxes, and half-square triangles for the corners of the boxes. Be sure to cut accurately, as this will affect the finished look of your quilt.
Sew your fabric pieces together, starting with the squares and adding half-square triangles to form the edges of the boxes. Use a consistent seam allowance throughout the process to maintain uniformity.
Once your pieces are sewn together, press each seam flat with an iron. This will help eliminate any puckers and give your quilt blocks sharp, clean edges.
Once all of your blocks are made, arrange them in your desired layout. You can follow a traditional grid pattern or get creative with diagonal or checkerboard layouts.
After arranging your blocks, sew them together row by row. Once the rows are sewn, join them to complete the quilt top.
Once the quilt top is assembled, you can add borders to frame the design. Afterward, quilt the layers together to finish your Box Quilt. This is a great time to add decorative stitching or quilting patterns to enhance the overall design.
While the Box Quilt Block – Pattern is beautiful on its own, there are many ways to personalize it and make it your own. Here are some ideas for customizing your quilt:
Experiment with different fabric combinations to create a quilt that reflects your personal style. Mix solid fabrics with prints, or use fabrics with different textures to add interest to the blocks.
Consider adding appliqué shapes or designs to your quilt. You can place these on top of the blocks for added detail, creating a more intricate and unique design.
Don’t feel confined to the traditional 6-inch or 12-inch blocks. Try creating larger or smaller blocks to create a different visual effect and adjust the size of your quilt.
If you have a lot of fabric scraps, use them to create a scrappy Box Quilt. The randomness of the colors and patterns will add a playful, vibrant feel to the quilt.
Don’t forget to add a personalized label to your quilt. You can sew it onto the back to commemorate the occasion or simply as a way to sign your work.
Q1: What is the easiest way to sew the Box Quilt blocks together?
A1: The easiest way to sew the Box Quilt Block – Pattern together is to break the process into manageable steps. Start by piecing the squares, then add the half-square triangles, and press as you go to keep everything neat.
Q2: Can I use any fabric for the Box Quilt pattern?
A2: Yes! You can use any fabric you like, but quilting cotton is the most commonly used fabric. Make sure to select fabrics that complement each other in terms of color and texture.
Q3: How do I ensure my blocks are the right size?
A3: Using a quilting ruler and rotary cutter will ensure that your blocks are cut to the correct size. Always measure your fabric before cutting and double-check your cuts for accuracy.
Q4: Can I make a Box Quilt by hand?
A4: Yes, it is possible to make a Box Quilt Block – Pattern by hand. However, using a sewing machine will speed up the process and provide more consistent stitches.
Q5: What kind of quilting designs can I use on a Box Quilt?
A5: You can use a variety of quilting designs, from simple straight lines to more intricate free-motion quilting. The design you choose will depend on your style and the overall look you want for your quilt.
The Box Quilt Block – Pattern is a timeless and versatile design that can be customized in many ways to suit your style. Whether you’re a beginner or an experienced quilter, this pattern offers endless possibilities for creating beautiful quilts. From selecting fabrics to piecing the blocks together, the process of making a Box Quilt is both rewarding and fun.
We hope this guide has helped you understand how to make your own Box Quilt Block – Pattern and provided you with inspiration for your next project. If you have any questions or suggestions, feel free to leave a comment below. Happy quilting!


