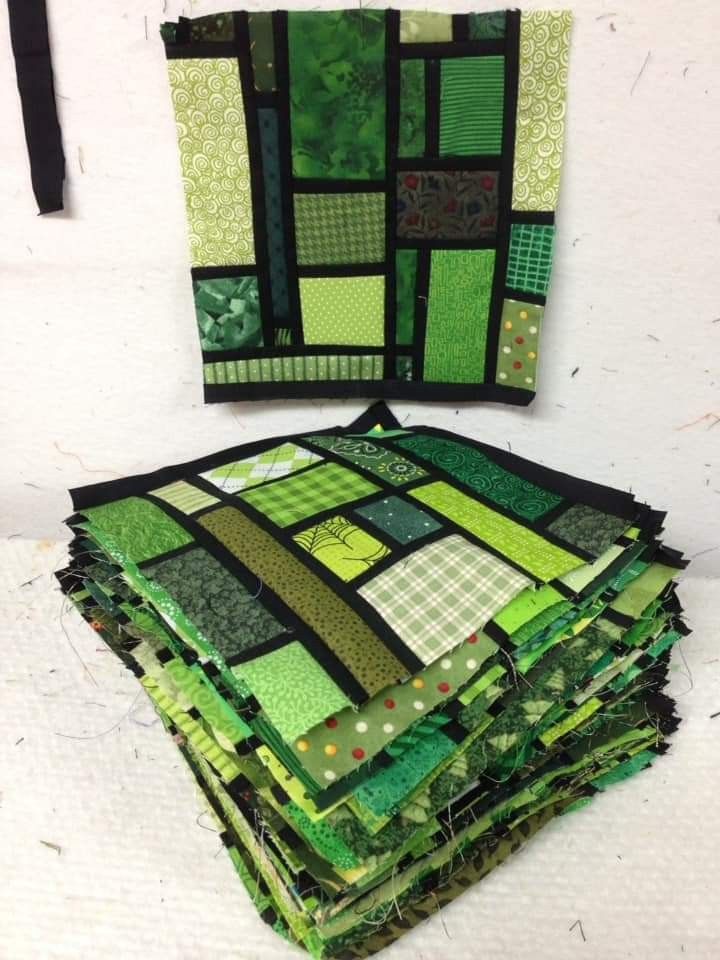
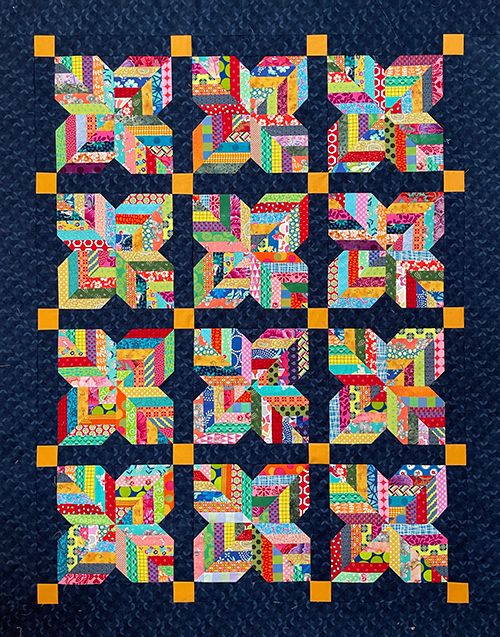
Stained Glass Block Made From Scraps - Tutorial

The Cheshire cats Quilt- Pattern is one of the most whimsical and visually captivating designs in the world of modern quilting. Inspired by the mischievous, disappearing feline from Lewis Carroll’s classic tale, this quilting project allows makers to play with bold colors, hidden shapes, and that iconic, toothy grin. Whether you are a fan of literary themes or simply love intricate patchwork, creating a quilt based on this theme offers a unique way to express your creativity through fabric selection and precise stitching techniques.
Finding the perfect Cheshire cats Quilt- Pattern requires a balance between artistic flair and technical clarity. For many quilters, the appeal lies in the “now you see it, now you don’t” nature of the design, often achieved through paper piecing or clever use of negative space. Because the character is known for his pink and purple stripes, this specific quilt design serves as an excellent opportunity to experiment with gradient fabrics and color theory to ensure the cat’s face pops against the background.
Embarking on a Cheshire cats Quilt- Pattern journey is not just about finishing a blanket; it is about storytelling through textile art. From selecting the right cotton weights to deciding on the quilting motif—perhaps a swirling pattern that mimics the cat’s magical disappearance—every choice adds a layer of personality to the final piece. In this guide, we will dive deep into the essential elements of this pattern, providing you with the expert tips and SEO-friendly advice needed to create a masterpiece that would make any hatter proud.
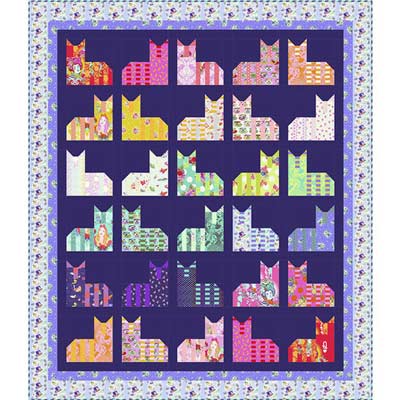
The foundation of a successful Cheshire cats Quilt- Pattern starts with the facial geometry. Unlike traditional blocks, this design often focuses on the exaggerated smile and wide, glowing eyes. Achieving this look requires high-quality quilting templates that guide your cuts with precision, ensuring the curves of the mouth look fluid rather than jagged.
When working with this quilt layout, it is vital to consider the fabric contrast. The Cheshire Cat is famous for his vibrant stripes, so using saturated hues of magenta and violet is a popular choice. However, modern quilters often opt for a minimalist aesthetic, using grayscale fabrics with a single splash of color for the eyes to create a more sophisticated art quilt.
Precision is key when assembling the block units. Because the face involves many small segments, many patterns recommend foundation paper piecing (FPP). This method allows you to sew directly onto paper guides, which is the best way to maintain the sharp angles required for the cat’s grin and pointed ears in a complex quilt pattern.
The background fabric choice can make or break your Cheshire cats Quilt- Pattern. A dark, “Wonderland-inspired” navy or black fabric provides a stunning backdrop that makes the neon colors of the cat appear as if they are glowing. Alternatively, a low-volume print fabric can give the quilt a vintage, storybook feel that is perfect for a nursery or a reading nook.
Another important aspect is the border design. To keep the focus on the central figure, many designers suggest a simple straight-edge border or a “piano key” border using scraps from the main body. This keeps the visual weight balanced and ensures that the intricate details of the cat’s face remain the undisputed star of the show.
Lastly, don’t forget the quilt batting. Since this design often features heavy topstitching to define the feline’s features, a thin, stable batting like 100% cotton or a cotton-poly blend is ideal. It provides enough loft to show off the quilt textures without making the detailed facial sections too bulky to handle under a domestic sewing machine.
To start your Cheshire cats Quilt- Pattern, you need a reliable sewing machine capable of handling multiple layers of fabric. A machine with a walking foot is highly recommended, especially when you begin the quilting process, as it ensures the layers move together evenly, preventing the dreaded “puckering” around the cat’s smile.
Your fabric shears and rotary cutters must be incredibly sharp. Because this pattern involves numerous small pieces and specific curves, a 28mm rotary cutter is often easier to maneuver than the standard 45mm version. High-quality acrylic rulers are also indispensable for checking your seam allowances and ensuring every block is squared up perfectly.
Thread selection is another critical component of the Cheshire cats Quilt- Pattern. Using a 50wt cotton thread is generally best for piecing because it is strong but thin enough to not add bulk to the seams. For the actual top quilting, you might consider a variegated thread in shades of pink and purple to add a magical, shifting color effect to the cat’s fur.
Marking tools are essential when you move away from the pattern templates to add custom details. A water-soluble fabric pen or tailor’s chalk allows you to sketch the whiskers or the pupils of the eyes before you sew. This ensures that the most expressive parts of the quilt design are symmetrical and placed correctly according to your vision.
Don’t overlook the importance of fabric starch. When working with the small, often bias-cut pieces required for a Cheshire cats Quilt- Pattern, fabric can easily stretch out of shape. Applying a bit of spray starch before cutting gives the fabric a “paper-like” crispness, making it much easier to sew intricate seams without distortion.
Finally, a large cutting mat and a dedicated pressing station with a hot iron are your best friends. In quilting, we “press” rather than “iron” to avoid stretching the fabric. Constant pressing of every seam is the secret to getting those professional results that make your handmade quilt look like a work of gallery art.
Mastering the curved piecing technique is a game-changer for the Cheshire cats Quilt- Pattern. The cat’s eyes and the arc of his smile often require sewing curves, which can be intimidating for beginners. Using plenty of pins and sewing slowly will help you navigate these shapes, resulting in a smooth, professional finish.
If the idea of sewing curves is too daunting, you can utilize appliqué techniques. Raw-edge appliqué or turned-edge appliqué allows you to cut the cat’s features out of fabric and sew them directly onto a base block. This method provides more freedom for artistic expression and is a popular way to handle the more complex parts of the Cheshire cat design.
For those who love a challenge, fussy cutting is a great way to enhance the Cheshire cats Quilt- Pattern. This involves cutting specific motifs from your fabric—perhaps small birds or flowers—to land exactly in the center of the cat’s eyes or ears. It adds a “hidden” layer of detail that rewards people for looking closely at your textile work.
The seam allowance is the most important measurement in your project. A consistent 1/4-inch seam is the standard in the quilting world. If your seams vary even slightly, the complex blocks of the Cheshire cats Quilt- Pattern will not line up, leading to a lopsided smile or misaligned stripes that are difficult to fix later.
Incorporate textural elements to bring the cat to life. Some quilters use minky fabric or velvet for the cat’s nose or ears to give the quilt a tactile dimension. While these fabrics can be trickier to sew, the “touch-and-feel” aspect adds a wonderful layer of charm to a custom-made quilt intended for a child or a fan.
The final step in piecing is the quilt top assembly. Once all your blocks are finished, laying them out on a design wall (or a clean floor) allows you to see the big picture. This is the moment to check for color balance and ensure that the “disappearing” effect of your Cheshire cats Quilt- Pattern is working exactly how you intended.
One common issue when making a Cheshire cats Quilt- Pattern is the “bubbling” of fabric in highly detailed areas. This usually happens if the quilting density is inconsistent. To fix this, ensure you quilt the entire surface with a similar level of detail, or use a dense stippling stitch in the background to make the cat’s face pop forward.
If you find that your block corners aren’t matching up, don’t panic. Sometimes a little “scootching” during the pressing stage can help. However, if the misalignment is significant, it is better to use a seam ripper and redo that section. Accuracy in the early stages of the pattern assembly saves a lot of frustration during the final binding.
Binding the quilt is the final “frame” for your artwork. For a Cheshire cats Quilt- Pattern, a striped binding—often called a “barbershop pole” binding—works beautifully to echo the striped nature of the character. You can choose a double-fold binding for durability, ensuring your quilt lasts for generations as a family heirloom.
Labeling your work is a step you shouldn’t skip. Every handmade quilt should have a label on the back with the name of the quilt pattern, your name, the date, and the occasion. You can even include a quote from Alice in Wonderland to tie the whole Cheshire cat theme together and give it a personal touch.
The washing and care of your finished piece are vital. Since you’ve spent so much time on your Cheshire cats Quilt- Pattern, use a “color catcher” sheet during the first wash to prevent the dark purples or pinks from bleeding into the lighter areas. Drying on a low heat setting or air-drying will keep the cotton fibers strong and vibrant.
Finally, take the time to photograph your work in natural light. Capturing the details of your stitching and the vibrancy of your fabric choices allows you to share your achievement with the online quilting community. Your unique take on the Cheshire cats Quilt- Pattern might just inspire another maker to start their own journey down the rabbit hole.
1. Is the Cheshire cats Quilt- Pattern suitable for beginners?
While it can be complex due to the facial details, many patterns offer “beginner-friendly” versions using simple appliqué instead of intricate piecing. If you are new to quilting, look for a pattern that uses large blocks and basic shapes.
2. What are the best colors to use for this quilt?
Traditionally, pink and purple stripes are used for the Cheshire cat. However, you can use any colors you like! Blue and grey or even neon green and black can create a stunning modern quilt version of this classic character.
3. Can I use scrap fabric for a Cheshire cats Quilt- Pattern?
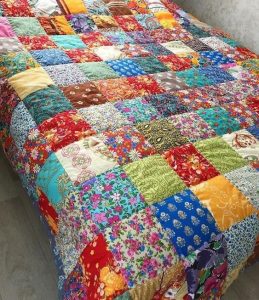
Absolutely! This is a fantastic scrap-busting project. Since the cat is “magical,” having a variety of different patterns and textures within the stripes can actually enhance the “shimmering” or disappearing look of the design.
4. How long does it take to complete the quilt top?
The time varies based on your experience level and the complexity of the pattern. A simple version might take a weekend, while a highly detailed paper-pieced design could take several weeks of dedicated work.
5. Do I need a special machine for the Cheshire cats Quilt- Pattern?
No special machine is required, but a zigzag stitch or a blanket stitch is very helpful if you are doing appliqué. Most importantly, ensure your machine is well-oiled and has a fresh needle before starting such a detailed sewing project.
6. Where can I find a Cheshire cats Quilt- Pattern?
You can find these patterns on popular independent designer platforms, in quilting magazines, or at your local quilt shop. Many designers offer digital downloads (PDFs) so you can start your project immediately.
Creating a Cheshire cats Quilt- Pattern is a rewarding experience that combines technical skill with pure imagination. In this article, we have explored the importance of precise piecing, the selection of vibrant fabrics, and the tools necessary to bring this iconic character to life.
From understanding the core design to troubleshooting the final stitches, you now have the knowledge to tackle this whimsical project with confidence. Whether you choose to follow a traditional color scheme or create something entirely new, the result will be a one-of-a-kind textile that captures the magic of storytelling.


