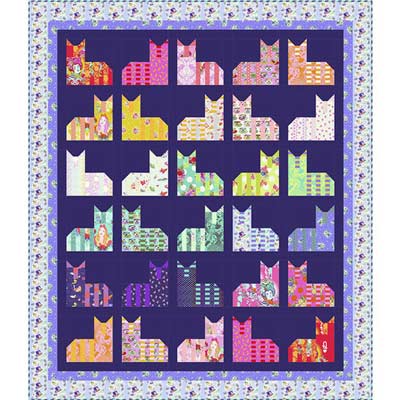
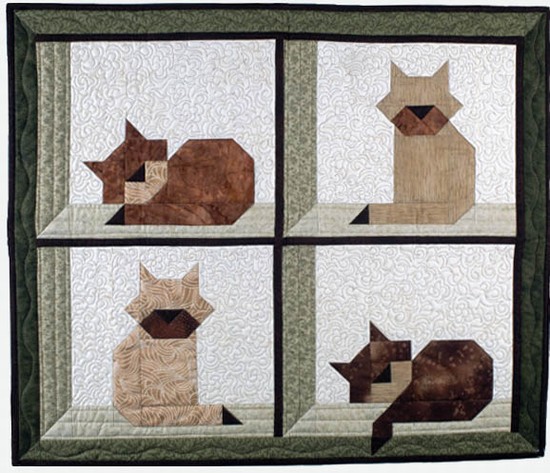
Cheshire cats Quilt- Pattern

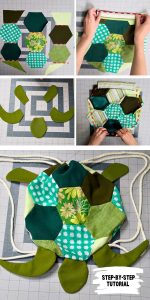
Creating a DIY Car Visor Organizer – Pattern is one of the most rewarding sewing projects for any vehicle owner looking to declutter their dashboard. Whether you are tired of hunting for your sunglasses while driving or need a dedicated spot for your fuel cards and registration papers, a custom-made organizer is the ultimate solution. By following a well-designed DIY Car Visor Organizer – Pattern, you can transform a chaotic sun visor into a streamlined command center that keeps your essentials within arm’s reach.
The beauty of a DIY Car Visor Organizer – Pattern lies in its versatility and the ability to personalize every pocket. Unlike mass-produced store versions that might not fit your specific needs, making your own allows you to choose durable fabrics that match your car’s interior. Using a DIY Car Visor Organizer – Pattern ensures that the dimensions are precise, preventing the organizer from sagging or interfering with your mirror, which is a common issue with generic accessories.
To get started with your DIY Car Visor Organizer – Pattern, you don’t need to be a master tailor; a basic understanding of straight-line sewing and some sturdy materials like canvas or faux leather will suffice. This project is perfect for scrap busting, as the small compartments require minimal fabric. By committing to this DIY Car Visor Organizer – Pattern, you are investing a small amount of time to gain a significant amount of daily convenience and safety by keeping your eyes on the road instead of searching through the glove box.

The core of a successful project is selecting the right DIY Car Visor Organizer – Pattern that fits the specific make and model of your vehicle. Most visors have standard dimensions, but it is always wise to measure the length and width of your sun visor before cutting your fabric to ensure a snug fit.
A high-quality DIY Car Visor Organizer – Pattern typically consists of a sturdy base layer reinforced with interfacing. This reinforcement is crucial because it provides the structural integrity needed to hold the weight of pens, tools, and electronics without drooping over time.
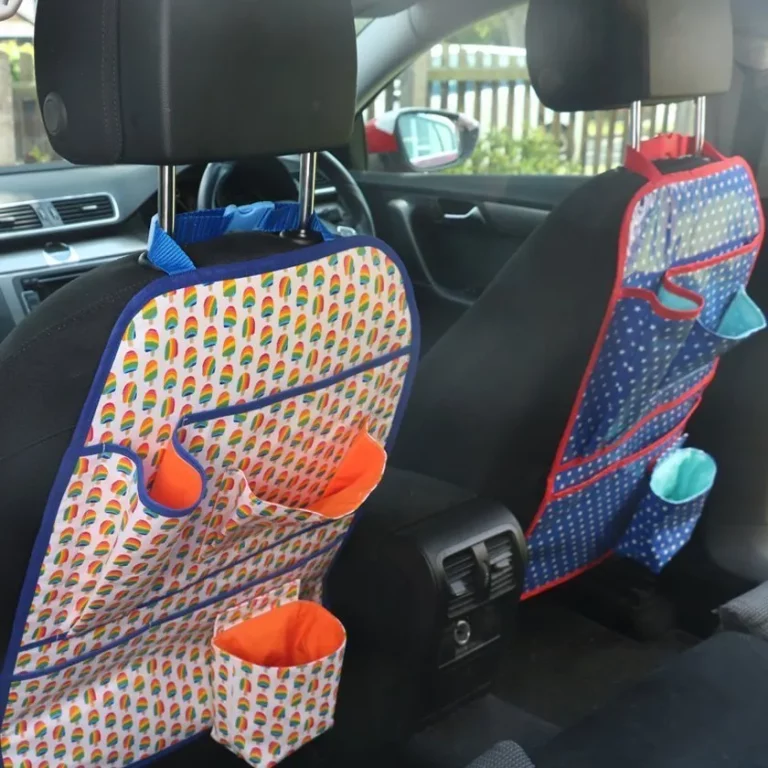
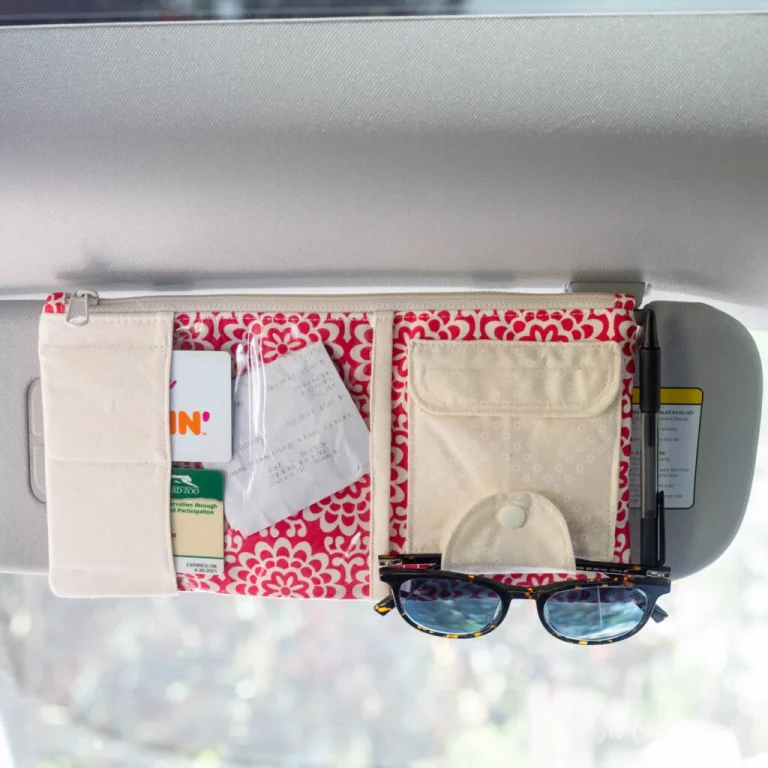
When examining your DIY Car Visor Organizer – Pattern, you will notice various pocket sizes designed for different items. Smaller slots are perfect for pens and styluses, while wider, pleated pockets are ideal for bulky items like garage door openers or thick sunglass cases.
The attachment method in a DIY Car Visor Organizer – Pattern usually involves heavy-duty elastic bands or hook-and-loop fasteners. Elastic is often preferred because it allows for easy installation and removal, stretching securely around the visor regardless of its thickness.
Material choice is another pillar of the DIY Car Visor Organizer – Pattern philosophy. While cotton is easy to sew, choosing a “non-slip” backing or a heavier duck cloth ensures that the organizer stays in place even during sharp turns or sudden stops.
Finally, the DIY Car Visor Organizer – Pattern often includes a layout for “hidden” pockets. These are flat compartments tucked behind the main visible pockets, providing a discreet location for emergency cash or important insurance documents that you don’t want on display.
To bring your DIY Car Visor Organizer – Pattern to life, you will need approximately half a yard of main fabric and a similar amount of lining. Durable materials like denim, cordura, or heavy upholstery fabric are highly recommended for the exterior to withstand constant sun exposure.
Precision is key when following the DIY Car Visor Organizer – Pattern, so make sure you have a rotary cutter and a self-healing mat. These tools allow for much straighter edges than traditional scissors, which is vital when you are sewing multiple layers of pocket fabric together.
Interfacing is the “secret sauce” of any DIY Car Visor Organizer – Pattern. I suggest using a firm, sew-in or fusible stabilizer. This prevents the fabric from stretching out of shape when you slide items in and out of the pockets daily.
Don’t forget the notions required by your DIY Car Visor Organizer – Pattern, such as high-strength polyester thread. Since the organizer will be under tension from the elastic and exposed to heat inside the car, a cheap thread might snap or degrade over time.
Elastic straps are a mandatory component of the DIY Car Visor Organizer – Pattern assembly. Opt for 1-inch or 1.5-inch wide elastic, as thinner bands may lose their “snap” or cause the organizer to wobble while you are driving.
Lastly, you might want to add some flair to your DIY Car Visor Organizer – Pattern by using contrast stitching or adding a small D-ring. A D-ring is a fantastic addition for clipping on keychains or small hand sanitizer bottles, making your organizer even more functional.
The first step in executing your DIY Car Visor Organizer – Pattern is the cutting phase. Lay your fabric flat and carefully cut the base piece and the various pocket strips according to the measurements provided in your guide, ensuring you leave room for seam allowances.
Once the pieces are cut, the DIY Car Visor Organizer – Pattern requires you to prep the pockets. Hem the top edges of all pocket strips first; this gives a professional finish and prevents the fabric from fraying as you use the organizer.
Next, you will layer the pockets onto the base fabric as dictated by the DIY Car Visor Organizer – Pattern layout. It is helpful to use sewing clips instead of pins for this step, especially if you are using thick fabrics or vinyl that might show permanent pinholes.
Now comes the “divider” sewing, a critical part of the DIY Car Visor Organizer – Pattern. You will sew vertical lines through the pocket strips to create individual compartments. Double-stitch at the top and bottom of these lines to provide extra reinforcement against wear and tear.
After the pockets are secured, the DIY Car Visor Organizer – Pattern moves to the attachment phase. Pin your elastic loops to the back or sides of the base, ensuring they are positioned so that they won’t cover any mirrors or lights built into your car’s visor.
The final stage of the DIY Car Visor Organizer – Pattern is the “sandwich” sew. Place the lining fabric right sides together with the pocketed base, sew around the edges leaving a small gap, turn it right side out, and topstitch the entire perimeter for a crisp, store-bought look.
One of the best ways to upgrade a standard DIY Car Visor Organizer – Pattern is by adding a dedicated mesh pocket. Mesh allows you to see exactly what is inside, making it the perfect spot for coins, charging cables, or small earbud cases.
If you frequently use your car for work, consider modifying the DIY Car Visor Organizer – Pattern to include a clear vinyl window. This is an excellent addition for displaying a parking permit or a business card without having to remove it from the organizer.
For those who prioritize safety, your DIY Car Visor Organizer – Pattern can be adjusted to include a specialized loop for a seatbelt cutter or a small emergency flashlight. Having these tools easily accessible can be life-saving in a critical situation.
Aesthetics matter too, so feel free to experiment with the DIY Car Visor Organizer – Pattern by using “fussy cutting” techniques. This involves positioning your fabric so that a specific print or logo is perfectly centered on the main pocket for a high-end, custom look.
If you have a larger SUV or truck, you can scale up the DIY Car Visor Organizer – Pattern dimensions. Larger visors provide more “real estate,” allowing you to add even more rows of pockets or even a zippered compartment for added security.
Finally, consider the climate when finishing your DIY Car Visor Organizer – Pattern. If you live in a very hot area, avoid using dark vinyl which can become burning hot to the touch; instead, stick with breathable, light-colored fabrics that stay cool under the sun.
What is the best fabric for a DIY Car Visor Organizer – Pattern?
The best fabrics are heavyweight materials like canvas, denim, or outdoor polyester. These fabrics are durable enough to hold heavy items and resist fading from UV rays.
How do I clean my organizer once it is finished?
If you used machine-washable fabrics like cotton or denim, you can spot clean it with a damp cloth and mild soap. If it is very dirty, hand wash and air dry to prevent the internal stabilizer from warping.
Will this DIY Car Visor Organizer – Pattern fit any car?
Most patterns are designed for standard visors, but it is highly recommended to measure your specific visor first. You can easily adjust the width of the base fabric in the pattern to ensure a perfect fit for your vehicle.
Can I make this without a sewing machine?
While a sewing machine is much faster and provides stronger seams, you can certainly hand-sew this project using a “backstitch” for durability. It will just take more time and patience.
How do I prevent the organizer from sagging?
Sagging is usually caused by a lack of internal support. Ensure you use a heavy-duty interfacing or even a thin piece of plastic (like from a flexible cutting mat) inside the base of your organizer.
Is it safe to have an organizer on my visor?
Yes, as long as it is secured tightly and does not obstruct your view of the road or interfere with the deployment of airbags. Always ensure the elastic is tight and the organizer is flush against the visor.
In conclusion, following a DIY Car Visor Organizer – Pattern is an incredibly efficient way to bring order to your driving experience. Throughout this guide, we have explored the essential materials, the step-by-step construction process, and creative ways to customize your project to fit your lifestyle.
By taking the time to sew your own organizer, you ensure that every pocket serves a purpose and every strap fits perfectly. This project not only enhances your car’s interior but also promotes a safer, more focused driving environment by eliminating clutter.

