
Horizontal Row Quilt - Pattern

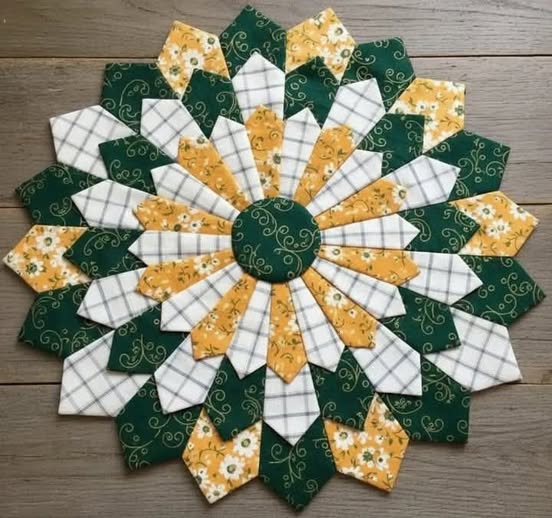
Mastering the art of the Dresden Plate Quilt- Pattern is a journey into one of the most beloved and visually stunning traditions in the world of quilting. This classic pattern has captured the hearts of makers for generations, offering a perfect blend of vintage charm and modern versatility. When you decide to create a Dresden Plate Quilt, you are not just sewing fabric together; you are crafting a floral-inspired masterpiece that radiates from a central point, creating a secondary design of petals that can be as colorful or as minimalist as you desire.
The beauty of the Dresden Plate Quilt- Pattern lies in its geometric precision and its ability to use up even the smallest scraps of cherished fabric. Originally gaining massive popularity in the 1920s and 30s, the Dresden Plate remains a staple in the quilting community because it allows for endless customization. Whether you prefer a “pointy” petal edge or a “rounded” finish, the pattern provides a structured framework that ensures your circular blocks lie perfectly flat against their background squares, which is the hallmark of a high-quality handmade quilt.
To successfully execute a Dresden Plate Quilt- Pattern, one must understand the relationship between the wedge shapes and the central circle. This quilting pattern relies on a specific number of blades—usually 20—that are sewn together to form a full 360-degree circle. Because the Dresden Plate Quilt is an appliqué-style project, the finished “plate” is sewn onto a larger base fabric, giving you the opportunity to play with negative space and intricate quilting stitches. In the following sections, we will break down the essential steps and techniques needed to perfect this iconic design.
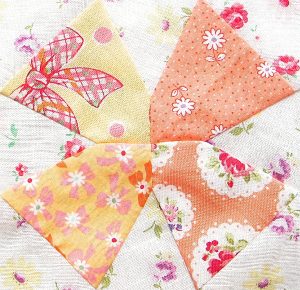
When embarking on a Dresden Plate Quilt- Pattern, the first and most exciting step is selecting your color palette. Because the pattern is composed of many individual blades, it is the perfect candidate for a “scrappy” look. You can choose a variety of prints that share a common color thread, or you can go for a more organized aesthetic by alternating two contrasting fabrics around the wheel. The Dresden Plate Quilt looks particularly striking when high-contrast colors are used between the petals and the background.
The weight of the fabric is also a crucial consideration for this specific pattern. Most quilters prefer 100% high-quality quilting cotton because it holds a crease well and doesn’t fray excessively. Since the Dresden Plate Quilt- Pattern involves many small seams meeting at a central point, using a fabric that is too thick or too stretchy can lead to bulkiness in the center, making it difficult to attach the decorative middle circle later on.
Don’t forget the importance of the background fabric in your Dresden Plate Quilt. While the petals are the stars of the show, the background provides the stage. A solid white, cream, or light grey background can make a vibrant Dresden Plate pop, whereas a dark navy or charcoal background creates a sophisticated, modern vibe. Always pre-wash your fabrics if you are worried about bleeding, especially when mixing dark and light colors in a pattern like this.
Texture can also play a role in your Dresden Plate Quilt- Pattern. Some modern quilters incorporate linens or even small amounts of silk to give the “petals” a different tactile feel. However, for your first Dresden Plate, sticking to standard cotton will make the construction process much smoother. The goal is to ensure that all the fabrics used in the quilt have similar care requirements so the finished piece remains durable for years.
The central circle of the Dresden Plate Quilt offers another opportunity for creativity. Many people choose a bold, solid color to act as a “bullseye” that draws the eye inward. Others use a fussy-cut fabric, where a specific motif like a flower or a bird is centered perfectly in the middle of the pattern. This small detail can turn a standard fabric project into a true work of art that tells a story through its design.
Finally, consider the scale of the prints you are using. Since the blades of the Dresden Plate Quilt- Pattern are relatively narrow at the top and even narrower at the bottom, large-scale prints may get “lost” or look unrecognizable. Small-scale florals, dots, or geometric prints usually work best to ensure that each petal of your Dresden Plate contributes to the overall visual harmony of the finished block.
Precision cutting is the secret to a flat-laying Dresden Plate Quilt- Pattern. To get started, you will need a specialized Dresden Plate ruler or a template. Most patterns are designed for a 18-degree or 22.5-degree wedge, depending on how many petals you want in your circle. Using a rotary cutter and a steady hand ensures that every blade in your Dresden Plate Quilt is identical, which is vital for the pieces to fit together without puckering.
Once your wedges are cut, the next step in the Dresden Plate Quilt- Pattern is to create the finished top edge of the petal. For a pointed petal, you fold the wide end of the wedge in half (right sides together) and sew a straight line across the top. When you turn this right side out and center the seam, you get a perfect, crisp point. This technique is what gives the Dresden Plate Quilt its distinct, flower-like appearance.
Pressing is perhaps the most important part of this stage. After turning your points, you must press them flat with an iron. A professional Dresden Plate Quilt- Pattern will emphasize that the center seam of each blade must be perfectly aligned with the center of the point. If these seams are crooked, the entire quilt block will look off-center. Using a bit of starch can help keep these small pieces of fabric crisp and easy to handle.
If you prefer a rounded Dresden Plate, the preparation is slightly different. You might use a cardboard template and a gathering stitch to pull the fabric over the edge, or use a “turned-edge” appliqué method. No matter which style you choose, the pattern requires consistency. If one petal is slightly shorter or wider than the others, your Dresden Plate Quilt circle will not lay flat, causing a “mountain” in the middle of your block.
Organization is key when dealing with so many small pieces. Many quilters like to lay out their blades in a circle on a design board before sewing. This allows you to check the color distribution of your Dresden Plate Quilt- Pattern and make sure no two identical fabrics are touching. It’s much easier to rearrange the pieces now than it is to use a seam ripper later once the pattern is joined.
Finally, check your seam allowance. The Dresden Plate Quilt- Pattern almost always relies on a precise 1/4 inch seam. Because there are so many seams in one block (usually 20), even a tiny error in your seam width can multiply. By the time you reach the last petal, you might find you have too much or too little space to close the circle. Measuring your first few joined blades will ensure your Dresden Plate Quilt remains perfectly circular.
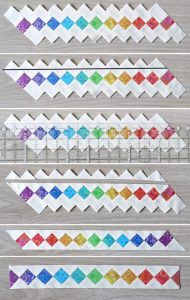
Assembling the blades of your Dresden Plate Quilt- Pattern is like putting together a puzzle. You will sew the blades together in pairs, then in groups of four, and so on, until you have two halves of a circle. Joining the two halves is the final “big” seam of the Dresden Plate. Once joined, you should be able to press the entire ring flat. The center hole might look a bit messy, but don’t worry—the center circle of the pattern will hide all the raw edges.
The next phase involves the background fabric. You will center your finished Dresden Plate ring onto a square of background fabric. It is helpful to fold the background square into quarters and lightly press it to find the exact center point. This ensures that your Dresden Plate Quilt- Pattern is perfectly positioned. Pin or baste the plate in place securely so it doesn’t shift during the final stitching process.
Now comes the “plate” attachment. You can use a blind hem stitch for a “hand-sewn” look, or a decorative blanket stitch on your machine for a more primitive style. The Dresden Plate Quilt is very forgiving here; as long as your stitches are even, the result will look beautiful. Make sure to sew around the entire outer perimeter of the pattern, catching the tips of each petal to keep them flat against the background.
The center circle is the finishing touch of the Dresden Plate Quilt- Pattern. To create a perfect circle, many quilters use the “foil method” or a dedicated circle template. You cut a piece of fabric slightly larger than the final circle, sew a gathering stitch around the edge, and pull it tight over a template. After pressing it, you remove the template, and you’re left with a perfect, smooth-edged circle ready to be appliquéd onto the center of your Dresden Plate.
Once the center circle is pinned over the raw edges in the middle of your pattern, you stitch it down using the same method you used for the outer edges. This circle doesn’t just look pretty; it provides structural integrity to the Dresden Plate Quilt. It locks all the inner seams in place, ensuring that the center of your block is just as durable as the rest of the quilt.
With the block fully assembled, give it one final, thorough press. You now have a completed Dresden Plate Quilt- Pattern block! From here, you can decide how many blocks you need for your final project. Some people make a single large block for a wall hanging, while others create dozens of smaller blocks to form a full-sized Dresden Plate Quilt that will be passed down through the family for years to come.
One common issue with the Dresden Plate Quilt- Pattern is a “wavy” outer edge. This usually happens if the blades were stretched during the sewing or pressing process. To avoid this, always press with an up-and-down motion rather than sliding the iron across the fabric. If your Dresden Plate is already wavy, you can sometimes “quilt it out” by using a denser quilting pattern in the background to pull the fabric taut.
Another frequent challenge is a “bulgy” center. If your Dresden Plate Quilt doesn’t want to lay flat in the middle, it might be because the seam allowances are too wide at the bottom of the wedges. To fix this, you can carefully trim a small amount of the bulk from the seam allowances where they meet in the center. Just be careful not to cut through your stitching, or your pattern will begin to unravel.
When it comes time to quilt the layers together, the Dresden Plate Quilt- Pattern offers many artistic choices. “Stitch-in-the-ditch” is a popular method, where you sew exactly in the seams between the petals. This emphasizes the individual blades of the Dresden Plate. Alternatively, you can do “echo quilting,” where you follow the shape of the petals about a quarter-inch away on the background fabric, creating a halo effect around the design.
If you are making a multi-block Dresden Plate Quilt, think about the sashing. Sashing is the strips of fabric between the blocks. Using a contrasting sashing can help define each Dresden Plate block, while using the same fabric as the background makes the plates look like they are floating in a sea of color. The pattern is flexible enough to accommodate both traditional and modern layouts.
The binding is the final frame for your Dresden Plate Quilt- Pattern. A bias binding is often preferred if you have rounded corners, but for a standard square quilt, a straight-grain binding works perfectly. Consider using one of the fabrics from the petals for the binding to tie the whole fabric design together. It provides a cohesive finish that celebrates the hard work you put into each individual block.
Remember that quilting is a skill that improves with every project. Your first Dresden Plate Quilt might not be perfect, but its handmade nature is what makes it valuable. The Dresden Plate Quilt- Pattern is a journey of patience and precision, and the result is a timeless piece of functional art. Enjoy the process of seeing your fabric scraps transform into a beautiful, blooming garden of cotton.
How many blades do I need for a standard Dresden Plate?
Most traditional Dresden Plate Quilt- Pattern designs use 20 blades. However, depending on the angle of your wedge template, you might use 12, 16, or even 24. The most important thing is that the total degrees of all blades add up to 360 so the circle closes perfectly.
Can I make a Dresden Plate without a special ruler?
Yes, you can! While a ruler makes it faster, you can create a paper template from any Dresden Plate Quilt- Pattern. Simply trace the shape onto cardstock, cut it out, and use it to trace your wedges onto the fabric. Just ensure your measurements are exact to avoid a lumpy finished product.
What is the difference between a pointed and a rounded Dresden Plate?
The difference is purely aesthetic. A pointed Dresden Plate has sharp, star-like tips, created by sewing and turning the top of the wedge. A rounded Dresden Plate has soft, petal-like curves. Both follow the same basic pattern for the body of the wedge, but the finishing technique for the outer edge varies.
Is the Dresden Plate considered a difficult pattern?
It is considered an “intermediate” pattern. While the straight seams are easy, the appliqué process and the need for precision in the center make it slightly more challenging than a basic patchwork quilt. However, with a good Dresden Plate Quilt- Pattern, even a brave beginner can succeed.
How do I wash a Dresden Plate Quilt?
Because of the appliqué, you should wash your Dresden Plate Quilt on a gentle cycle with cold water. Use a “color catcher” sheet to prevent dyes from the petals from staining the background. To keep the fabric and the points of the petals looking their best, air drying or a low-heat tumble dry is recommended.
Can I use the Dresden Plate pattern for things other than quilts?
Definitely! The Dresden Plate block is very versatile. You can use a single block to make a decorative pillow, a table runner, or even the back of a jacket. The Dresden Plate Quilt- Pattern is essentially a decorative medallion that can be applied to almost any flat fabric surface.
In this guide, we have explored the timeless beauty of the Dresden Plate Quilt- Pattern, covering everything from the initial fabric selection to the final assembly of the blocks. We discussed the importance of precision cutting, the choice between pointed and rounded petals, and the creative possibilities of the central circle.
This pattern remains a favorite because it combines historical tradition with the freedom for modern artistic expression. Whether you are using vintage scraps or contemporary prints, the Dresden Plate Quilt is a project that rewards patience with a stunning visual result.


