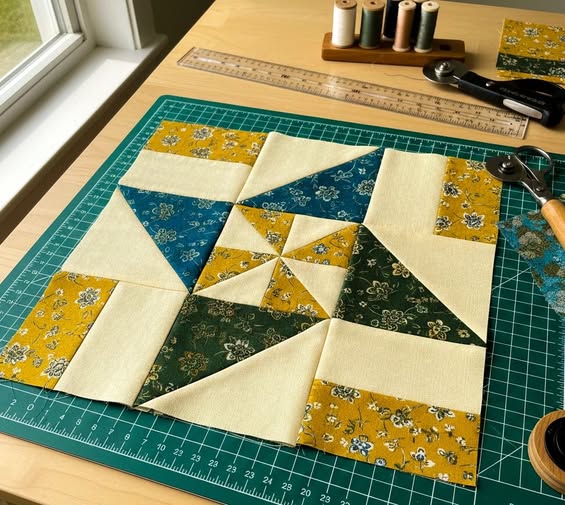
Catavento Patchwork Block - Pattern

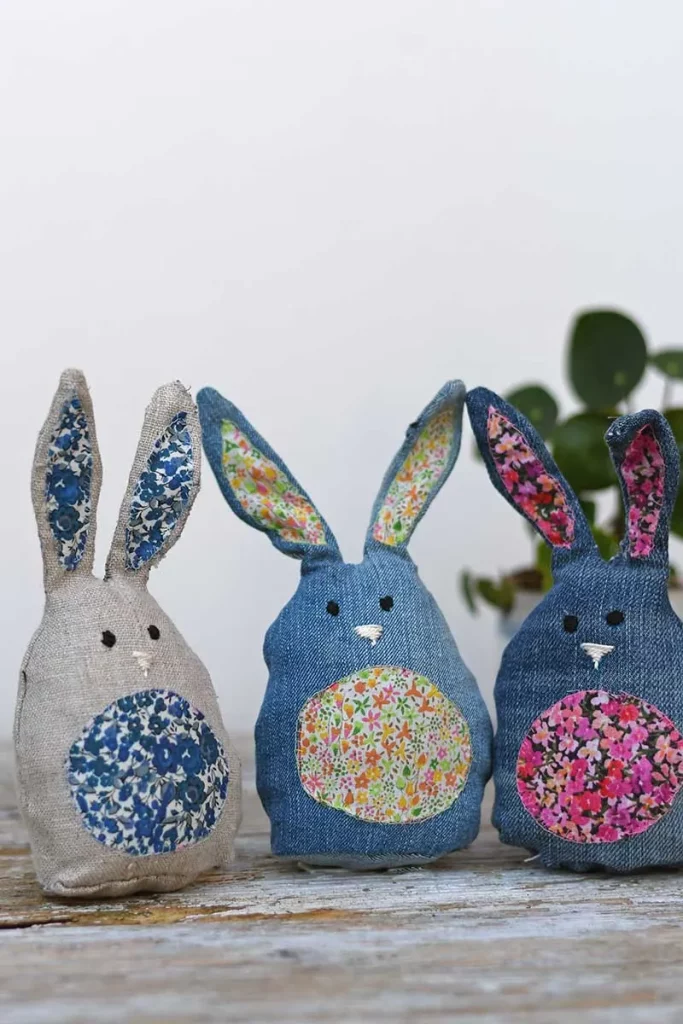
Finding the perfect Fabric bunnies – Pattern is a delightful way to bring a touch of handmade charm into your home, whether you are preparing for Easter festivities or looking for a timeless nursery gift. Sewing soft toys is a unique branch of the textile arts that allows for immense creativity, as every bunny you create can have its own personality based on the fabric, ears, and facial expressions you choose. This specific project is highly sought after by both novice crafters and experienced seamstresses because it offers a rewarding experience that results in a tangible, huggable companion.
When you dive into a Fabric bunnies – Pattern, you are engaging in a tradition of “softie” making that spans generations, yet modern designs have made the process more accessible than ever before. Unlike complex garment construction, these patterns generally focus on simple curves and small-scale assembly, making them an excellent choice for a weekend project. The joy of seeing a flat piece of cloth transform into a three-dimensional character is a magical part of the sewing journey that keeps people coming back to this classic stuffed animal design.
In this comprehensive guide, we will explore the nuances of selecting and executing a high-quality Fabric bunnies – Pattern. From choosing the right materials that ensure durability to mastering the delicate art of stuffing and finishing, we will cover every detail necessary to produce professional-looking results. By the end of this article, you will feel empowered to tackle your own bunny sewing project with confidence, knowing exactly how to handle the technical challenges while letting your personal style shine through every stitch.
The success of any Fabric bunnies – Pattern begins with the quality of the textile you choose, as the weight and stretch of the material will dictate the final shape. For a classic, sturdy bunny, many crafters recommend using 100% quilting cotton, which comes in an endless array of prints and is very easy to manipulate under a sewing machine. Cotton holds its shape well, making it ideal for beginners who are still getting used to sewing around the tight curves of bunny ears and paws.
If you are looking for a softer, more cuddly result from your Fabric bunnies – Pattern, you might consider using minky or fleece fabrics. These materials have a “pile” or fluffiness that mimics real fur, but they can be a bit slippery to sew, so using plenty of pins or a walking foot is highly recommended. For a more rustic or heirloom look, linen fabric is a beautiful choice, providing a sophisticated texture that looks wonderful in minimalist home decor or neutral-themed nurseries.
Don’t forget about the interfacing when working with thinner fabrics for your Fabric bunnies – Pattern. Applying a lightweight fusible interfacing to the back of your fabric pieces can prevent the stuffing from “poking through” or distorting the weave of the cloth. This extra step ensures that your bunny remains smooth and retains its silhouette even after years of being squeezed and played with by children.
The stuffing, or poly-fill, is another critical component that determines the “hugability” of your creation. When following a Fabric bunnies – Pattern, it is often best to use high-quality polyester fiberfill that is hypoallergenic and washable. To get into the tiny corners of the ears and the tips of the feet, many experts suggest using a stuffing tool or even a simple chopstick to push the fluff into place without tearing the seams.
For the facial features of your Fabric bunnies – Pattern, safety should be your top priority, especially if the toy is intended for a small child. Instead of using plastic buttons for eyes, which can be a choking hazard, consider using embroidery thread to hand-sew the eyes, nose, and mouth. Satin stitches and French knots are perfect for creating expressive, safe faces that add an artisanal touch to your handmade gift.
Lastly, think about the thread quality you are using for your assembly. A strong polyester thread is usually better than cotton thread for soft toys because it has a slight bit of “give” and is less likely to snap when you are stuffing the bunny firmly. When you are closing the final gap of your Fabric bunnies – Pattern, using a matching thread color and a ladder stitch will make the seam virtually invisible, resulting in a clean and professional finish.
Before you even touch your fabric, you must prepare your Fabric bunnies – Pattern by ensuring it is printed to the correct scale. Many digital patterns include a “test square” to verify that your printer hasn’t shrunk the design. Once verified, cutting out your paper templates with precision is vital, as even a quarter-inch discrepancy can result in a bunny that looks slightly lopsided or has ears that don’t match.
When laying your Fabric bunnies – Pattern onto the cloth, pay close attention to the fabric grain. Most patterns will have an arrow indicating the “grainline,” which should run parallel to the selvage edge of your fabric. Aligning your pieces with the grain prevents the fabric from stretching unevenly during the stuffing process, ensuring your bunny doesn’t end up looking too wide or too tall compared to the original design.
If your Fabric bunnies – Pattern features directional prints—such as flowers that grow upward or stripes—be extra careful with your placement. There is nothing more frustrating than finishing a beautiful bunny only to realize the pattern on its back is upside down! Take the time to “fussy cut” important motifs if you want a specific flower or character to appear right in the center of the bunny’s tummy.
Using a rotary cutter and a self-healing mat can provide much cleaner edges than traditional scissors, especially for the intricate curves of a Fabric bunnies – Pattern. However, if you prefer scissors, make sure they are very sharp to avoid fraying the edges of your fabric. Transferring any markings from the pattern, such as notches for arm placement or “stop and start” lines for the stuffing gap, is a step you should never skip.
For the ears of the Fabric bunnies – Pattern, many quilters like to use a contrasting fabric for the inner ear. This “mix and match” approach adds a pop of color and visual interest. To keep these pieces from shifting, you can use a bit of fabric glue or temporary basting spray before you head to the sewing machine. It’s these small details that elevate a simple pattern into a high-quality boutique item.
Finally, always remember to leave a seam allowance if the pattern doesn’t already include one. Most modern Fabric bunnies – Pattern downloads will specify a 1/4 inch or 3/8 inch allowance. Keeping this consistent is the secret to pieces that fit together perfectly. If you are making multiple bunnies, cutting them out all at once in a “production line” style can save you a significant amount of time and fabric.
Sewing a Fabric bunnies – Pattern involves a lot of curved seams, which can be intimidating for those used to straight-line quilting. The key to success is to slow down your machine’s speed and “pivot” frequently. When you reach a sharp curve, leave the needle in the down position, lift the presser foot, and slightly rotate the fabric before continuing. This prevents “jerky” lines and ensures the bunny has a smooth, organic shape.
Another professional tip for a Fabric bunnies – Pattern is to clip your curves after sewing but before turning the fabric right-side out. Using sharp embroidery scissors, make small snips into the seam allowance around the rounded parts of the head and paws. This removes the “bulk” of the fabric inside, allowing the seam to lay flat and smooth once the bunny is turned. Just be careful not to snip through your actual stitches!
If your Fabric bunnies – Pattern includes long, floppy ears, you might want to add a layer of quilt batting or flannel inside them. This gives the ears some “body” so they don’t just hang limp, but it doesn’t make them as stiff as wire would. Topstitching around the edge of the ears after they are turned is another great way to keep the layers together and add a decorative, finished look to your project.
Dealing with the “neck” area of a Fabric bunnies – Pattern can sometimes be tricky because it is the narrowest point. When sewing the head to the body, it is often easier to do this by hand using a backstitch for extra strength. Hand-sewing allows for much more control than a machine in these tight, circular spaces, ensuring that the head is securely attached and doesn’t wobble.
As you assemble the various parts of your Fabric bunnies – Pattern, you will eventually need to turn the bunny right-side out through a small opening. This can be stressful on the seams, so make sure to backstitch at the beginning and end of the opening to reinforce the thread. Using a turning tool or a dull knitting needle can help you push out the points of the feet and the tips of the ears without poking a hole through the fabric.
One often overlooked aspect of sewing a Fabric bunnies – Pattern is the importance of pressing. Even though it is a 3D object, pressing your seams flat before you stuff the bunny makes a world of difference. It “sets” the stitches into the fabric and helps the bunny look more like a professional toy and less like a “crafty” experiment. A tailor’s ham is a helpful tool here for pressing those awkward, rounded seams.
Stuffing is perhaps the most influential part of completing a Fabric bunnies – Pattern. The goal is to make the bunny firm enough to stand or sit, but soft enough to be cuddly. Start with small “walnut-sized” clumps of stuffing rather than one giant handful. By adding small amounts at a time, you can avoid the “lumpy” look that often plagues handmade toys, ensuring a smooth surface across the entire fabric bunny.
Pay special attention to the “limbs” of your Fabric bunnies – Pattern. If you stuff the arms and legs too tightly at the top, they will stick out awkwardly from the body. Many patterns suggest leaving the top half-inch of the limbs empty or lightly stuffed so that they can flop naturally. This gives the bunny a more relaxed, “shabby chic” appearance that is very popular in modern stuffed toy trends.
Weighting the bottom of your bunny is a great trick if you want it to sit on a shelf. You can sew a small pouch filled with plastic pellets or clean dried beans and place it at the very bottom of the body before finishing the stuffing. This gives the Fabric bunnies – Pattern a bit of “heft” and helps it stay upright, making it a perfect decorative piece for a nursery or a mantlepiece.
Closing the stuffing gap is where your hand-sewing skills really shine. The ladder stitch (also known as a hidden stitch) is the gold standard for this task. By catching a tiny bit of fabric on one side of the opening and then the other, you create a “ladder” of thread that, when pulled tight, disappears into the seam. This makes the entry point of the stuffing completely invisible on your finished Fabric bunnies – Pattern.
Once the bunny is closed, you can add accessories like a ribbon bow, a small hand-sewn vest, or even a tiny carrot accessory. These embellishments are what truly bring a Fabric bunnies – Pattern to life. If you are making the bunny as a gift, you could even embroider the child’s name or birthdate onto one of the ears to create a personalized keepsake that will be cherished for years.
The very final step is to give your bunny a “massage.” Once it is all sewn up and stuffed, use your hands to move the stuffing around and even out any minor lumps or bumps. This helps the fibers settle into the curves of the Fabric bunnies – Pattern and gives the toy its final, polished shape. Your handmade creation is now ready to be loved, gifted, or displayed as a testament to your sewing skills!
1. How long does it take to complete a Fabric bunnies – Pattern?
For most people with basic sewing knowledge, a bunny takes between 2 to 4 hours from cutting to finishing. If you are adding intricate embroidery or hand-sewn clothes, it may take a bit longer, but the basic assembly is quite fast.
2. Can I wash my handmade fabric bunny?
If you used 100% cotton and high-quality polyester stuffing, yes! I recommend placing the bunny in a mesh laundry bag and using a delicate cycle with cold water. Air drying is best to prevent the stuffing from clumping or the fabric from shrinking.
3. What is the best age for this toy?
While fabric bunnies are great for all ages, the construction matters. If you use embroidered eyes and nose, it is safe for infants. If you use buttons or wire, it is better suited as a decorative piece or for children over the age of three.
4. How do I make the ears stand up?
If you want “perky” ears on your Fabric bunnies – Pattern, you can insert a piece of plastic canvas or a very thick craft felt inside the ear. Avoid using wire if the toy is for a child, as it can eventually poke through the fabric.
5. I don’t have a sewing machine; can I sew this by hand?
Absolutely! Soft toys are actually very easy to sew by hand using a tight backstitch. It will take longer, but hand-sewing often allows for better precision on the tiny curves of the bunny’s face and paws.
6. Where can I find a good Fabric bunnies – Pattern?
There are many free patterns available on craft blogs, or you can purchase more detailed, professional designs on platforms like Etsy. Look for patterns that include a “seam allowance” and clear illustrations for the best experience.
Creating a handmade toy using a Fabric bunnies – Pattern is a deeply satisfying project that combines technical sewing skills with creative artistry.
Throughout this article, we have discussed the importance of choosing the right textiles, the necessity of clipping curves, and the secrets to achieving a lump-free stuffing technique. By following these steps, you transform simple scraps of fabric into a soulful companion that carries the warmth of a handmade gift.