
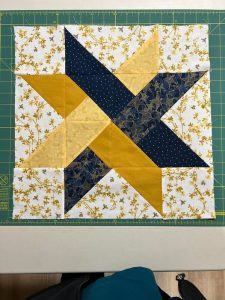
Horizontal Row Quilt - Pattern

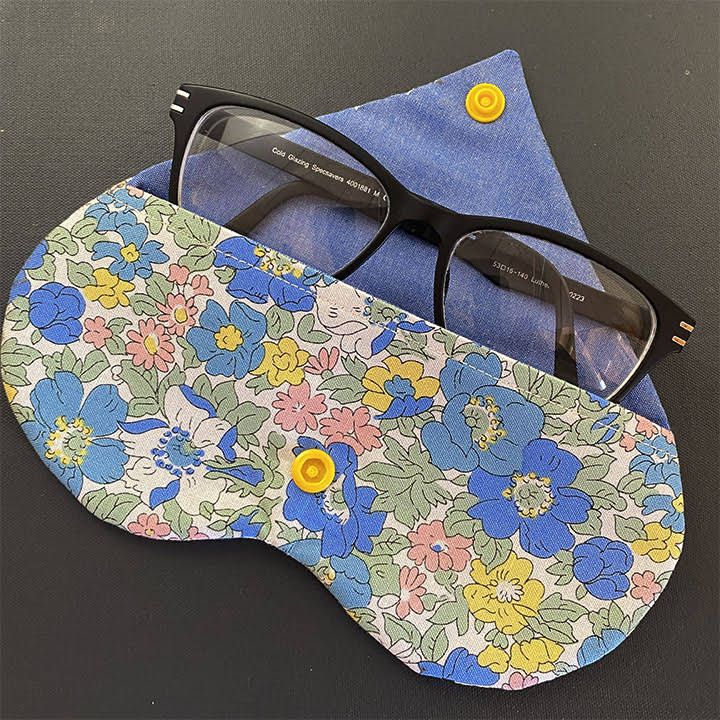
If you’re looking for a fun and functional craft project, a fabric glasses case – pattern is the perfect solution. Not only does it help protect your eyewear from scratches and damage, but it’s also an excellent way to express your personal style with colors, textures, and creative prints. Whether you’re a seasoned sewer or a DIY beginner, creating your own glasses case using a fabric pattern is both rewarding and practical.
With the rise of sustainable living and handmade products, many people are turning to DIY accessories to reduce waste and personalize their everyday items. A fabric glasses case – pattern can be customized for sunglasses, reading glasses, or prescription lenses, making it a versatile gift or personal item. Plus, it’s an ideal project for using leftover fabric scraps or experimenting with new textile designs.
In this article, we’ll guide you through everything you need to know about fabric glasses case patterns, from choosing materials to finishing touches. Whether you’re sewing by hand or using a machine, you’ll discover the essential steps and creative inspiration to craft your very own unique glasses case.
When starting your fabric glasses case – pattern, selecting the right fabric is one of the most important decisions. The material you use will impact not only the appearance but also the durability and functionality of the final product.
Cotton is the most popular fabric choice because it’s easy to sew and widely available. It also comes in endless colors and prints, making it ideal for customization. Quilting cotton, in particular, provides a nice balance between softness and sturdiness.
Canvas or denim are excellent choices for a more rugged and protective case. These materials are thicker and offer better protection for your glasses, especially if you plan to carry them in a handbag or backpack where they might get knocked around.
Felt is another user-friendly fabric, especially for beginners. It doesn’t fray, which means you don’t have to worry about finishing the edges. Felt also offers cushioning and a smooth surface, which helps prevent scratching.
If you want to add a luxurious touch, consider using velvet or corduroy for the outer layer. However, these fabrics can be slippery or tricky to work with, so they’re better suited for experienced sewers.
Don’t forget the lining! The inside of your glasses case should be soft to protect the lenses. Materials like microfiber, soft cotton flannel, or satin are excellent choices for the interior.
Lastly, consider adding fusible interfacing between the fabric layers to add stiffness and structure. This is especially important if you’re using lightweight materials like cotton.
Now that you’ve selected your fabric, it’s time to find a fabric glasses case – pattern that fits your needs. There are dozens of free and paid templates available online, so you’ll want to choose one that matches your skill level and preferred style.
Look for patterns that offer step-by-step instructions and visual diagrams. These are particularly helpful if you’re a beginner or working with a new sewing technique. Many creators also share video tutorials to walk you through the process visually.
Most basic patterns are rectangular pouches with a flap or drawstring closure. These are easy to sew and require only a few seams. If you’re more advanced, you might enjoy trying a snap frame or a zippered case for added security and a polished look.
Don’t be afraid to modify the pattern to suit your taste. For instance, you can change the dimensions to better fit oversized sunglasses or slim reading glasses. You can also add a keyring loop, pocket for cleaning cloths, or decorative buttons.
Make sure to print your pattern to scale and double-check the measurements before cutting your fabric. A well-fitting case will protect your glasses better and look more professional.
Always test your pattern using inexpensive or scrap fabric first. This allows you to make adjustments before using your final fabric, especially if you’re using expensive or delicate materials.
Once you’re happy with the test version, you can confidently cut and sew the final product using your chosen materials and design tweaks.
Once you’ve chosen a fabric glasses case – pattern and gathered your materials, it’s time to get sewing. This project can typically be completed in under an hour, depending on the complexity of the pattern.
Start by cutting your fabric according to the pattern. You’ll usually need two outer fabric pieces, two lining pieces, and two interfacing pieces. Iron the interfacing to the wrong side of the outer fabric if required.
Next, sew the outer fabric pieces together, right sides facing. Use a 1/4″ seam allowance and leave the top open. Do the same with the lining fabric, but leave a small opening at the bottom to turn the case right side out later.
If your pattern includes a flap or curved edge, make sure to trim and notch the curves before turning the fabric. This helps the shape lay flat and look clean once it’s flipped.
Now, join the lining and outer shell by placing them right sides together and sewing around the top opening. Turn the case right side out through the hole in the lining and stitch the hole closed.
Once turned, push the lining into the outer shell and press the seams neatly with an iron. This gives your glasses case a professional look.
Finally, you can add finishing touches like topstitching, labels, buttons, snaps, or even embroidery. This is your chance to get creative and make the case truly your own.
A basic fabric glasses case – pattern can be the foundation for countless creative variations. Here are some ideas to take your project to the next level.
Try using patchwork or quilting techniques for the exterior. This adds texture and visual interest, and it’s also a great way to repurpose fabric scraps.
Experiment with embroidery or applique to personalize the case. You could add your initials, a favorite quote, or decorative shapes and designs.
For extra protection, consider adding a padded lining. Use fusible fleece or quilt batting between the fabric layers to cushion your glasses from drops and bumps.
You can also make matching accessories, like a small pouch for lens wipes or a coordinating keychain. These make excellent gifts and create a cohesive look.
If you’re feeling ambitious, try creating a double-pocket case that can hold two pairs of glasses or one pair plus a cleaning cloth. These are especially useful for travel.
Finally, consider making seasonal or themed cases, such as holiday prints, summer florals, or fabric that matches your outfit. The possibilities are endless when you start with a strong pattern.
Q1: What is the best fabric for a glasses case?
A: Cotton is the most popular due to its ease of use and variety of prints. However, canvas and denim offer more protection, and microfiber or flannel are ideal for lining to prevent scratches.
Q2: Can beginners make a fabric glasses case?
A: Absolutely. Many fabric glasses case – pattern options are beginner-friendly and require only basic sewing skills like straight stitching and pressing.
Q3: Do I need a sewing machine?
A: A sewing machine makes the process faster and neater, but you can sew a glasses case by hand if you have the patience and precision for small stitches.
Q4: Where can I find fabric glasses case patterns?
A: Many craft blogs, sewing forums, and online marketplaces like Etsy offer free and paid patterns. Look for ones with step-by-step instructions and illustrations.
Q5: How do I make my glasses case more protective?
A: Use thicker fabrics like canvas or denim, add interfacing or padding, and ensure the case has a secure closure like a zipper, button, or snap.
Q6: Can I wash my fabric glasses case?
A: Yes, but wash gently by hand or on a delicate cycle. Air dry to prevent shrinkage. Avoid machine washing if your case includes metal parts or delicate fabrics.
Creating your own fabric glasses case – pattern is a rewarding DIY project that combines function, fashion, and creativity. You’ve learned how to choose the right fabric, find and modify a pattern, sew your own case step-by-step, and explore creative variations to personalize your design. With just a little time and effort, you can produce a handmade item that’s both beautiful and practical.
If you found this guide helpful, please leave a sincere opinion or suggestion below. Your feedback helps us improve and bring more valuable content for fellow DIY enthusiasts like you!


