
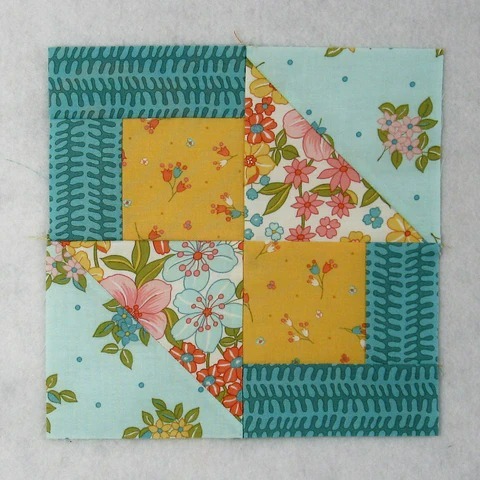
Horizontal Row Quilt - Pattern

The Fence Quilt Block – Pattern is a simple yet visually striking quilt design that’s beloved for its versatility and ease of construction. Whether you’re new to quilting or a seasoned creator, this pattern offers a timeless look that works beautifully in both modern and traditional projects. The clean lines and repetitive structure make it a favorite among quilters who enjoy creating texture and flow in their work.
The name “Fence” comes from the block’s resemblance to a classic split rail fence or garden barrier. Its horizontal or vertical strip layout adds a sense of movement and direction, making it ideal for creating larger quilt tops with minimal fuss. It’s also a great choice for using up fabric scraps, jelly rolls, or pre-cut strips, making it both economical and environmentally friendly.
In this article, we’ll walk you through the details of the Fence Quilt Block – Pattern, from its design structure to fabric selection, assembly, and creative variations. With step-by-step guidance and design tips, you’ll gain confidence in crafting a quilt that’s both beautiful and meaningful.
The Fence Quilt Block – Pattern is rooted in classic American quilting traditions. It is one of those timeless designs that has stood the test of time due to its simplicity and flexibility in design and layout.
At its core, the fence block consists of strips of fabric sewn side by side, either horizontally or vertically. This creates a rail or slat appearance—much like a split rail fence. You can alternate fabric colors, use solids and prints, or create gradients for added visual interest.
Traditionally, these blocks are rectangular, and when assembled, they create repeating rows that can mimic the look of a fence line or ladder. You can rotate the blocks for different effects—horizontal, vertical, or even a zigzag look by changing orientation as you go.
One of the advantages of this pattern is how quickly it comes together. Without the need for complex angles, points, or curves, the fence block is very forgiving, especially for beginners. Even with small inaccuracies, the final layout still looks cohesive and polished.
This block also lends itself well to strip piecing, a time-saving technique where you sew long strips together and then cut them into smaller units. This makes it perfect for quick quilts, last-minute gifts, or batch projects.
Because of its simplicity, it’s also a great pattern for experimenting with bold colors, high contrast designs, or fabric collections that you want to highlight without overcomplicating the quilt.
Choosing the right fabrics is key to bringing your Fence Quilt Block – Pattern to life. Because of the repetitive layout and emphasis on lines, your fabric choices will either create harmony or dramatic contrast—depending on your desired effect.
Many quilters use jelly rolls or fabric strips from their stash to piece together fence blocks. This makes it a great stash-busting project. You can mix prints with solids or stick to a single color family for a cohesive look.
For a traditional quilt, earthy tones like browns, greens, and creams work beautifully, evoking the image of a rustic fence. For a more modern design, opt for bold, saturated colors, or black-and-white contrast for a clean, graphic feel.
When selecting tools, you’ll need quilting essentials such as a rotary cutter, self-healing cutting mat, quilting ruler, sewing machine, iron, pins or clips, and fabric marking tools. These help keep your cuts straight and accurate, which is important in this linear design.
You’ll also want a consistent seam allowance—typically ¼ inch—so that all your blocks are the same size when finished. Using a seam guide or foot attachment can help keep things consistent throughout the project.
Lastly, pre-washing your fabric is a good idea, especially if you’re mixing light and dark colors. This will prevent any unexpected bleeding or shrinking after the quilt is completed and washed.
Now it’s time to begin constructing your Fence Quilt Block – Pattern. The beauty of this block is in its simplicity—you don’t need intricate templates or complicated steps to get started.
Begin by cutting your fabric strips. These can be any width, but most commonly range from 2½” to 3½” wide. The length depends on how large you want your final block to be. For example, four 2½” x 10″ strips sewn side by side create a 10″ square block.
Arrange your fabric strips in the order you want them sewn. You can create a random layout or plan a specific color order for a gradient or ombré effect. The layout is one of the most fun parts—experiment with different fabric combinations!
Sew the strips together along the long edges, keeping a consistent seam allowance. Press your seams to one side or open, depending on your preference. Pressing is key—it keeps the block flat and helps with accuracy in final assembly.
Square up your block if needed, trimming any uneven edges so it fits cleanly into your quilt layout. Repeat the process for the desired number of blocks. You can make all blocks identical or mix and match layouts for variety.
Once your blocks are complete, start assembling the quilt top. Arrange the blocks in rows, alternating direction for a woven effect, or keep them all aligned for a clean, linear finish. Play with rotation and placement to get your desired look.
Join the blocks into rows, and then sew the rows together. Add borders if you wish, then prepare for quilting by creating your quilt sandwich—quilt top, batting, and backing.
Once your quilt top is assembled, it’s time to quilt and bind your Fence Quilt Block – Pattern. The finishing steps are where your quilt truly comes to life.
Layer your quilt top with batting and backing. Smooth everything out and baste using safety pins, spray adhesive, or hand basting. Make sure there are no puckers or folds before quilting.
Quilting patterns for this block can range from straight-line quilting that echoes the strip lines, to free-motion quilting for added texture. Even basic stitch-in-the-ditch quilting works beautifully for this design.
After quilting, trim the excess batting and backing. Prepare your binding strips—either matching or contrasting—and sew them around the quilt edges. You can machine-bind for speed or hand-bind for a more traditional finish.
Don’t forget to add a label to the back of your quilt! Include your name, the quilt title, date, and any special message. It’s a personal touch that turns your creation into a keepsake.
For a unique twist, consider making a mini version of your quilt block as a coaster, pillow, or placemat. Fence blocks are so simple they adapt well to small projects.
You can also embellish your quilt with applique, embroidery, or hand-stitching between the fence rails for added detail. Customization gives your quilt even more personality and meaning.
Q: What size should I cut the fabric strips for a Fence Quilt Block?
A: Most quilters use strips between 2½” and 3½” wide. Length depends on how large you want your final block, but 10–12 inches is a common starting size.
Q: Is the Fence Quilt Block beginner-friendly?
A: Yes! This pattern is ideal for beginners because it involves straight seams, simple cutting, and flexible layout options.
Q: Can I use jelly rolls for this pattern?
A: Absolutely. Jelly rolls (2½” pre-cut strips) are perfect for this pattern, saving time on cutting and adding variety to your block layout.
Q: What layout options are available with fence blocks?
A: You can alternate the direction of blocks, use staggered strips, rotate blocks 90 degrees, or even create zigzag and woven layouts.
Q: How many blocks do I need for a lap quilt?
A: This depends on your block size. For 10″ blocks, a 5×6 layout (30 blocks) makes a 50″x60″ lap quilt, a common and cozy size.
Q: Can I add borders to the finished quilt?
A: Yes! Borders frame the quilt and can enhance the overall design. You can use solid colors, matching fabrics, or even pieced borders for added flair.
The Fence Quilt Block – Pattern is a celebration of simplicity, flexibility, and creative potential. With its clean lines and easy construction, it’s perfect for quilters of all levels and offers endless design possibilities.
We covered everything from the pattern’s origins and fabric selection to block assembly and finishing touches. Whether you choose bold prints, soft pastels, or earthy neutrals, your quilt will reflect your unique vision and personality.
Now it’s your turn! Try this pattern for your next quilt project—big or small—and enjoy the satisfaction of crafting something both beautiful and timeless. If this article helped you, feel free to leave a sincere review or share your suggestions for future tutorials. Happy quilting!


