
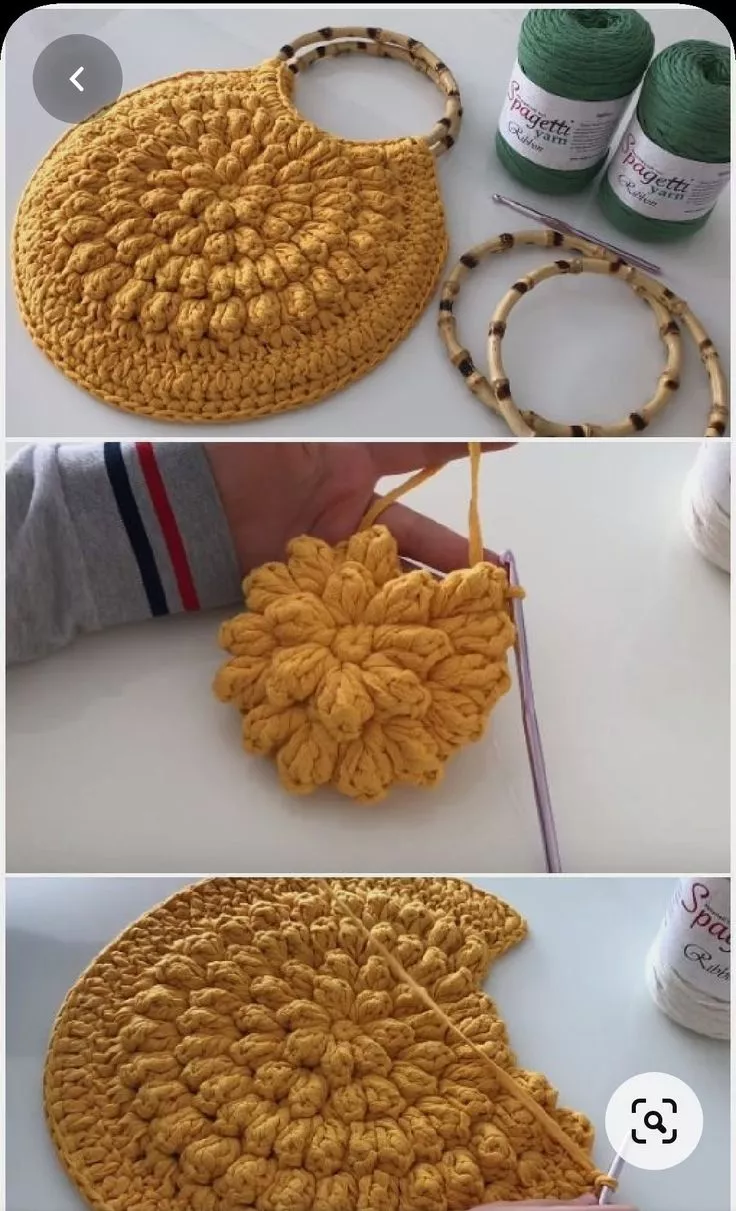
Horizontal Row Quilt - Pattern

If you’re looking for a creative and heartwarming way to brighten up your dining area, the Fruit Quilt Placemat Tutorial – Pattern is just the project for you. Perfect for both beginner and experienced quilters, this charming tutorial guides you through designing and making placemats that feature cheerful fruit motifs—like apples, pears, or strawberries—that’ll bring a slice of summer to your table year-round.
These quilted fruit placemats are more than just practical—they’re conversation starters. Handmade with love, they reflect your personality and attention to detail. Each placemat becomes a small piece of home decor art, adding charm and style to every meal.
In this article, we’ll walk step-by-step through the Fruit Quilt Placemat Tutorial – Pattern, covering materials, layout, piecing, quilting, and finishing. You’ll also find tips to customize your design, care for your placemats, a helpful FAQ section, and a warm invitation at the end for your own ideas or feedback.
To begin your Fruit Quilt Placemat Tutorial – Pattern, gather some basic quilting materials that will bring your design to life while giving it durability for everyday use.
Start with cotton quilting fabric in assorted colors: bright tones for your fruit motifs (reds for apples, yellows for lemons, or pinks for strawberries) and complementary fabrics for the background and border. Stick to quality cotton for both beauty and easy washing.
You’ll also need batting or fusible fleece to give your placemats structure and a cozy feel. Batting adds softness, whereas fusible fleece keeps the placemat stiff and flat without pins.
Your tools list includes: a rotary cutter, self-healing mat, quilting ruler, pins or clips, sewing machine, thread (matching your design), and a fabric marker for outlining shapes. Also have coordinating bobbins ready and a pressing iron for crisp seams.
Optional extras: fusible web or appliqué adhesive (if you’re attaching fruit shapes), embroidery floss or buttons for texture, and bias tape for a neat edge finish. These embellishments can elevate your placemats into display-worthy keepsakes.
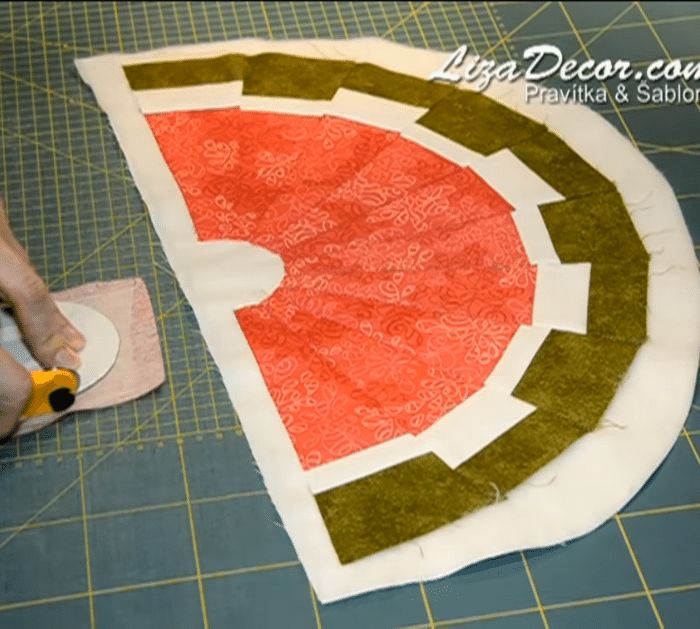
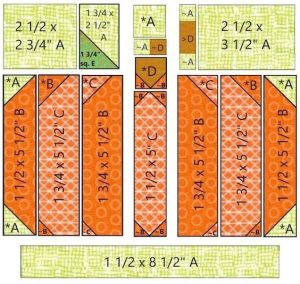
Before cutting, make or print your Fruit Quilt Placemat Pattern, which should include templates for the fruit shapes, placemat outline, and seam allowances. A clear pattern helps you stay organized and ensures consistent sizing.
Now that your materials are ready, let’s bring your Fruit Quilt Placemat Pattern to life with this step-by-step process.
The Fruit Quilt Placemat Tutorial – Pattern offers abundant possibilities for personalization. Let your creativity shine with these tweaks and embellishments.
Now that your Fruit Quilt Placemat Pattern is completed, let’s talk about care and ways to get the most from your lovely handmade creations.
Hand-washing in cold water with mild detergent keeps fabrics bright and seams strong. You can also machine-wash on a gentle cycle using a laundry bag to protect the edges, then lay flat to dry.
Rotate between different placemats to evenly distribute wear and tear. Over time, you might refresh the binding or fix frayed edges.
If your placemat loses loft, give it a gentle light steam press or wash with extra softener to restore its puffiness.
Showcase your placemats outside of mealtime too. They double beautifully as wall hangings, desk mats, or kitchen décor when hung with a ribbon or special clip.
If you gift these, note on a small tag that they’re handmade, machine-washable, and unique—kids, guests, or craft fair visitors will be thrilled.
Finally, keep testing new shapes and designs—fruit is just the beginning. Once you’ve mastered the Fruit Quilt Placemat Tutorial – Pattern, expand to veggies, wildflowers, or even personal monograms for an endless buffet of inspiration.
Q1: Is this pattern suitable for beginners?
Absolutely! With basic sewing and appliqué skills, you can complete these placemats. The clear, visual nature of fruit shapes makes the project both engaging and accessible.
Q2: What fabric should I use for durability?
100% cotton is excellent for its sturdiness, washability, and variety. Prewash it to avoid shrinkage or bleeding later.
Q3: How should I press the appliquéd fruit?
Iron gently on a low to medium setting, and consider using a pressing cloth to protect stitched edges. Steam can help flatten quilting lines.
Q4: Can I quilt by hand instead of using a sewing machine?
Yes! Hand quilting adds charm and texture. Use quilting stitches, tie the quilt sandwich, or couching to keep layers together.
Q5: How do I prevent the placemat from curling?
Use quality batting or fusible fleece for stability. Press edges flat during finishing, and secure with binding to maintain shape.
Q6: Can I sell placemats made from this pattern?
Yes—especially if you’ve designed the pattern yourself. If using someone else’s specific pattern, check licensing, but handmade items are commonly salable with credit.
Creating a Fruit Quilt Placemat Tutorial – Pattern combines artistry, practicality, and joy. From vibrant fruit appliqués to cozy quilted textures, these placemats brighten your table and warm your home with thoughtful handmade charm.
In this guide, we covered everything—from essential materials and step-by-step instructions to creative variations and care tips. Now it’s your turn to bring your vision to life, infuse it with personal flair, and celebrate mealtime in style.
Have you tried making a fruit quilt placemat, or are planning to start one? Please share your experience, creative ideas, or suggestions in the comments below—your insights inspire others and nurture our crafty community.


