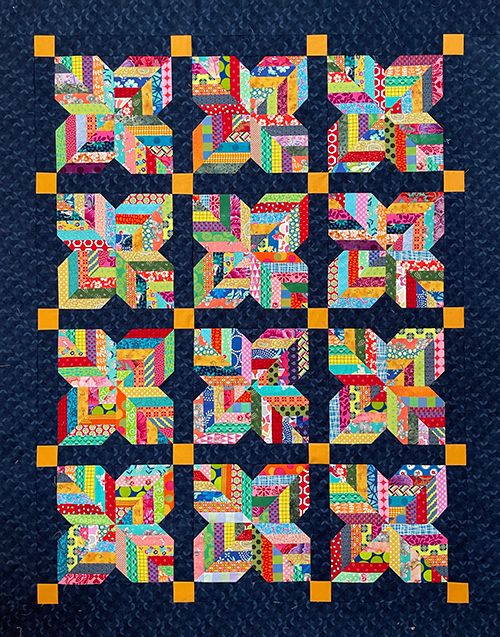
Easy Scrappy Lap Quilt - Tutorial

The Granny Square Vest – Pattern is a timeless masterpiece of the fiber arts world that has successfully transitioned from vintage wardrobes to modern high-street fashion. If you are looking for a project that combines nostalgia with contemporary style, learning how to assemble a vest from classic squares is the perfect creative journey. This garment is incredibly versatile, allowing you to use up your yarn scraps or design a sophisticated, monochromatic look that elevates a simple white shirt or a summer dress.
When you embark on a Granny Square Vest – Pattern, you are participating in a tradition that spans generations, yet offers endless possibilities for modern innovation. The beauty of the granny square lies in its modularity; you aren’t just crocheting a flat piece of fabric, but building individual components that come together like a puzzle. This makes it a fantastic “on-the-go” project, as you can crochet a single square during a commute or while relaxing at a cafe, eventually joining them to create a full crochet garment.
In this detailed guide, we will explore the foundational elements of executing a professional-grade Granny Square Vest – Pattern. We will discuss the best yarn choices for different seasons, the geometric logic of the layout, and the techniques used to join your squares with a seamless finish. Whether you are a beginner picking up a hook for the first time or an expert looking for a fresh boho-chic design, understanding the structural nuances of this pattern will ensure your finished vest is both durable and stylish.
The first step in any Granny Square Vest – Pattern is selecting a yarn that matches your desired drape and warmth. For a lightweight, summer-ready vest, a 100% cotton or bamboo blend is ideal because it breathes well and holds the shape of the stitches without becoming too heavy. If you want a cozy, autumnal layer, consider a soft wool or high-quality acrylic that provides insulation while maintaining a soft “squish” factor against the skin.
Color theory plays a massive role in the outcome of your Granny Square Vest – Pattern. You can go for the “scrappy” look, where every round of every square is a different color, creating a vibrant and eclectic masterpiece. Alternatively, choosing a palette of three or four harmonizing tones—like cream, sage, and terracotta—can give your handmade vest a more intentional, high-fashion aesthetic that coordinates easily with your existing wardrobe.
Hook size is equally important when working through a Granny Square Vest – Pattern. While the yarn label gives a recommendation, you should always make a test square first. If your square feels stiff like a rug, move up a hook size to achieve a better “flow.” If it feels too loose and floppy, move down a size. A vest needs a certain amount of structural integrity to sit correctly on the shoulders without sagging over time.
Don’t overlook the importance of yarn weight consistency. When following a Granny Square Vest – Pattern, ensure that all the different colors of yarn you use are of the same thickness (e.g., all DK or all Worsted). Mixing weights can result in squares of different sizes, which makes the assembly process a nightmare. Using a consistent weight ensures that your squares align perfectly when it comes time to seam the front and back panels.
In addition to yarn and hooks, you will need a few essential tools to finish your Granny Square Vest – Pattern successfully. A sturdy tapestry needle is required for weaving in the many ends that come with multi-colored squares. You will also want to have a set of blocking mats and pins. Blocking your squares before joining them is the secret to a professional finish, as it ensures every piece is the exact same measurement and the corners are perfectly square.
Finally, consider the functionality of your Granny Square Vest – Pattern. Will you want buttons or a tie-front? Buying your notions—like wooden buttons or decorative toggles—at the beginning of the project can help you visualize the final product. Some crafters even choose to line their vests with fabric for extra durability, though a well-crocheted cotton granny square is usually sturdy enough to stand on its own for daily wear.
The heart of the Granny Square Vest – Pattern is, of course, the classic granny square itself. This usually consists of rounds of “granny clusters” (three double crochets) separated by chain spaces. The trick to a perfect square is maintaining even tension throughout the rounds. If you find your squares are “leaning” or twisting, try turning your work over after every round; this simple hack keeps the stitches straight and the edges crisp.
As you follow the Granny Square Vest – Pattern, you will need to decide how many rounds each square should be. Smaller squares result in a more detailed, intricate look but require more joining work. Larger squares are faster to complete and result in a bolder, more geometric pattern. Most standard vests use squares that are approximately 4 to 5 inches wide, which allows for easy adjustment to different body sizes by adding or removing columns.
The corners are the most critical part of the Granny Square Vest – Pattern. Typically, a corner consists of two clusters separated by two or three chains. Making sure these corner spaces are consistent is vital for the geometric symmetry of the vest. If your corners are too tight, the square will curl into a bowl; if they are too loose, the edges will ruffle. Finding that “sweet spot” of tension is what distinguishes a beginner project from an expert one.
When working on a Granny Square Vest – Pattern, you will likely need to create “half-squares” or triangles to fill in the neckline or the armholes. This is a slightly more advanced technique where you work back and forth in rows rather than in the round. Learning to adapt the granny stitch into a triangular shape is essential for creating a comfortable V-neck or a rounded shoulder, giving the garment a more tailored and flattering fit.
Counting your stitches might seem tedious, but it is the soul of a successful Granny Square Vest – Pattern. If one square has 12 clusters per side and the next has 13, they will not join smoothly, leading to puckering. Check your count every few rounds. It is much easier to fix a mistake in a single square than to try and “fudge” the alignment when you are halfway through assembling the entire crochet bodice.
The final round of your squares in the Granny Square Vest – Pattern is often done in a single solid color. This “joining color” acts as a frame for the colorful centers and provides a cohesive look to the garment. Using a neutral shade like black, white, or beige for the final round and the seaming can make even the most chaotic color combinations look sophisticated and professionally designed.
Once you have a mountain of beautiful squares, the assembly phase of the Granny Square Vest – Pattern begins. There are several ways to join your pieces, the most popular being the “Whip Stitch” or the “Slip Stitch Join.” The whip stitch is done with a tapestry needle and creates a flat, nearly invisible seam, while the slip stitch join (done with a crochet hook) creates a raised, decorative ridge that adds texture to the garment construction.
Another highly recommended method for the Granny Square Vest – Pattern is the “Join-As-You-Go” (JAYG) technique. This involves joining the squares together during the final round of crochet. This method is a favorite among experienced crafters because it eliminates the need for sewing at the end and ensures that the vest grows as a single piece. It also makes it easier to try the vest on as you go to check the fit.
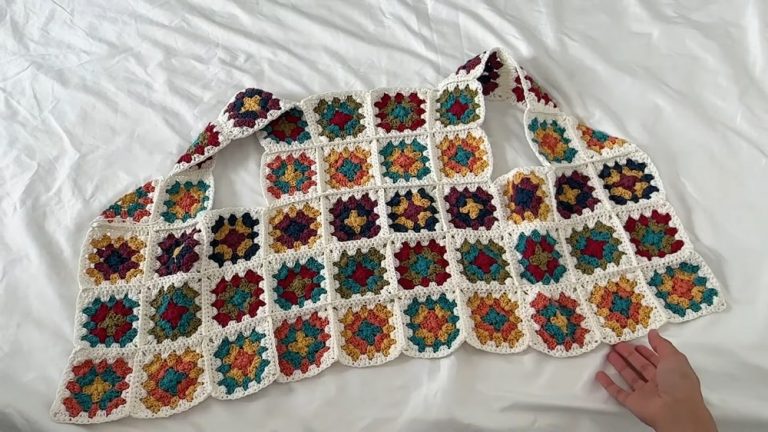
The layout is the next crucial step in your Granny Square Vest – Pattern. Lay all your finished squares on a flat surface or a bed to decide on the color placement. You want to ensure that no two identical colors are touching and that the “visual weight” is distributed evenly. Taking a photo of your layout before you start joining is a pro tip—it serves as a map so you don’t get confused during the assembly process.
Shoulder seams and side seams in a Granny Square Vest – Pattern require extra reinforcement. These areas take the most strain when you are putting the vest on or taking it off. It is often a good idea to use a slightly stronger joining stitch or even a double pass of yarn at the armpit and shoulder points to prevent the crochet stitches from stretching or breaking over time.
Fitting the Granny Square Vest – Pattern to your body is an organic process. Most patterns consist of two front panels and one large back panel. If you find the vest is too small after joining the squares, you can easily add “extension rows” of granny stitches to the sides or the shoulders. This modular nature makes the granny square vest one of the most size-inclusive patterns available in the world of DIY fashion.
The final assembly step is the ribbing or edging. A Granny Square Vest – Pattern usually looks best with a finished border around the armholes, the neckline, and the bottom hem. A simple row of single crochet or a more complex “front post/back post” double crochet ribbing can give the vest a polished, “store-bought” look while providing extra stability to the edges, preventing them from curling.
After putting so much love into your Granny Square Vest – Pattern, proper care is essential. Always check the care instructions for the yarn you used. If you used wool, you must hand-wash the vest in cool water to avoid felting. If you used cotton or acrylic, a gentle machine wash in a laundry bag might be safe. Regardless of the material, never hang a crochet vest to dry; the weight of the water will stretch the squares. Always dry it flat on a towel.
Styling the results of your Granny Square Vest – Pattern is where the fun really begins. For a classic 70s vibe, pair your vest with flared jeans and a turtleneck. For a more modern, “clean girl” aesthetic, wear a monochromatic vest over an oversized white button-down shirt and tailored trousers. The crochet texture provides a beautiful contrast to smooth fabrics like silk or denim, making it a versatile layering piece.
Seasonal transitions are the perfect time to break out your Granny Square Vest – Pattern. In the spring, it acts as a light outer layer over a sun dress. In the winter, it adds an extra layer of core warmth under a heavy coat. Because it is sleeveless, it doesn’t add bulk to your arms, making it one of the most comfortable and practical handmade garments you can own for year-round wear.
If you find that your vest has stretched out over time, don’t panic! You can often “reset” the shape of your Granny Square Vest – Pattern by dampening it and re-blocking it to the original measurements. This is why keeping your blocking mats is so useful. A little bit of steam from an iron (held an inch away from the fabric) can also help to kill bacteria and refresh the fibers without a full wash.
Gifting a vest made from a Granny Square Vest – Pattern is a wonderful gesture. Because the size is somewhat adjustable, it is a safer bet than a fitted sweater. You can even make matching “mini” versions for children or “pet vests” for a fun family photo. The heirloom quality of a crochet vest means it is something that can be passed down through generations, carrying the story of the maker in every stitch.
Finally, don’t be afraid to evolve your Granny Square Vest – Pattern. Once you have mastered the basic vest, you can start adding pockets, hoods, or even lengthening it into a full duster coat. The skills you learn while making this vest—color switching, joining, and edging—are the building blocks for almost every other project in the world of crochet. Wear your creation with pride!
The number of squares depends on your size and the size of the squares themselves. For a standard medium vest using 5-inch squares, you typically need about 20 to 24 squares for the back and 10 to 12 squares for each front panel. Always layout your squares against a vest you already own to check the dimensions.
Absolutely! The granny square is one of the first things most people learn to crochet. The only “tricky” part is the assembly and the shaping of the neckline. If you can make a square, you can make a vest. Just take it one square at a time, and the project won’t feel overwhelming.
For summer, 100% mercerized cotton is the winner. It has a slight sheen, doesn’t pill easily, and is very cool against the skin. It also provides excellent stitch definition, which makes the “holes” in the granny square pattern look intentional and crisp rather than messy.
Curling usually happens because of tight tension or not enough chain stitches in the corners. If your squares are curling, try using a larger hook. Additionally, blocking your squares (pinning them down and steaming them) will flatten them out perfectly before you join them.
Yes, it is one of the most adaptable patterns. To make the vest larger, you can either make more squares, add more rounds to each square, or add “filler” rows of granny stitches to the sides of the panels. It is very easy to customize to any body type.
A seasoned crocheter can often finish a vest in a week or two, while a beginner might take a month. Since the project is made of small units, it feels very fast because you reach “mini-milestones” every time you finish a single square.
In this article, we have journeyed through the essential steps of creating a beautiful Granny Square Vest – Pattern, from the initial selection of high-quality yarns to the final, polished assembly. We’ve learned that the secret to a professional-looking garment lies in the details: consistent tension, careful color planning, and the magic of blocking.
The granny square vest is more than just a piece of clothing; it is a canvas for your creativity and a testament to the enduring appeal of handmade fashion. By mastering this crochet pattern, you have unlocked the ability to create a custom wardrobe staple that is as unique as you are.


