
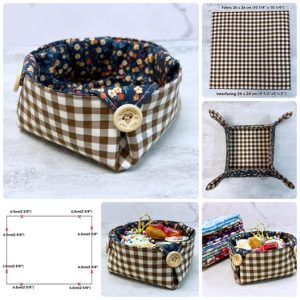
Horizontal Row Quilt - Pattern

Creating handmade letters is a fun and educational way to use your sewing skills, and learning how to make fabric alphabet letters – pattern is a fantastic starting point. Whether you’re designing toys for toddlers, room decor for kids, or educational aids for homeschooling, fabric letters are versatile, soft, and safe for small hands.
Sewing fabric letters also offers a great opportunity to upcycle fabric scraps. With simple materials and a bit of creativity, you can craft colorful, touchable alphabet letters that children can use to spell their names, learn phonics, or even decorate their playroom walls. This project is beginner-friendly and can be personalized endlessly.
In this tutorial, you’ll learn how to make fabric alphabet letters – pattern using clear steps, helpful tips, and effective sewing techniques. From selecting materials to finishing touches, we’ll walk you through the entire process to help you create your own set of charming, soft, and educational fabric letters.
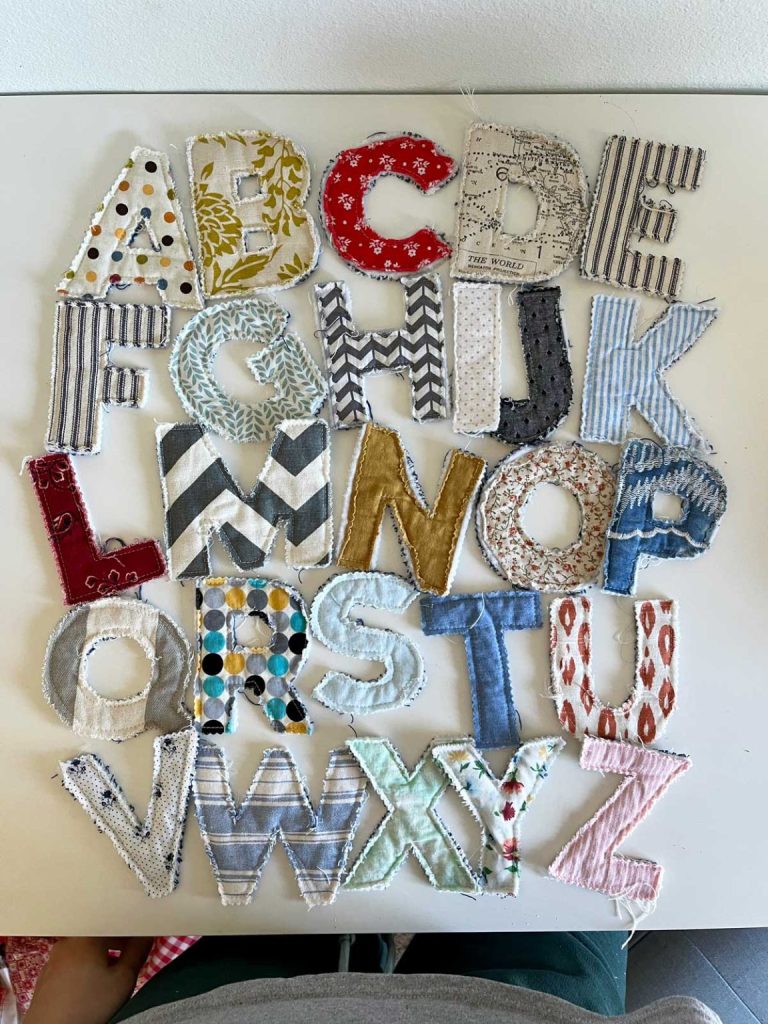
When starting your journey on how to make fabric alphabet letters – pattern, the first step is selecting the right materials. Choosing durable, colorful, and safe fabrics ensures your letters will be both attractive and long-lasting.
Cotton fabric is an ideal choice because it’s easy to work with and comes in endless colors and prints. For extra visual interest, try mixing patterns like polka dots, stripes, or themed prints such as animals or ABCs. If you’re making these for a baby or toddler, make sure the fabric is soft and free from harsh dyes.
You’ll also need batting or stuffing to give your letters a soft, plush feel. Polyester fiberfill is commonly used and available at most craft stores. If you want a flatter look, fusible fleece or quilt batting can be layered between fabrics before stitching.
In addition to fabric and filling, gather basic sewing supplies: scissors, pins, needles, thread, and a sewing machine. A fabric marker or chalk pencil will help with tracing the letters. You’ll also want an iron for pressing seams and possibly interfacing if you want your letters to hold their shape firmly.
To create uniform letters, you can either draw your own templates or use printable fabric alphabet letter patterns available online. Make sure the font is clear and readable—bold block letters are perfect for beginners and little learners alike.
Finally, consider whether you want uppercase, lowercase, or both. Uppercase letters are easier to cut and sew due to their larger, simpler shapes, but mixing both can add educational value.
Once your materials are ready, it’s time to cut and prep your letters. This step is important in making sure your fabric alphabet letters – pattern look clean, professional, and consistent.
Start by printing or tracing your alphabet templates onto card stock. This makes them easier to trace and reuse. Place the templates on the back side of your fabric and trace around each letter using a fabric-safe marker.
For each letter, you’ll need two pieces—front and back. If you’re planning to stuff them, cut both pieces from the same fabric or mix and match for fun contrast. Be sure to leave enough space between letters when cutting so you have room for seam allowances.
Once all your letters are cut, decide if you want to add interfacing. Iron-on interfacing can make thin fabrics more durable and gives the letters more structure, especially helpful if the letters will be handled often.
Before sewing, pin or clip the fabric pieces together with right sides facing. Make sure they line up neatly to avoid awkward seams or misaligned shapes later.
If you’re creating a no-sew version for crafting with kids, you can use felt instead of fabric and glue the layers together. Felt doesn’t fray and is easy to cut, making it a great choice for younger children.
For a more tactile experience, consider adding different textures. Use fleece, denim, or even corduroy to create sensory-friendly alphabet sets for babies or children with special learning needs.
Now that your letters are cut and prepped, let’s get into the sewing portion of how to make fabric alphabet letters – pattern. This is the part where your pieces really come to life.
With the right sides of the fabric facing each other, begin sewing along the traced lines, using about a ¼-inch seam allowance. Be sure to leave a small opening—about 1 to 2 inches—so you can turn the letter right-side-out and insert stuffing.
Go slowly around curves and corners, pivoting your needle as needed to keep the stitch smooth. If your sewing machine has a walking foot, use it to help the fabric layers feed evenly, especially if using batting or thicker fabrics.
After sewing, trim any excess fabric and notch the corners or curves to reduce bulk when turning. This will help the letter hold its shape better. Use small scissors or pinking shears if desired.
Turn the letter right-side-out through the opening. A blunt object like a chopstick or the end of a paintbrush can help you push out the corners and curves gently.
Stuff the letter evenly with fiberfill, using small amounts at a time to avoid lumpy areas. Make sure to reach into the tips and corners so the shape looks full and even.
Once the letter is stuffed to your liking, fold in the raw edges at the opening and close it with a ladder stitch (invisible hand stitch) or a topstitch using your sewing machine.
After mastering how to make fabric alphabet letters – pattern, the real fun begins—finding creative ways to use your handmade letters! These letters are not only fun to make but also serve many educational and decorative purposes.
One popular use is as an educational toy for toddlers. Create a full alphabet set and store them in a fabric bag. Kids can play spelling games, match letters to pictures, or learn the alphabet in a hands-on way.
You can also make name banners by sewing or gluing letters onto ribbon or string. Hang the banner on a bedroom wall, nursery door, or classroom for a personalized touch. Add decorative touches like pom-poms, felt stars, or fabric flowers to make it extra special.
For a baby gift, create a soft letter set in a handmade pouch or use them as applique on a baby blanket. Parents will appreciate the handmade charm and the sensory benefits for their little one.
Classrooms and homeschoolers can benefit from wall-mounted fabric alphabets. Use Velcro on the back of each letter so kids can rearrange them on a felt board during spelling lessons or story time.
For holidays or special occasions, switch up the colors to match the theme. Think red and green letters spelling “JOY” at Christmas or pastels for an Easter alphabet set.
Lastly, consider selling custom name sets or full alphabets at craft fairs or on Etsy. Parents, teachers, and decorators love personalized and handmade items, and your fabric letters could become a popular product.
Q1: Can I wash the fabric alphabet letters?
Yes, if you use washable fabrics and stuffing like polyester fiberfill. Avoid using hot water or tumble drying, as some fabrics may shrink.
Q2: What size should I make each letter?
A common size is 4–6 inches tall, but you can adjust depending on your purpose—smaller for appliqué, larger for toddler toys or wall hangings.
Q3: Can I use a glue gun instead of sewing?
Yes, especially if you’re using felt or crafting with kids. Just be cautious with hot glue around little ones.
Q4: How long does it take to make a full alphabet?
Depending on skill level, making 26 letters can take a few days. Start with just a name or a few favorite letters if you’re short on time.
Q5: Are there free printable letter templates?
Absolutely! You can find free printable fabric alphabet letter patterns online in various fonts and sizes. Choose block-style letters for easier sewing.
Q6: Can I personalize letters with embroidery or embellishments?
Yes! Embroider names, initials, or even add small appliqués like hearts, stars, or animals to make each letter unique.
Learning how to make fabric alphabet letters – pattern is not only a rewarding sewing project, but also a wonderful way to create educational, personalized, and decorative items. With just a few simple materials and some creativity, you can make a project that kids will love and cherish.
From choosing fabrics and cutting shapes to sewing and stuffing, this tutorial gave you a step-by-step path to complete your own alphabet letter set. You now have the skills to customize, gift, decorate, and educate—all with your handmade fabric letters.
We’d love to hear from you! If you tried this pattern, share your thoughts, ideas, or suggestions in the comments. What worked best for you? Did you customize your letters in a fun way? Your feedback helps build a stronger crafting community. 🧵📚🧒


