
Water Bottle Bag - Pattern

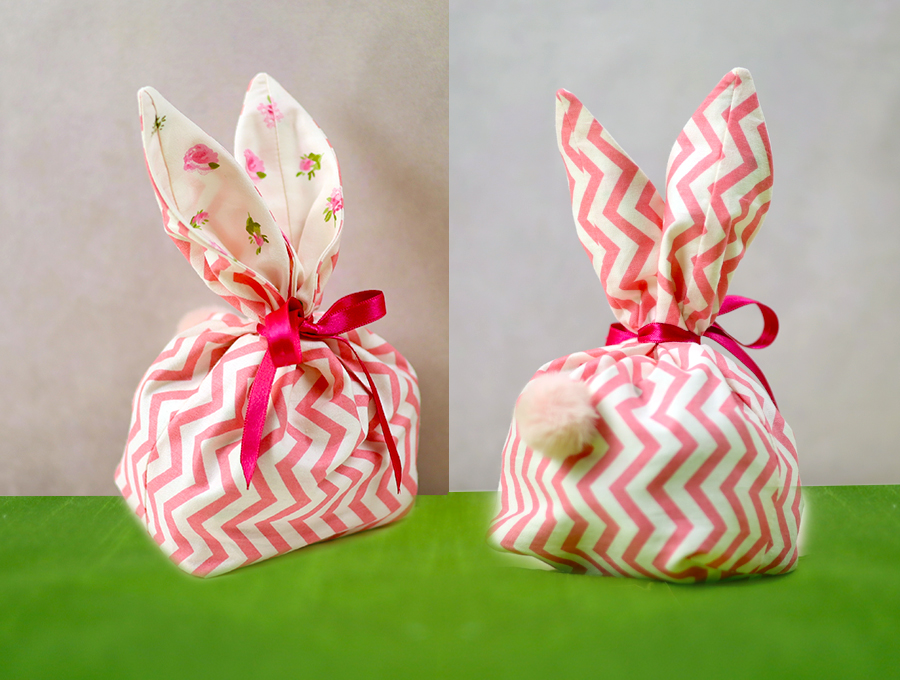
The little bunny-shaped bag – pattern is one of the most charming projects you can undertake if you love sewing or crafting unique accessories. Whether you are looking to create a thoughtful gift for a child, a festive Easter accessory, or simply a whimsical piece for your own collection, this crochet or sewing guide provides everything you need to get started. The beauty of a bunny ear purse lies in its versatility, allowing you to play with different fabrics, textures, and colors to bring a little personality to a functional item.
Choosing to work with a little bunny-shaped bag – pattern is an excellent way for beginners to practice essential techniques like curved stitching, lining insertion, and decorative embroidery. Because the shape is organic and playful, it forgives minor imperfections that might be more noticeable in a rigid, geometric design. Throughout this guide, we will explore the best materials to use, the step-by-step assembly process, and how to customize your animal-themed handbag to make it truly one-of-a-kind.
When you download or draw your little bunny-shaped bag – pattern, you are not just following a set of instructions; you are engaging in a creative journey. High-quality DIY craft patterns are designed to be intuitive, ensuring that the final product is durable enough for daily use while maintaining its adorable aesthetic. In the following sections, we will break down the terminology, the required tools, and the professional tips needed to ensure your bunny pouch looks like it came straight from a high-end boutique.
The foundation of any successful project is the little bunny-shaped bag – pattern itself, which acts as the blueprint for your creation. A well-designed sewing template will include specific pieces for the front and back panels, the iconic long ears, and often a circular or oval base to provide depth. Understanding how these pieces interlock is the first step toward mastering handmade accessory design.
When we talk about a digital pattern, we are referring to the precise measurements and “seam allowances” required to make the bag functional. For a little bunny-shaped bag – pattern, the seam allowance is crucial because the ears need to be flipped inside out, requiring a steady hand and accurate cutting. Most PDF patterns will provide a scale key to ensure you print the pieces at the correct size.
The fabric selection is the next vital component mentioned in your crafting instructions. For a soft, cuddly feel, many makers choose faux fur, minky fabric, or high-quality felt. These materials give the bunny bag its signature plush look, though they can be slightly more challenging to sew than standard cotton. If you are a novice, starting with a sturdy canvas or linen might be easier.
Another key term often found in a little bunny-shaped bag – pattern is “interfacing.” This is a hidden layer of material fused to the back of your fabric to provide structure. Without fusible interfacing, your bunny might look a bit wilted rather than standing tall and proud. It is especially important for the ears, as you want them to maintain their shape even when the bag is being carried.
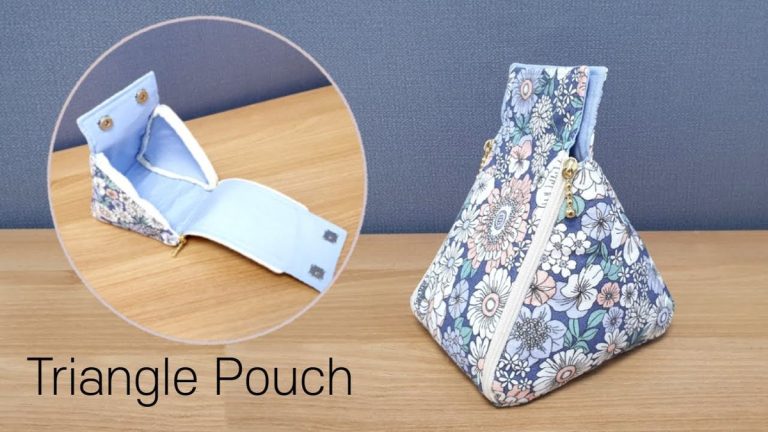
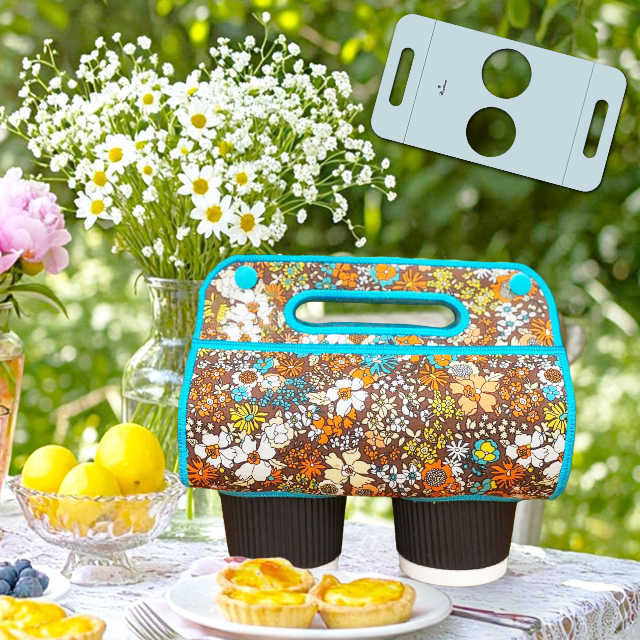
Hardware is the final piece of the puzzle when analyzing your handbag pattern. You will need to decide between a zipper closure, a drawstring top, or a magnetic snap. Each option changes the “vibe” of the bag; a drawstring is perfect for a vintage-style bunny pouch, while a zipper offers more security for a modern toddler backpack.
Lastly, don’t forget the embroidery details. A little bunny-shaped bag – pattern usually includes a guide for the face. Using embroidery floss to hand-stitch a pink nose and sleepy eyes adds a “human touch” that machines simply cannot replicate. This customization is what transforms a simple project into a cherished heirloom gift.
Before you dive into your little bunny-shaped bag – pattern, setting up an organized workspace is essential for SEO-optimized crafting. You will need a clean, flat surface for cutting your fabric, as any wrinkles in the material can lead to an uneven bag silhouette. Gather your fabric shears, pins, and a marking pen that disappears with heat or water.
The cutting process is where the little bunny-shaped bag – pattern truly begins to take shape. Always remember to lay your pattern pieces along the “grainline” of the fabric. This ensures that the bag doesn’t stretch out of shape over time. If you are using a patterned fabric, pay close attention to the direction of the print so your bunnies aren’t upside down!
Selecting the right sewing machine needle is a technical detail that many overlook but is vital for a professional finish. If you chose a thicker fabric for your bunny-shaped accessory, a size 90/14 needle is usually best. For lighter cottons, an 80/12 needle will prevent puckering. Matching your polyester thread color to your fabric ensures that your seams remain discreet and clean.
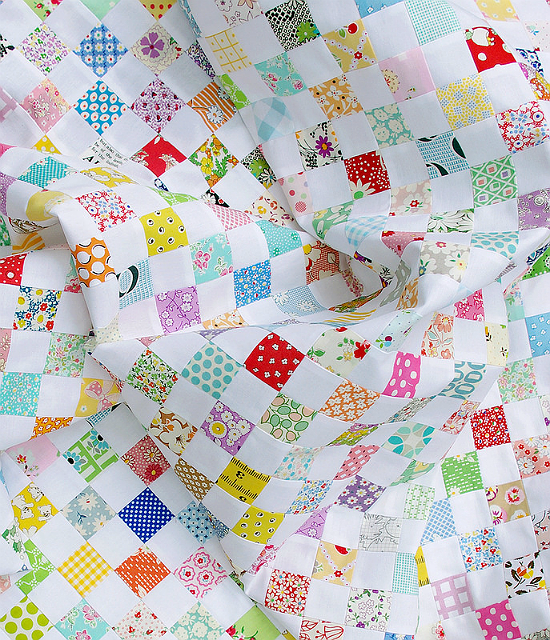
Lining your bag is a step that elevates the quality of your little bunny-shaped bag – pattern results. A contrasting lining fabric, such as a floral print or a bright polka dot, provides a delightful surprise whenever the bag is opened. The lining also hides the raw edges of your exterior fabric, making the interior of the bunny purse as beautiful as the exterior.
The ears are arguably the most important feature of the little bunny-shaped bag – pattern. To give them extra “pop,” you can use a different fabric for the inner ear, such as a soft pink satin. When sewing the ears, remember to “clip the curves.” This involves making small snips in the seam allowance so that when you turn the ears right-side out, the fabric lays flat and smooth.
Finally, consider the strap attachment. Whether you are using a braided cord, a ribbon, or a sewn fabric strap, you must reinforce the attachment points. Since this is a handheld or shoulder bag, these points will experience the most tension. Doubling back over your stitches at the side seams will ensure your little bunny-shaped bag – pattern creation lasts for years.
Now it is time to put the little bunny-shaped bag – pattern into action by joining the pieces. Start by preparing the ears, as they are often sewn into the top seam of the main body. Aligning the inner and outer ear pieces correctly is a hallmark of a high-quality handmade bag. Once sewn and turned, give them a good press with an iron to sharpen the edges.
Next, focus on the face construction. It is much easier to embroider or apply applique details to the front panel before the bag is fully assembled. Following the markings on your little bunny-shaped bag – pattern, center the nose and eyes. If you prefer a 3D look, you can use safety eyes, but be sure they are secured tightly, especially if the bag is for a young child.
Attaching the base (if your pattern includes one) requires patience. Pins or sewing clips are your best friends here. By matching the center points of the side panels to the center points of the base, you ensure the little bunny-shaped bag – pattern stays symmetrical. Sew slowly around the curves, pivoting the fabric as needed to maintain an even seam.
The lining assembly mirrors the exterior assembly, but with one crucial difference: you must leave a small opening in the bottom seam. This “turning hole” allows you to pull the entire bag through once the exterior and lining are joined at the top. It is a magical moment in bag making when the structure finally reveals itself.
Integrating the closure is the penultimate step of your little bunny-shaped bag – pattern. If you are installing a zipper, use a zipper foot on your machine to get as close to the teeth as possible. For a drawstring bunny bag, you will create “casings” near the top edge. Precision here ensures the bag opens and closes smoothly without catching on the fabric.
To finish, hand-stitch the opening in the lining using a ladder stitch (also known as an invisible stitch). This small detail is what separates amateur crafts from professional-grade boutique items. Give the entire bunny-shaped bag a final steam press, and you have successfully brought your creative sewing pattern to life!
Once you have mastered the basic little bunny-shaped bag – pattern, the possibilities for customization are endless. You can scale the pattern up to create a bunny tote bag or down for a coin purse. Experimenting with different textures, like quilted cotton or repurposed denim, can give the same pattern a completely different aesthetic.
Adding decorative embellishments is a great way to make your version of the little bunny-shaped bag – pattern stand out. Think about adding a small pom-pom tail to the back or a tiny bow near one of the ears. These small “Easter eggs” in design add value and charm, making the item more “pinnable” on social media platforms like Pinterest.
If you are a seller, using the term little bunny-shaped bag – pattern in your product descriptions is key for e-commerce SEO. Potential customers often search for specific shapes and themes. Highlighting that your bag is handmade from an original pattern adds a level of authenticity and craftsmanship that mass-produced items lack.
Photography is your most powerful tool for showcasing the little bunny-shaped bag – pattern. Use natural lighting and a neutral background to let the colors of the bag pop. Including a photo of a child holding the bag or showing what fits inside (like a phone and some candy) helps customers visualize the product’s scale and utility.
Seasonal marketing is also highly effective. While a bunny bag is cute year-round, it sees a massive spike in interest during the Easter season and springtime fashion trends. Tailoring your keywords to include “Easter basket alternative” or “Spring gift for girls” alongside your little bunny-shaped bag – pattern will drive more targeted traffic.
Lastly, consider offering the little bunny-shaped bag – pattern as a digital download for other crafters. The “DIY” movement is huge, and sharing your expertise through a well-written tutorial can create a passive income stream. Whether you are selling the finished product or the instructions, the bunny-shaped design remains a timeless favorite in the crafting community.
What is the best fabric for a little bunny-shaped bag – pattern?
The best fabric depends on the desired look. For a soft, plush feel, use minky or fleece. For a more structured, everyday bag, cotton canvas or heavy linen works beautifully. Always ensure you use a matching interfacing to give the bag the necessary support.
Can a beginner sew this little bunny-shaped bag – pattern?
Yes! This project is considered intermediate-beginner friendly. The most challenging parts are sewing the curves and turning the ears, but with a bit of patience and slow stitching, anyone with basic sewing machine skills can complete it successfully.
How do I clean my handmade bunny bag?
If you used cotton or synthetic fleece, most handmade bags can be spot-cleaned with a damp cloth and mild detergent. If the bag needs a deep clean, hand-washing and air-drying is recommended to maintain the shape and protect any hand-embroidered details.
How long does it take to finish a little bunny-shaped bag – pattern?
For an experienced sewist, the project usually takes between 2 to 4 hours, including cutting and embroidery. Beginners should set aside a full afternoon to ensure they don’t feel rushed during the finer detail work.
What size is the finished bag?
Typically, a little bunny-shaped bag – pattern is designed to be around 6 to 8 inches wide—perfect for small essentials. However, most digital patterns can be resized using your printer’s “scale” setting if you wish to make a larger version.
Do I need a special sewing machine for this?
No, a standard home sewing machine with a straight stitch and zigzag stitch capability is all you need. If you are using very thick fabrics like faux fur, a walking foot attachment can be helpful but is not strictly necessary.
In this article, we have explored the wonderful world of creating a little bunny-shaped bag – pattern, from the initial material selection to the final invisible stitches. We discussed the importance of fabric choice, the technicality of interfacing, and the creative joy of custom embroidery.
By following a structured approach, you can transform a simple piece of cloth into a functional piece of art that brings a smile to anyone’s face. Crafting your own accessories is not just about the final product; it’s about the skills you gain and the love you pour into every seam.


