
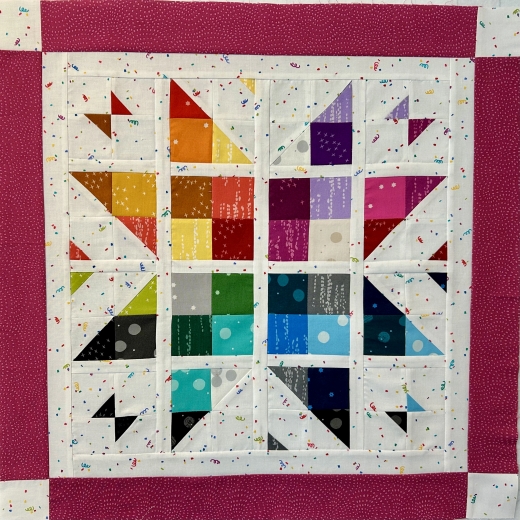
Horizontal Row Quilt - Pattern

The Lucky Star Block Quilt – Pattern is one of the most timeless and captivating designs in the quilting world. With its crisp lines, elegant geometry, and symbolic appeal, this star-inspired block is as versatile as it is visually stunning. Whether you’re a beginner or a seasoned quilter, the Lucky Star Block Quilt – Pattern provides an opportunity to work with classic shapes while expressing your creativity through color and layout.
Historically, star blocks have been associated with good fortune, guidance, and direction—making the “lucky star” a meaningful motif for quilts. Its balanced structure lends itself well to a wide range of color combinations and arrangements, allowing you to create quilts that are both beautiful and deeply personal. From traditional Americana styles to modern minimalist designs, the Lucky Star Block Quilt – Pattern fits right in.
This pattern has gained popularity not only because of its aesthetic but also due to its accessibility. It can be made using basic quilting techniques such as half-square triangles, flying geese, and simple square construction. In this article, we’ll walk through what makes the Lucky Star Block so special, how to sew it, design ideas, and expert tips to help you craft a quilt that feels truly lucky.
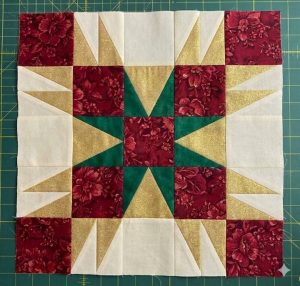
The Lucky Star Block Quilt – Pattern is a specific type of star quilt block known for its striking symmetry and eight-point star appearance. Unlike some complex star patterns, this version is easier to construct while still offering a high-impact visual result. It’s ideal for quilters who want to create a dynamic focal point or repeat it across an entire quilt.
At its core, the Lucky Star Block is made up of triangles and squares arranged in such a way that they form a radiant star with sharp points and a solid center. The block typically finishes at 12 inches square, but it can be resized depending on your project.
The star shape has symbolic significance in many cultures, often representing guidance, luck, and inspiration. That’s part of the reason why the Lucky Star Block Quilt – Pattern is a favorite for gifts like graduation quilts, baby quilts, or projects meant to celebrate new beginnings.
One of the advantages of this pattern is how well it works with contrast. You can create bold stars with bright fabrics on dark backgrounds or go for a softer look with pastels and low-volume prints. This flexibility means the pattern adapts to your fabric stash, personal taste, or even seasonal themes.
Another great feature is its ability to be combined with other blocks. The Lucky Star Block pairs beautifully with simple sashing, alternate blocks, or even a sampler quilt layout. It can stand alone as a statement or support a larger quilt story.
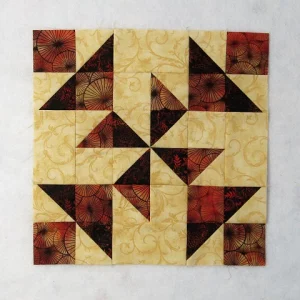
Many modern designers have created variations of the Lucky Star, introducing new elements like curved seams, off-center stars, or color gradients. These adaptations prove that while the design is rooted in tradition, it continues to evolve with quilting trends.
Creating your own Lucky Star Block Quilt – Pattern begins with cutting your fabric accurately. You’ll typically need four squares for the corners, four flying geese units for the points, and one square for the center. You can use coordinating fabrics or make a scrappy version for more visual interest.
Start by constructing the flying geese units. These are formed by attaching two smaller triangles to opposite sides of a larger triangle. A common method is the “no-waste” technique, which helps minimize fabric scraps and keep your pieces uniform.
Next, assemble the corner squares and the center square. These provide a solid foundation for the block and help balance the visual weight of the star points. The center square is a great place to use a bold print or fussy-cut fabric to highlight a specific motif.
Once all the individual units are complete, lay them out in a 3×3 grid. The flying geese units should form the star points, with the center square in the middle and the solid squares at the corners. This layout is simple but creates a stunning final design.
Sew each row together using a consistent ¼-inch seam allowance. Press the seams carefully—either open or nested—to ensure flat, crisp joins. Once the rows are assembled, sew the rows together to complete the block.
After your first block, you can repeat the process with different fabrics to build an entire quilt top. Depending on your project, you can frame each block with sashing or set them side by side for a more seamless effect. Either way, the Lucky Star Block Quilt – Pattern shines brightly in any arrangement.
One of the most exciting aspects of the Lucky Star Block Quilt – Pattern is its adaptability in design. With just a few simple changes, you can transform your quilt from traditional to modern, from subtle to bold, or from seasonal to timeless.
A classic layout uses alternating Lucky Star blocks with solid filler blocks. This helps the stars stand out more while speeding up the quilt-making process. It’s also a great way to showcase beautiful background fabrics that might otherwise be overlooked.
For a more modern approach, try using negative space. Make just a few Lucky Star blocks and float them on a large background. This gives a minimalist look that focuses attention on the blocks and creates an airy, artistic feel.
Color plays a huge role in the design. Consider using a gradient or ombré effect by arranging the star blocks from light to dark across the quilt. This gives movement to the quilt and enhances the illusion of the stars twinkling.
Another creative idea is to make each star in a different color, creating a rainbow or “scrappy” quilt effect. This works especially well for stash-busting projects and brings a cheerful, playful vibe to the finished quilt.
If you’re interested in themed quilting, the Lucky Star Block Quilt – Pattern works beautifully for holidays. Use reds and greens for Christmas, autumn hues for fall, or icy blues and whites for a winter-themed design.
You can also experiment with scale. Try making a large-scale star for the center of a medallion quilt or mix different block sizes in a sampler layout. The possibilities are nearly endless, and the pattern’s flexibility means your creativity can lead the way.
To get the best results with the Lucky Star Block Quilt – Pattern, start with accurate cutting. Use a rotary cutter, ruler, and mat, and double-check your measurements before making any cuts. Precision matters, especially when piecing triangles and flying geese.
Choose high-contrast fabrics to make your stars pop. Dark star points on a light background or vice versa will give you the cleanest visual result. Avoid fabrics that blend too closely, or your points might get lost in the design.
Maintain a consistent seam allowance. A ¼-inch seam is standard in quilting and is crucial for keeping your blocks square and the points aligned. If you’re new to quilting, use a quarter-inch presser foot for your sewing machine to improve accuracy.
Press as you go. Pressing seams carefully—especially when working with triangles—helps the fabric lie flat and keeps the block size consistent. Use a hot iron with steam or a pressing spray for crisp results.
Chain piecing can help save time and keep your units organized. Sew multiple components without cutting the thread between them, then snip them apart once finished. This method is efficient and helps build momentum during the piecing process.
Finally, embrace small imperfections. While the Lucky Star Block Quilt – Pattern looks sharp and geometric, slight variances won’t ruin your project. Quilting is about expression and enjoyment, not perfection. Celebrate your progress, and let the stars shine in their own unique way.
Q1: What is a Lucky Star Block in quilting?
A: The Lucky Star Block Quilt – Pattern is a traditional quilt block featuring an eight-pointed star, made with triangles and flying geese units. It’s known for its clean symmetry and visual impact.
Q2: Is this block good for beginner quilters?
A: Yes! While it involves a few key techniques like flying geese and half-square triangles, the Lucky Star is very approachable for beginners and offers a great learning opportunity.
Q3: What size block should I use?
A: The standard size is 12.5 inches unfinished (12 inches finished), but you can scale it up or down depending on your quilt layout or design preference.
Q4: Can I use scraps for a Lucky Star Block Quilt?
A: Absolutely! Scraps work beautifully for the star points or center squares. Just ensure you maintain value contrast so the design stands out.
Q5: How many blocks do I need for a full quilt?
A: This depends on the size of the quilt and block. For a lap quilt using 12″ blocks, you might need 20–25 blocks. Adjust based on borders, sashing, and overall size.
Q6: What quilting pattern works best for this design?
A: Straight-line quilting or echo quilting around the stars helps enhance the geometric look. Free-motion stars or swirls can add texture without distracting from the block design.
The Lucky Star Block Quilt – Pattern brings timeless charm and design flexibility to every quilting project. Whether you’re crafting a full-size quilt, a table runner, or a wall hanging, this star-inspired block shines with beauty, meaning
, and creativity.
In this article, we explored what makes the Lucky Star Block Quilt – Pattern so beloved, how to sew it, various layout ideas, and tips to make your quilting process smoother. From classic designs to modern interpretations, this pattern is a brilliant addition to any quilter’s repertoire.
Have you created a Lucky Star quilt before? Share your honest thoughts, tips, or suggestions in the comments below. Your insight could inspire the next quilter looking to start their lucky star journey!


