
Bird-shaped Pincushion - Pattern

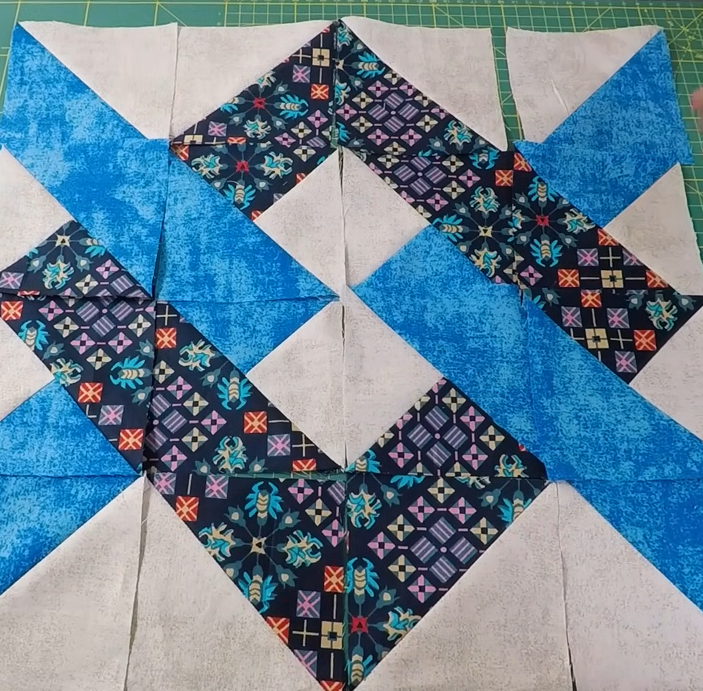
The Nine Patch Quilt Block – Pattern remains one of the most iconic and beloved foundations in the world of quilting, serving as the perfect starting point for novices and a versatile canvas for experienced artists. This classic design is essentially a grid of nine equal squares arranged in three rows of three, creating a balanced and harmonious look that can be adapted into thousands of different configurations. Whether you are aiming for a primitive, scrappy aesthetic or a crisp, modern minimalist vibe, understanding the fundamental structure of this block is essential for anyone serious about the craft of textile assembly.
Because the Nine Patch Quilt Block – Pattern relies on simple geometric divisions, it provides an excellent opportunity to experiment with color theory and fabric values without the stress of complex curves or intricate piecing. Many quilters find that this pattern is the ultimate “stash buster,” allowing them to use up small remnants of fabric while still achieving a cohesive and professional-looking finished product. The rhythmic nature of cutting and sewing these squares makes it a meditative process, often leading to a state of creative flow that is as rewarding as the physical quilt itself.
In this comprehensive guide, we will explore every facet of the Nine Patch Quilt Block – Pattern, from its historical significance to the modern shortcuts that make it faster to assemble than ever before. We will discuss the best tools for achieving precision, how to choose fabrics that create visual interest, and the technical secrets to getting those elusive “perfect points” where the corners meet. By mastering this essential quilt block, you will unlock a world of design possibilities that will allow you to create stunning heirlooms for generations to come.
The historical roots of the Nine Patch Quilt Block – Pattern date back to a time when fabric was a precious commodity and nothing went to waste. Early American quilters used these small squares to salvage usable bits of worn-out clothing, turning necessity into a form of artistic expression. Today, we honor that tradition by continuing to use the nine-patch structure as a building block for more complex designs, such as the “Irish Chain” or the “Double Nine Patch,” which extend the simple grid into sprawling, intricate quilt layouts.
At its core, the block is divided into a 3×3 grid, meaning the mathematical logic is incredibly straightforward. If you want a finished 9-inch block, each individual square must be 3.5 inches (3 inches finished plus a half-inch for seam allowance). This ease of calculation makes it a favorite for teachers introducing students to the hobby. The simplicity of the Nine Patch Quilt Block – Pattern ensures that the focus remains on learning the mechanics of a straight seam and the importance of accurate cutting.
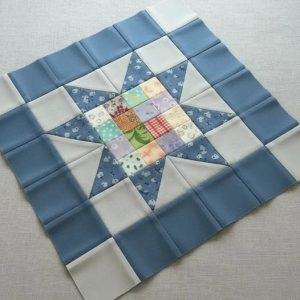
There are two primary ways to arrange the colors in a Nine Patch Quilt Block – Pattern: the checkerboard and the focused center. In a checkerboard layout, you alternate between two contrasting colors, creating a sense of movement across the quilt top. In a focused center layout, eight squares of one color surround a single different square in the middle. This variation allows for a “medallion” effect, which can be used to highlight a specific fabric motif or a special piece of embroidery.
Modern quilters often utilize the Nine Patch Quilt Block – Pattern as a “filler” block to balance out more complex appliqué or paper-pieced sections of a quilt. Its clean lines provide a visual resting place for the eye, preventing the overall design from becoming too cluttered or overwhelming. This architectural role in quilt design is why the pattern has never gone out of style; it is the structural glue that holds more ambitious textile projects together with grace and simplicity.
One of the most fascinating aspects of this pattern is its ability to change character based on the “value” of the fabrics used. Value refers to how light or dark a color is regardless of its hue. By playing with values in a Nine Patch Quilt Block – Pattern, you can create secondary patterns that appear when multiple blocks are sewn together. This is known as the “disappearing nine-patch” technique, where the original block is cut apart and rearranged to create a much more complex look with very little extra effort.
Finally, the Nine Patch Quilt Block – Pattern serves as a vital pedagogical tool. It teaches the importance of “nesting seams,” a technique where seam allowances are pressed in opposite directions so they lock together like a puzzle. This ensures that the corners of the squares align perfectly, a skill that is transferable to almost every other quilting template you will encounter in your journey. Master the nine-patch, and you have essentially mastered the fundamentals of precision patchwork.
To achieve a professional finish with your Nine Patch Quilt Block – Pattern, precision starts at the cutting mat. Using a high-quality rotary cutter and an acrylic ruler is non-negotiable for modern quilters. Even a sixteenth of an inch error in cutting can multiply across the nine squares, resulting in a block that is “wonky” or difficult to square up. Taking the time to ensure your fabric is ironed flat and aligned with the grain before you begin to cut will pay dividends in the long run.
One of the most efficient ways to assemble the Nine Patch Quilt Block – Pattern is through a method called strip piecing. Instead of cutting dozens of individual small squares, you sew long strips of fabric together into a “strip set.” For example, you might sew a dark strip between two light strips. Once sewn, you then cut across the width of these joined strips to create pre-assembled units. This method significantly reduces the time spent at the sewing machine and improves the overall accuracy of your quilt units.
When using the strip piecing method for the Nine Patch Quilt Block – Pattern, it is crucial to use a “scant quarter-inch seam.” This means sewing just one or two threads narrower than a true quarter inch. This small adjustment accounts for the thickness of the fabric as it folds over the seam when pressed. Without a scant seam, your units will often end up slightly too small, a common frustration for beginners trying to match up the rows of their patchwork design.
Pressing is the “secret sauce” of a perfect Nine Patch Quilt Block – Pattern. You should always press your seams toward the darker fabric to prevent the seam allowance from showing through the lighter squares—a phenomenon known as “shadowing.” Additionally, in a nine-patch, you should press the seams of the top and bottom rows in one direction, and the middle row in the opposite direction. This allows the seams to “nest” beautifully when you join the rows together.
For those who prefer a more traditional approach, cutting individual squares for the Nine Patch Quilt Block – Pattern allows for a truly “scrappy” look. This is the perfect time to use your fabric scraps from previous projects. By choosing squares that all share a similar color temperature—like all “warm” reds, oranges, and yellows—you can create a chaotic yet harmonious quilt that feels rich with history and personal meaning. This variety is what makes every nine-patch unique.
Finally, always “square up” your blocks after assembly. Even with perfect cutting and sewing, fabric can stretch or shift. Using a square quilting ruler to trim your finished Nine Patch Quilt Block – Pattern to the exact size required ensures that when you go to sew your blocks into a full quilt top, everything fits together perfectly. This extra step is the hallmark of a meticulous quilter and results in a finished product that hangs straight and looks balanced.
The beauty of the Nine Patch Quilt Block – Pattern is its versatility; it is far more than just a 3×3 grid. One popular variation is the “Double Nine Patch,” where each of the nine squares in the block is itself a smaller nine-patch. This creates an intricate, mosaic-like appearance that looks incredibly complex but is achieved through the same simple steps as the original. It’s a great way to showcase fine hand-quilting or detailed machine stitching.
Another creative twist is the “Nine Patch on Point.” By rotating the Nine Patch Quilt Block – Pattern 45 degrees so it looks like a diamond, you completely change the visual flow of the quilt. This requires the use of “setting triangles” to fill in the edges of the quilt top, but the result is a dynamic and elegant design that feels more sophisticated than a standard horizontal layout. It’s a favorite for bridal quilts and special anniversary gifts.
You can also experiment with “Negative Space” in your Nine Patch Quilt Block – Pattern. By using a solid, neutral color for eight of the squares and a bright, bold print for only the center square, you create a modern, minimalist look. This style is very popular in contemporary modern quilting circles, where the focus is often on the interaction between the fabric and the quilting stitches rather than the complexity of the piecing itself.
The “Disappearing Nine Patch” is perhaps the most famous variation of the Nine Patch Quilt Block – Pattern. In this version, you sew a standard nine-patch, then cut it in half both horizontally and vertically. By rotating and rearranging the four resulting pieces, you create a complex geometric pattern with diagonal lines and smaller squares that seems to defy the original 3×3 logic. It is a “magic” trick of quilting geometry that never fails to impress.
Integrating different textures is another way to elevate the Nine Patch Quilt Block – Pattern. While quilting cotton is the standard, you can mix in linens, chambrays, or even silks (if you use a stabilizer). Combining a matte cotton with a slightly shiny silk in a nine-patch creates a subtle play of light that adds luxury to a simple design. This mix of textile textures makes the quilt a tactile experience as well as a visual one.
Lastly, consider the border. A Nine Patch Quilt Block – Pattern quilt looks stunning when framed with a wide, solid border that matches one of the colors within the blocks. Alternatively, you can create a “piano key” border using leftover strips from your block assembly. This ties the whole project together and ensures that not a single inch of your beautiful quilting fabric goes to waste, staying true to the resourceful origins of the craft.
If your Nine Patch Quilt Block – Pattern ends up looking a bit like a circle or a polygon instead of a square, the issue is likely “fabric draw.” This occurs when the sewing machine’s tension is too tight, or the feed dogs are pulling the fabric unevenly. Always test your tension on a scrap of fabric before starting your main project. A flat, relaxed block is the goal, and proper machine maintenance is the first step toward achieving it.
Another common hurdle is the “vanishing point,” where the corners of your squares don’t quite meet in the middle. This usually happens because the fabric was pushed or pulled during the sewing process. Using fine quilting pins to secure the intersections before you sew is essential. Pinning exactly through the “well” of the seam ensures that the rows don’t shift as they go under the presser foot, preserving the integrity of the quilt block.
If you find that your Nine Patch Quilt Block – Pattern is consistently too small, check your seam allowance. Even a hair’s breadth wider than a quarter inch will result in a block that is nearly a quarter inch too small overall once all the seams are sewn. Many modern machines come with a specialized quarter-inch foot that has a guide on the side to help you stay perfectly on track, which is a worthwhile investment for any serious maker.
Fabric “bleeding” can ruin a Nine Patch Quilt Block – Pattern, especially if you are using high-contrast colors like red and white. It is always a good idea to pre-wash your fabrics or use “color catchers” in the wash to ensure the dyes are set. Since the nine-patch often features light and dark fabrics side-by-side, any color migration will be immediately visible and difficult to fix once the quilt top is assembled.
Sometimes, despite your best efforts, a block just won’t lay flat. This can be caused by “over-manipulating” the fabric with a hot iron. Instead of sliding the iron back and forth (which can stretch the fibers), use a “pressing” motion—lifting the iron up and setting it down. Using a tailor’s clapper can also help flatten seams without the risk of distortion, ensuring your Nine Patch Quilt Block – Pattern remains perfectly square.
Finally, remember that perfection is a journey, not a destination. Even in antique museum quilts, you will often find small mistakes in a Nine Patch Quilt Block – Pattern. These “humility blocks” remind us that quilting is a human art form. If a corner is a millimeter off, don’t be too hard on yourself. The beauty of a finished quilt lies in the love and time invested in its creation, not just the mathematical perfection of its patchwork seams.
1. Is the Nine Patch Quilt Block – Pattern good for absolute beginners?
Absolutely! It is often the very first block taught in quilting classes because it introduces cutting, sewing straight seams, and pressing without the complexity of triangles or curves. It is the gold standard for beginner quilting.
2. What size should I make my squares?
Common sizes include 2.5-inch squares (for a 6-inch finished block), 3.5-inch squares (for a 9-inch block), or 4.5-inch squares (for a 12-inch block). Always remember to add 0.5 inches to your desired “finished” square size to account for the seam allowance.
3. Can I make a Nine Patch Quilt Block – Pattern using a sewing machine or does it have to be hand-sewn?
While historically these were hand-sewn, the vast majority of modern quilters use a sewing machine for speed and durability. However, hand-sewing a nine-patch can be a very portable and relaxing “slow stitching” project for traveling.
4. How do I calculate how many blocks I need for a queen-sized quilt?
First, determine the size of your finished block. For a queen quilt (approx. 90″ x 108″), if you use 10-inch finished blocks, you would need 9 blocks across and 11 blocks down, totaling 99 Nine Patch Quilt Block – Pattern units.
5. What is the “Disappearing Nine Patch”?
It is a technique where you take a finished Nine Patch Quilt Block – Pattern, cut it into four equal quadrants, and rearrange them. It creates a much more complex-looking pattern with very little extra work, making it a favorite for “quick” quilts.
6. Do I need to starch my fabric for this pattern?
While not strictly necessary, many quilters find that using fabric starch makes the cotton easier to handle and prevents the small squares from stretching, leading to much more accurate corners and a crisper finish.
The Nine Patch Quilt Block – Pattern is a timeless masterpiece of design that bridges the gap between historical tradition and modern creativity.
Throughout this article, we have discussed the fundamental 3×3 structure, the efficiency of strip piecing, and the various ways you can transform this simple block into complex works of art like the “Disappearing Nine Patch.” By focusing on precision cutting and mastering the “nesting seam” technique, you can create quilt tops that are as structurally sound as they are visually stunning.


