
American-style placemat with a fruit theme - Pattern

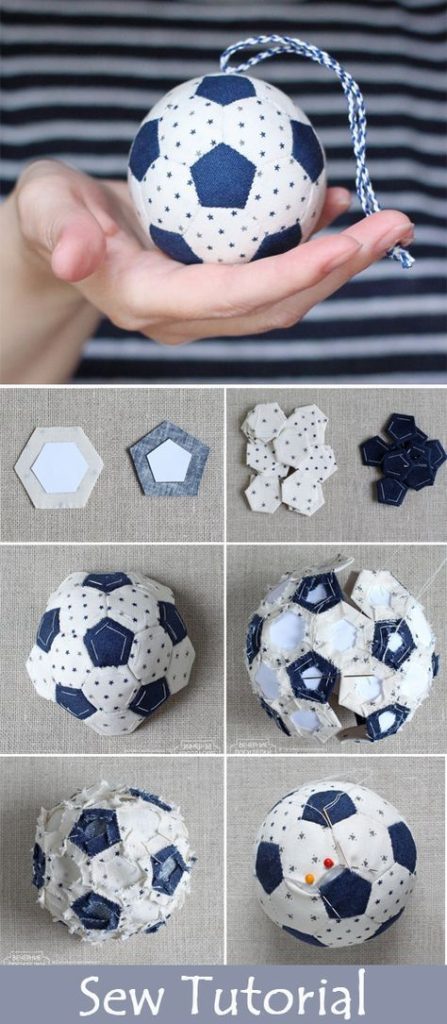
A Patchwork Football Tutorial – Pattern is the ultimate creative project for sports fans and sewing enthusiasts alike, offering a unique way to combine the precision of quilting with the joy of handmade toys. Creating a soft, fabric-based football is not just about making a plaything; it is about mastering geometric shapes and understanding how flat pieces of fabric can transform into a three-dimensional object. This Patchwork Football Tutorial – Pattern is meticulously designed to guide you through the process of selecting fabrics, cutting accurate shapes, and assembling them into a classic American football silhouette that is perfect for nursery decor, tailgate parties, or safe indoor play.
When you embark on a project using a Patchwork Football Tutorial – Pattern, you are engaging in a tradition of “scrappy” sewing that allows you to repurpose small pieces of fabric into something meaningful and durable. The beauty of this specific Patchwork Football Tutorial – Pattern lies in its accessibility; you don’t need a high-tech sewing machine or expensive specialty tools to achieve a professional-looking result. By focusing on the fundamental principles of patchwork, such as consistent seam allowances and careful pinning, you ensure that your finished football looks symmetrical and stays together even after hours of enthusiastic play.
In this comprehensive guide, we will break down every stage of the Patchwork Football Tutorial – Pattern to ensure your success, regardless of your current sewing skill level. We will explore the mathematics behind the curved segments, the importance of choosing the right stuffing material, and how to add those iconic “laces” that give the football its authentic character. Following a high-quality Patchwork Football Tutorial – Pattern is a fantastic way to sharpen your sewing skills while creating a gift that will be cherished for years to come. Let’s prepare our sewing space and dive into the detailed steps of this rewarding craft project.
The first step in any successful Patchwork Football Tutorial – Pattern is choosing the right material, as the fabric dictates both the look and the durability of the final product. While traditional footballs are made of leather or pigskin, a fabric version benefits from soft yet sturdy materials like high-quality quilting cotton, flannel, or even soft minky for a tactile experience. When following a Patchwork Football Tutorial – Pattern, it is wise to choose fabrics that do not have too much stretch, as excessive “give” can lead to a misshapen ball once you begin the stuffing process.
Colors play a vital role in making your Patchwork Football Tutorial – Pattern stand out, whether you want a realistic brown look or a vibrant, multi-colored team spirit design. You can use this Patchwork Football Tutorial – Pattern to showcase your favorite team’s colors by alternating panels of different prints and solids. Using scrap fabric is encouraged here, as the smaller panels of a football are perfect for utilizing those beautiful remnants you’ve been saving in your stash for a special occasion.
Texture is another element that can elevate your Patchwork Football Tutorial – Pattern from a simple toy to a professional-grade craft. Some makers prefer to use a slightly textured fabric like corduroy or a faux-suede to mimic the grip of a real football, which adds a wonderful sensory layer to the project. As you read through this Patchwork Football Tutorial – Pattern, think about who will be using the ball; for babies, soft organic cottons are best, while for older children, heavier-duty canvas might be more appropriate.
Interface or stabilizers can be a secret weapon when working with a Patchwork Football Tutorial – Pattern. If you choose a thinner fabric, applying a lightweight fusible interface to the back of each panel can prevent the fabric from distorting under the pressure of the stuffing. Our Patchwork Football Tutorial – Pattern suggests this extra step for anyone using lightweight cottons, as it ensures the “football” shape remains crisp and aerodynamic rather than becoming lumpy or round like a basketball.
Preparation of the fabric is key before you cut a single piece for your Patchwork Football Tutorial – Pattern. Always pre-wash and iron your fabrics to account for any shrinkage that might occur later, especially if the football will be played with outdoors or by children who might get it dirty. A clean, flat surface and a sharp rotary cutter or fabric shears are essential tools mentioned in every Patchwork Football Tutorial – Pattern to ensure that your curved edges are smooth and easy to sew together.
Lastly, consider the “laces” of your football, which are a hallmark of the Patchwork Football Tutorial – Pattern. You can use white grosgrain ribbon, felt strips, or even heavy embroidery floss to create this detail. Planning how you will attach these—whether sewn directly onto a panel before assembly or added at the very end—is a crucial part of the planning phase of your Patchwork Football Tutorial – Pattern. Taking the time to coordinate your thread color with your fabric and laces will result in a much more cohesive and polished final product.
The heart of this Patchwork Football Tutorial – Pattern is the template, which usually consists of four identical leaf-shaped (or “mandala”) panels. Accuracy during the cutting phase is the most important factor in ensuring that all four panels meet perfectly at the top and bottom points. When you download or draw your Patchwork Football Tutorial – Pattern, make sure the seam allowance is clearly marked, as even a quarter-inch deviation can significantly change the circumference and overall shape of the ball.
Using a template for your Patchwork Football Tutorial – Pattern allows you to fussy-cut specific motifs from your fabric, such as a team logo or a specific flower pattern. To do this, place your transparent template over the fabric until the desired design is centered, then cut around it carefully. This Patchwork Football Tutorial – Pattern technique is what makes handmade items so much more special than store-bought ones, allowing for a level of customization that is truly unique to the maker.
If you are new to sewing curves, this Patchwork Football Tutorial – Pattern is an excellent way to practice. The gentle arc of the football panels is forgiving, but it still requires a steady hand and a slow sewing speed. Before you start the final assembly, our Patchwork Football Tutorial – Pattern recommends stay-stitching along the curved edges of each panel within the seam allowance. This prevents the bias edges of the fabric from stretching out of shape while you are pinning and sewing the pieces together.
Marking the “start” and “stop” points on each panel of your Patchwork Football Tutorial – Pattern is a pro tip that shouldn’t be overlooked. Because the football comes to a sharp point at both ends, you need to be precise about where your seams meet. In this Patchwork Football Tutorial – Pattern, we suggest using a water-soluble fabric pen to mark exactly where the seam allowance ends at the tips. This ensures that all four panels converge at a single, neat point without leaving a hole or creating a bulky cluster of fabric.
The “laces” panel of your Patchwork Football Tutorial – Pattern requires a little extra attention before the main assembly. It is much easier to sew your decorative laces onto one of the fabric panels while it is still flat. Most Patchwork Football Tutorial – Pattern instructions will tell you to center the laces on one of the four segments. You can zig-zag stitch a piece of white felt or use a decorative machine stitch to create the illusion of laces, which adds that unmistakable “gridiron” look to your project.
Once all four panels are cut and the laces are attached to one, lay them out in the order you wish to sew them. This is the moment where you can see the color balance of your Patchwork Football Tutorial – Pattern and make any last-minute changes. Organized preparation is the hallmark of a successful Patchwork Football Tutorial – Pattern, and taking these few extra minutes to verify your layout will save you from using the seam ripper later on in the process.
The assembly of the Patchwork Football Tutorial – Pattern begins by pinning two panels together with the right sides facing each other. Sew along one curved edge, making sure to backstitch at the beginning and end for security. A common mistake in a Patchwork Football Tutorial – Pattern is rushing this curve; instead, move slowly and adjust the fabric frequently to ensure the edges stay perfectly aligned. Use a standard 1/4 inch seam allowance unless your specific template dictates otherwise.
Continue adding the third and fourth panels to your Patchwork Football Tutorial – Pattern in the same manner. As you add more pieces, the project will begin to take on its three-dimensional shape, which is the most exciting part of the process. In this Patchwork Football Tutorial – Pattern, the goal is to create a “shell” that is fully closed except for one side of the final panel. Leaving a 2-to-3-inch gap in the middle of one seam is essential for turning the ball right-side out and adding the stuffing.
When you reach the points where all panels meet, the Patchwork Football Tutorial – Pattern requires precision. You want to sew as close to the tip as possible without overlapping the previous seams too much. If the points look messy on the inside, don’t worry—once the ball is turned and stuffed, the tension from the inside will help sharpen those ends. This Patchwork Football Tutorial – Pattern emphasizes the importance of trimming the excess fabric at the tips to reduce bulk before turning.
Clipping the curves is a vital step in any Patchwork Football Tutorial – Pattern involving rounded shapes. Small notches or clips made into the seam allowance (being careful not to cut the stitches) allow the fabric to stretch and lay flat once the ball is turned. Without clipping, the seams of your Patchwork Football Tutorial – Pattern might look puckered or strained. This simple technique, often highlighted in a Patchwork Football Tutorial – Pattern, is what gives the ball its smooth, professional curvature.
Now comes the moment of truth in the Patchwork Football Tutorial – Pattern: turning the ball right-side out through the opening you left. Use a blunt tool, like a chopstick or a purple thang, to gently push the points out from the inside. Following this Patchwork Football Tutorial – Pattern ensures that your points are fully extended and sharp. Give the entire shell a good press with an iron to flatten the seams and prepare it for the most transformative step—the stuffing.
The choice of stuffing for your Patchwork Football Tutorial – Pattern will determine how the ball feels and performs. High-quality polyester fiberfill is the most common choice as it is washable and retains its bounce. When stuffing your Patchwork Football Tutorial – Pattern, add small handfuls at a time and push them into the points first. It takes more stuffing than you might think to make a firm football, so keep going until the fabric is taut and there are no visible “dimples” or soft spots in the structure.
Closing the gap in your Patchwork Football Tutorial – Pattern is the final sewing task and requires a ladder stitch (or invisible stitch) by hand. This stitch allows you to join the final edges together from the outside so that the seam is virtually hidden. A good Patchwork Football Tutorial – Pattern will remind you to tuck the raw edges of the opening inward and pin them carefully before you start hand-sewing. This ensures the final seam is just as strong and beautiful as the machine-sewn ones.
Once the ball is closed, you might want to add extra decorative elements to your Patchwork Football Tutorial – Pattern. Some crafters like to add a small bell or a rattle insert inside the stuffing before closing, especially if the ball is intended for a baby. This Patchwork Football Tutorial – Pattern modification makes the toy even more engaging. Just ensure the rattle is safely encased in the center of the stuffing so it cannot be felt through the fabric.
Maintenance of your handmade item from this Patchwork Football Tutorial – Pattern is quite simple if you chose your fabrics wisely. Most fabric footballs can be machine washed on a gentle cycle inside a pillowcase and air-dried. Following the care instructions in our Patchwork Football Tutorial – Pattern will help keep the colors vibrant and the shape intact for a long time. If you used delicate fabrics like silk or wool, spot cleaning is recommended instead to preserve the fibers.
If you find that your football from the Patchwork Football Tutorial – Pattern is slightly lopsided, don’t panic! You can often “massage” the stuffing from the outside to redistribute it more evenly. This is a common occurrence in any Patchwork Football Tutorial – Pattern and is easily fixed by rolling the ball between your hands or gently punching it to move the fiberfill into the gaps. A well-stuffed ball should feel firm but still have a little bit of “give” when squeezed.
For those who want to take their Patchwork Football Tutorial – Pattern to the next level, consider making a matching set. You can create a smaller “junior” version or a larger “stadium” version by simply scaling the template up or down on a photocopier. This Patchwork Football Tutorial – Pattern is so versatile that you could even make a whole “team” of balls in various colors for a sports-themed party or as a unique gift set for a family of fans.
In conclusion, the Patchwork Football Tutorial – Pattern is a project that combines technical skill with heartfelt creativity. Every stitch you take brings you closer to a finished piece that is far superior to any mass-produced plastic ball. By following this Patchwork Football Tutorial – Pattern, you have learned not just how to make a toy, but how to manipulate fabric into complex shapes—a skill that will serve you well in all your future sewing endeavors. Enjoy your new handmade football and the satisfaction of a project well done!
What is the best fabric for a Patchwork Football Tutorial – Pattern?
The best fabrics are non-stretch materials like quilting cotton, denim, or heavy flannel. These fabrics hold the shape of the Patchwork Football Tutorial – Pattern better than knits or jerseys, ensuring the ball looks like a football rather than a round sphere.
Do I need a sewing machine for this Patchwork Football Tutorial – Pattern?
While a sewing machine makes the process much faster, you can certainly complete a Patchwork Football Tutorial – Pattern by hand using a strong backstitch. Hand-sewing allows for even more control over the tight curves and points of the ball.
How do I make the laces look realistic?
In our Patchwork Football Tutorial – Pattern, we recommend using white felt strips or thick white ribbon. Sew one long vertical strip down the center of one panel, then sew several shorter horizontal strips across it to mimic the look of real leather laces.
What size is the finished football from this pattern?
A standard Patchwork Football Tutorial – Pattern usually results in a ball that is about 10 to 12 inches long, which is close to the size of a professional football. However, you can easily scale the template to make mini versions or giant plush versions.
Is this project safe for babies?
Yes, if you use 100% cotton fabric and ensure all seams are double-stitched for strength. When making a Patchwork Football Tutorial – Pattern for an infant, avoid using small beads or buttons for decoration; stick to embroidered laces or fabric appliques for safety.
Can I use this pattern to make a rugby ball?
While similar, a rugby ball is more rounded and doesn’t have laces. You can use the same Patchwork Football Tutorial – Pattern base, but you would skip the laces and perhaps use a slightly wider template to achieve that “egg” shape characteristic of rugby.
This article has provided a detailed look at the Patchwork Football Tutorial – Pattern, covering everything from fabric selection and template preparation to the final assembly and care.
We’ve seen how important accuracy is when cutting the panels and how small details like clipping curves and using a ladder stitch can make a massive difference in the quality of your finished project. This Patchwork Football Tutorial – Pattern is more than just a sewing project; it’s a way to express creativity and craft something that brings joy to people of all ages.


