
American-style placemat with a fruit theme - Pattern

The Quarter Log Cabin Quilt Tutorial – Pattern is a fantastic way to dive into the world of traditional quilting with a modern, asymmetrical twist that adds visual interest to any project. Unlike the standard log cabin block that builds outward from a central square in all four directions, this variation focuses on growth from two sides, creating a striking “quarter” effect. If you have been searching for a Quarter Log Cabin Quilt Tutorial – Pattern that balances simplicity with sophisticated design, you have come to the right place to master this versatile technique.
This specific Quarter Log Cabin Quilt Tutorial – Pattern is ideal for quilters of all skill levels, especially those who love using pre-cut fabrics or scrap stashes to create something vibrant and unique. By manipulating the placement of light and dark fabrics, the Quarter Log Cabin Quilt Tutorial – Pattern allows you to generate secondary patterns like chevrons or diamonds when multiple blocks are sewn together. Throughout this guide, we will explore how to select your quilting materials, cut your strips with precision, and assemble your blocks using the most efficient sewing techniques.
Before we get into the stitching, it is essential to understand that the Quarter Log Cabin Quilt Tutorial – Pattern relies heavily on a consistent quarter-inch seam allowance to ensure all your logs line up perfectly at the end. Because the design grows exponentially on one corner, any slight deviation in your seam accuracy will be magnified as the block gets larger. Grab your rotary cutter, your favorite cotton fabrics, and your sewing machine, because we are about to embark on a creative journey through the steps of this timeless Quarter Log Cabin Quilt Tutorial – Pattern.
The soul of any Quarter Log Cabin Quilt Tutorial – Pattern lies in the contrast between your fabric choices, which gives the quilt its depth. Traditionally, these blocks use a color value system where one side of the “L” shape is composed of dark fabrics and the other of light fabrics. You will want to choose a “hearth” square (the starting corner) that pops, perhaps in a bold red or a contrasting neutral.
To begin this Quarter Log Cabin Quilt Tutorial – Pattern, you need to decide on the width of your strips, commonly referred to as logs. Standard designs often use 2.5-inch strips, which are compatible with popular Jelly Rolls, making the cutting process much faster. Ensure your fabric is pressed flat with a steam iron to remove any wrinkles that might distort your measurements during the cutting phase.
Accuracy in the Quarter Log Cabin Quilt Tutorial – Pattern starts with the cutting mat; use a sharp blade in your rotary cutter to avoid frayed edges. You will need to cut a variety of lengths, starting from a small square and increasing as you move outward. Organized quilters often find it helpful to label their strips by length or color group to keep the assembly process moving smoothly.
High-quality quilting cotton is the gold standard for this Quarter Log Cabin Quilt Tutorial – Pattern because it holds its shape and is easy to manipulate. Avoid stretchy fabrics or overly thick materials for your first attempt, as they can make achieving a flat quilt top difficult. Gathering all your notions, including quilting pins and high-quality polyester thread, will set you up for success.
If you are following this Quarter Log Cabin Quilt Tutorial – Pattern to use up leftovers, consider a scrappy quilt approach. This involves mixing various prints within the same color family to create a “controlled chaos” look that is very popular in modern farmhouse decor. Just ensure that the visual weight remains balanced so the quarter-log design remains recognizable.
Lastly, don’t forget to check your sewing machine tension before starting the official Quarter Log Cabin Quilt Tutorial – Pattern blocks. A quick test scrap will save you hours of unpicking later on. Once your strips are cut and your machine is humming, you are ready to move into the heart of the construction phase of this beautiful quilt pattern.
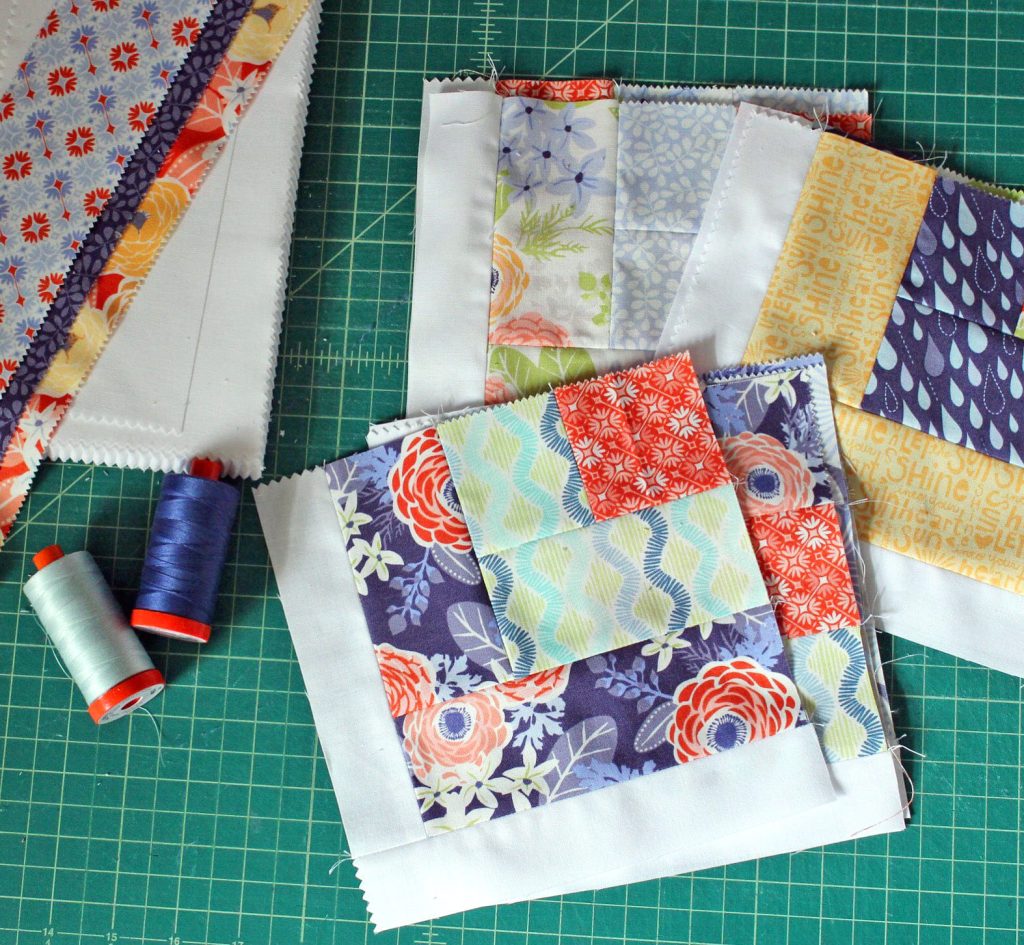
The core of the Quarter Log Cabin Quilt Tutorial – Pattern is the sequence of adding logs to the starter square. Unlike the standard method, you will only add strips to the top and right side (or bottom and left) of your central square. This creates an “L” shaped growth pattern that pushes the center to one corner of the block, which is the hallmark of the Quarter Log Cabin Quilt Tutorial – Pattern.
Start by taking your center square and sewing the first “log” to the right side using a scant 1/4 inch seam. In this Quarter Log Cabin Quilt Tutorial – Pattern, “scant” means a hair’s breadth narrower than a full quarter inch to account for the fold of the fabric. Press the seam toward the newer log to prevent bulk and keep the quilt block lying flat.
Next, according to the Quarter Log Cabin Quilt Tutorial – Pattern, you will sew the second log to the top of your newly created unit. This second log should be the same length as the combined width of the center square and the first log. This rhythmic addition of strips—side then top—is what builds the geometric pattern that quilters find so addictive and meditative.
As you continue following the Quarter Log Cabin Quilt Tutorial – Pattern, alternate your fabric colors to maintain the light-and-dark contrast. This contrast is vital for the visual impact of the finished quilt, as it defines the “steps” of the cabin. Continue this rotation until your block reaches the desired size, which is typically anywhere from 8 to 12 inches square for most standard quilt designs.
Finger pressing is a great tip during this Quarter Log Cabin Quilt Tutorial – Pattern to save time, but a final press with an iron after every two logs is recommended. Keeping the block square is the biggest challenge, so use a quilting ruler frequently to trim any excess fabric. This ensures that when you join multiple blocks, the corners will match up perfectly without any “waves” in the fabric.
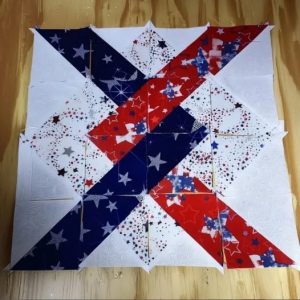
By the time you finish the final row of this Quarter Log Cabin Quilt Tutorial – Pattern, you will see the distinctive asymmetrical look. The beauty of this sewing technique is that it is forgiving; if a strip is a little long, you can simply trim it to fit. This makes the Quarter Log Cabin Quilt Tutorial – Pattern an excellent project for building confidence in beginners while remaining a favorite for experts.
One of the most exciting parts of completing a Quarter Log Cabin Quilt Tutorial – Pattern is deciding how to arrange your finished blocks. Because the design is asymmetrical, rotating the blocks can create entirely different visual effects. You could arrange them so all the “hearth” squares meet in the center to create a large diamond pattern, or line them up in a “furrow” style.
In this Quarter Log Cabin Quilt Tutorial – Pattern, we encourage you to play with your blocks on a design wall or a flat floor before sewing them together. Try a “zigzag” or “chevron” layout by alternating the orientation of the blocks in each row. The Quarter Log Cabin Quilt Tutorial – Pattern is incredibly versatile, allowing you to create a traditional look or a very contemporary aesthetic just by changing the layout.
Another variation to consider in your Quarter Log Cabin Quilt Tutorial – Pattern is the width of the logs. You can use improvisational quilting techniques where each log is a slightly different width. This gives the quilt a “wonky” or artistic feel that is very popular in the modern quilting community. It breaks the rigidity of the traditional grid and adds a unique, handcrafted character to your work.
Color play is also a major component of the Quarter Log Cabin Quilt Tutorial – Pattern. While the light/dark split is traditional, you could try a monochromatic look using different shades of a single color, like blue. Using gradient fabrics or “ombré” strips in your Quarter Log Cabin Quilt Tutorial – Pattern can create a stunning 3D effect that looks much more complex than it actually is to sew.
For those who want a larger project, this Quarter Log Cabin Quilt Tutorial – Pattern can easily be scaled up to a King-sized bedspread or scaled down for a baby quilt or a table runner. The math stays the same regardless of the size; you simply add more logs or more blocks. The repeatable nature of the pattern makes it easy to calculate how much fabric you will need for various sizes.
Don’t forget the power of negative space. You can alternate your Quarter Log Cabin Quilt Tutorial – Pattern blocks with plain fabric squares to let the design “breathe.” This is a common technique in minimalist quilting and can help your colorful blocks really stand out. No matter which layout you choose, the Quarter Log Cabin Quilt Tutorial – Pattern remains a sturdy and reliable foundation for a beautiful heirloom.
Once your blocks are joined and your quilt top is complete, the final phase of the Quarter Log Cabin Quilt Tutorial – Pattern begins. You will need to create a “quilt sandwich,” which consists of the finished top, the batting (the fluffy middle layer), and the backing fabric. Secure these layers together using basting pins or a temporary spray adhesive to prevent shifting during the quilting process.
When it comes to the actual quilting of your Quarter Log Cabin Quilt Tutorial – Pattern, you have several options. “Stitch in the ditch” is a classic choice where you sew along the existing seams to hide the stitches. However, for a Quarter Log Cabin Quilt Tutorial – Pattern, straight-line quilting that follows the “L” shape of the logs can emphasize the design and add a wonderful texture to the finished piece.
If you have a longarm quilting machine or want to try free-motion quilting, loops or floral patterns can soften the sharp geometric lines of the Quarter Log Cabin Quilt Tutorial – Pattern. The choice of quilting design can drastically change the “feel” of the quilt, from stiff and structural to soft and cuddly. Choose a quilting thread that either blends in with your fabrics or contrasts for an extra pop of color.
The final step in this Quarter Log Cabin Quilt Tutorial – Pattern is the binding. This is the fabric strip that wraps around the raw edges of the quilt to seal it. For a professional look, use a double-fold binding and sew it to the front by machine, then hand-stitch it to the back for a clean, invisible finish. This ensures your handcrafted quilt is durable enough to survive years of use and washing.
After binding, give your quilt a final, gentle press. Many quilters like to add a custom quilt label to the back, documenting the date, the name of the Quarter Log Cabin Quilt Tutorial – Pattern, and the maker’s name. This turns your project into a documented piece of history that can be passed down through generations. Your journey through the Quarter Log Cabin Quilt Tutorial – Pattern is now complete, resulting in a stunning work of art.
Remember that every quilt is a learning experience. If your corners aren’t perfectly sharp or your seams are a little wobbly, don’t worry—that is the “signature” of a handmade item. The Quarter Log Cabin Quilt Tutorial – Pattern is meant to be enjoyed, both during the making process and in its final form as a cozy blanket. You have now mastered a fundamental skill that will serve you in countless future sewing projects.
1. Is the Quarter Log Cabin Quilt Tutorial – Pattern suitable for beginners?
Yes! Because it only requires sewing straight lines and uses a repetitive process, it is one of the best patterns for those new to quilting. It helps beginners practice seam accuracy and fabric coordination.
2. How much fabric do I need for a standard throw-size Quarter Log Cabin Quilt?
Generally, for a 50″ x 60″ quilt, you will need approximately 5 to 6 yards of total fabric for the top. This varies depending on whether you are using scraps or yardage and how many different colors you plan to incorporate.
3. Can I use a Jelly Roll for this pattern?
Absolutely. A Jelly Roll (pre-cut 2.5″ strips) is perfect for the Quarter Log Cabin Quilt Tutorial – Pattern. It saves a significant amount of cutting time and ensures all your logs are a consistent width.
4. Why is my block turning out skewed or not square?
This usually happens due to an inconsistent seam allowance. Even a tiny error adds up over several logs. Using a walking foot and a specialized 1/4″ quilting foot can help keep your layers moving evenly and your seams straight.
5. What is the difference between a traditional Log Cabin and a Quarter Log Cabin?
A traditional block builds on all four sides of the center square, keeping the center in the middle. The Quarter Log Cabin only builds on two adjacent sides, which “pushes” the center square into a corner.
6. Do I have to use a square for the center?
While a square is traditional, you can start with a rectangle or even a triangle if you want to experiment with “wonky” log cabins. However, for this specific tutorial, a square is recommended for the best results.
In this Quarter Log Cabin Quilt Tutorial – Pattern, we have covered everything from the initial fabric selection to the final binding of your quilt.
We explored how the contrast between light and dark fabrics creates the iconic look of the cabin, and how the “L” shaped assembly distinguishes the quarter-style from the traditional block. By following these steps, you’ve learned how to turn simple strips of cotton into a complex, beautiful geometric design that is both functional and artistic.


